
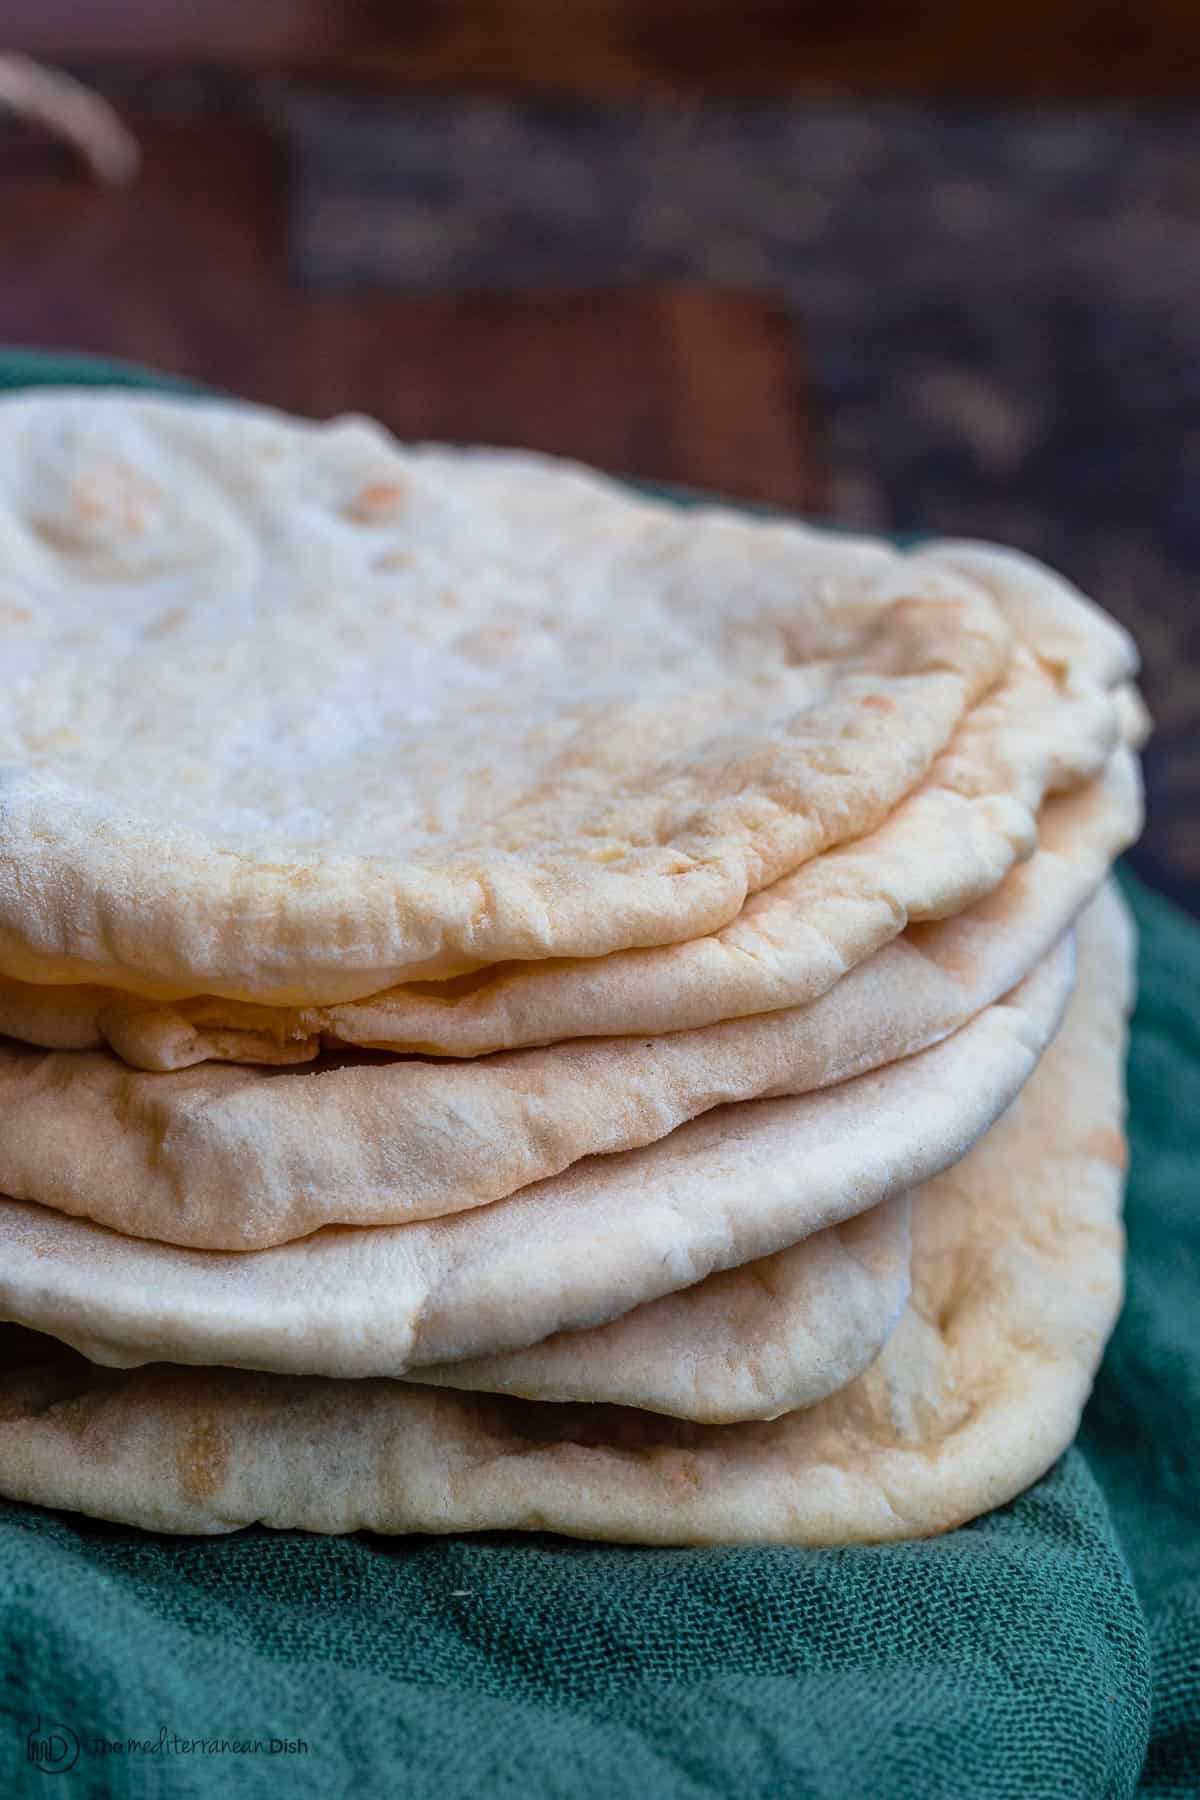
This homemade pita bread recipe is easy to make and requires a few ingredients you may already have on hand! Mix up the very simple dough, let it rise, and experience the magic of fresh, warm, perfectly puffy homemade pita bread. Baking and skillet instructions included!
Pita bread is freezer friendly. And you can even prepare the dough ahead. Be sure to read through for tips and my step-by-step tutorial.

Many ways to use pita bread!
Whether we’re talking falafel, shawarma, hummus or even deli meat, pita pockets are my go-to.
In fact, a basket of warm pita is almost always on the dinner table next to anything from soups and stews to saucy meatballs requiring something to sop up the delicious goodness.
I’ve turned pita into chips and churro chips! And when the kids need a good snack to hold them over until a late dinner, I serve up some pita with a little dish of za’atar and some extra virgin olive oil for dipping.
Is it worth it to make your own homemade pita bread?
YES! As someone who grew up on authentic fresh pita bread from Egyptian bakeries, I can tell you this: pita bread we buy at grocery stores here in the U.S. is simply not the same. Like store-bought sandwich bread, store-bought pita has typically been sitting on the shelf for a few days.
Don’t get me wrong, I have bought pita at the store many times. It must be warmed up and used pretty quickly.
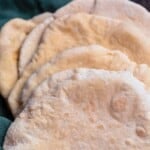
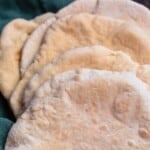
But what I’m after here is: Fresh. Warm. Fragrant. Perfectly puffy pita bread. Making it takes me back to the streets of Egypt where I grew up.
Making pita bread at home is straightforward and takes just a few ingredients you probably already have on hand.
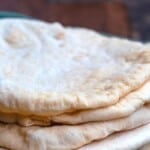
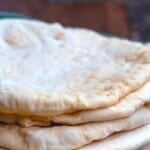
This recipe will make 8 pitas. And you can bake them in the oven or cook them stovetop in a hot skillet.
Ingredients
- Water
- Yeast
- Pinch sugar
- All-purpose flour (or a combination of all-purpose flour and whole wheat flour)
- Kosher salt (I use Diamond Crystal kosher salt)
- Extra virgin olive oil (I used Private Reserve Greek extra virgin olive oil)
Do I need a stand mixer to make pita bread?
No! In fact, I prefer to knead the dough by hand for my pita bread. You will not be doing too much kneading, and the result is almost better than using a stand mixer. Here’s all the equipment you need to make this pita bread recipe:
- Large mixing bowl like this one (affiliate link)
- Wooden spoon or anything to stir the dough
- A rolling pin (affiliate link) to flatten the pita like
How to Make Pita Bread: Step-by-Step
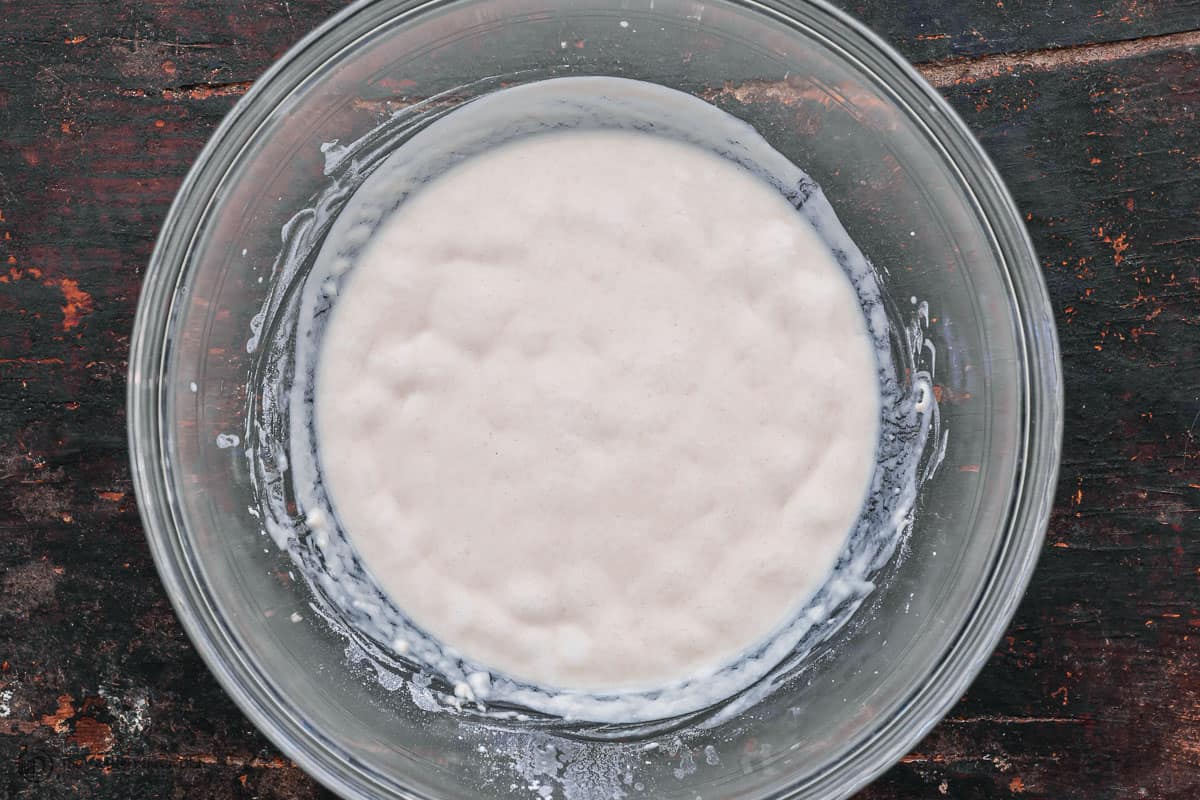
Step 1: Make sponge
Combine 1 cup lukewarm water in a large mixing bowl with yeast and sugar. Stir until dissolved. Add 1/2 cup flour and whisk together. Place the mixing bowl in a warm (not hot) place, uncovered. Wait about 15 minutes or until mixture is frothy and bubbling a bit
Tip: If you don’t see some bubbles, your yeast is dead. Start over with new yeast.
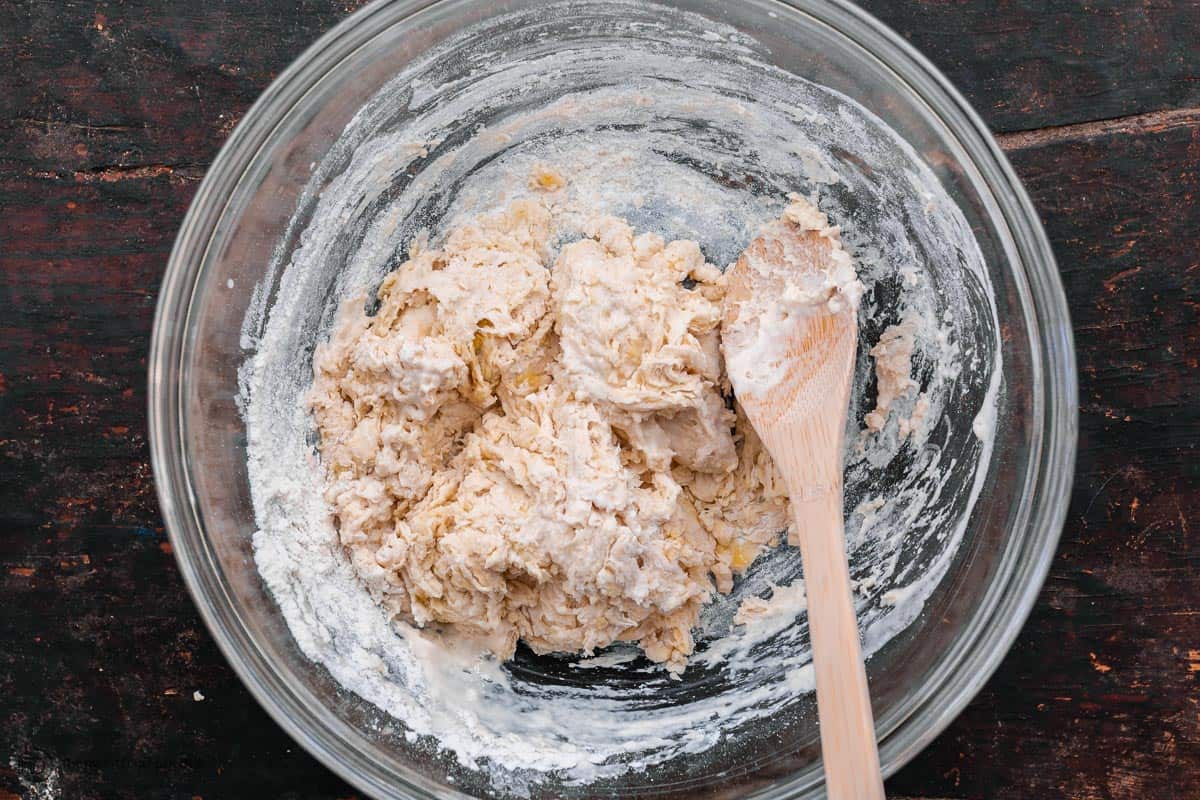
Step 2: Form the pita dough
Now add salt, olive oil, and the remaining flour (keep about 1/2 cup of the flour for dusting later). Stir until mixture forms a shaggy mass.
(What’s a shaggy mass? Basically, at this point, the dough has little to no gluten development and just looks like a sticky mess and you can easily pull bits off).
Dust with a little flour, then knead the mixture inside the bowl for about 1 minute incorporating any stray bits.
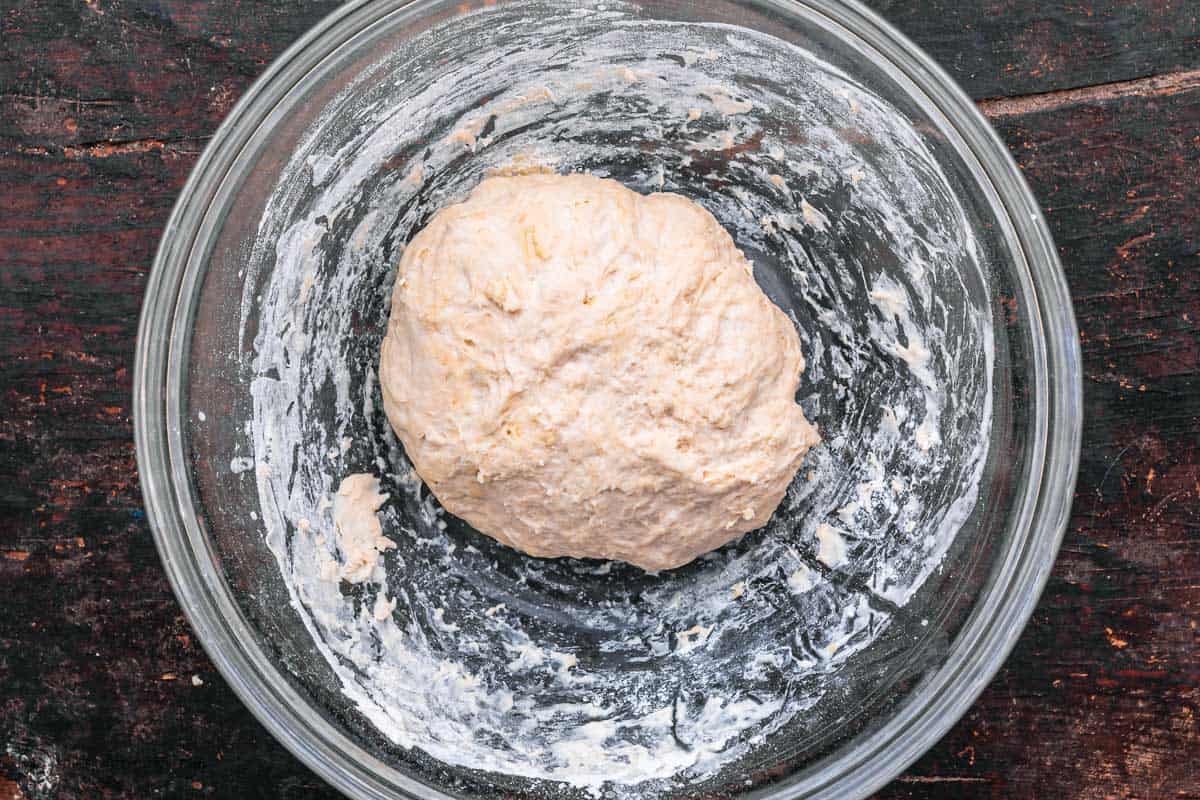
Step: 3 Knead the dough
Dust a clean working surface with just a little bit of flour. Knead lightly for 2 minutes or so until smooth. Cover and let the dough rest for 10 minutes, then knead again for a couple more minutes. The dough should be soft and a little bit moist, you can help it with a little dusting flour, but try not to add too much.
Step: 4 Let the pita dough rise
Clean the mixing bowl and give it a light coating of extra virgin olive oil. Put the dough back in the bowl and turn it a couple times just to coat it a bit with the olive oil.
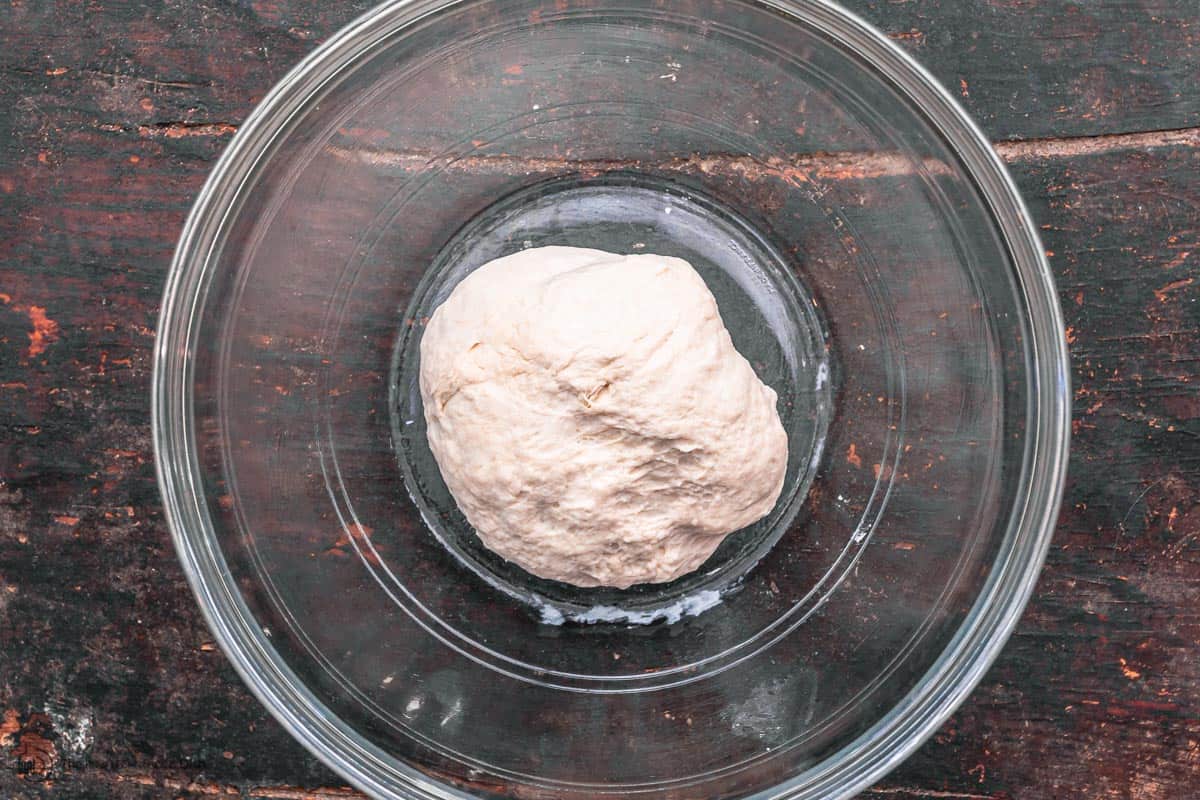
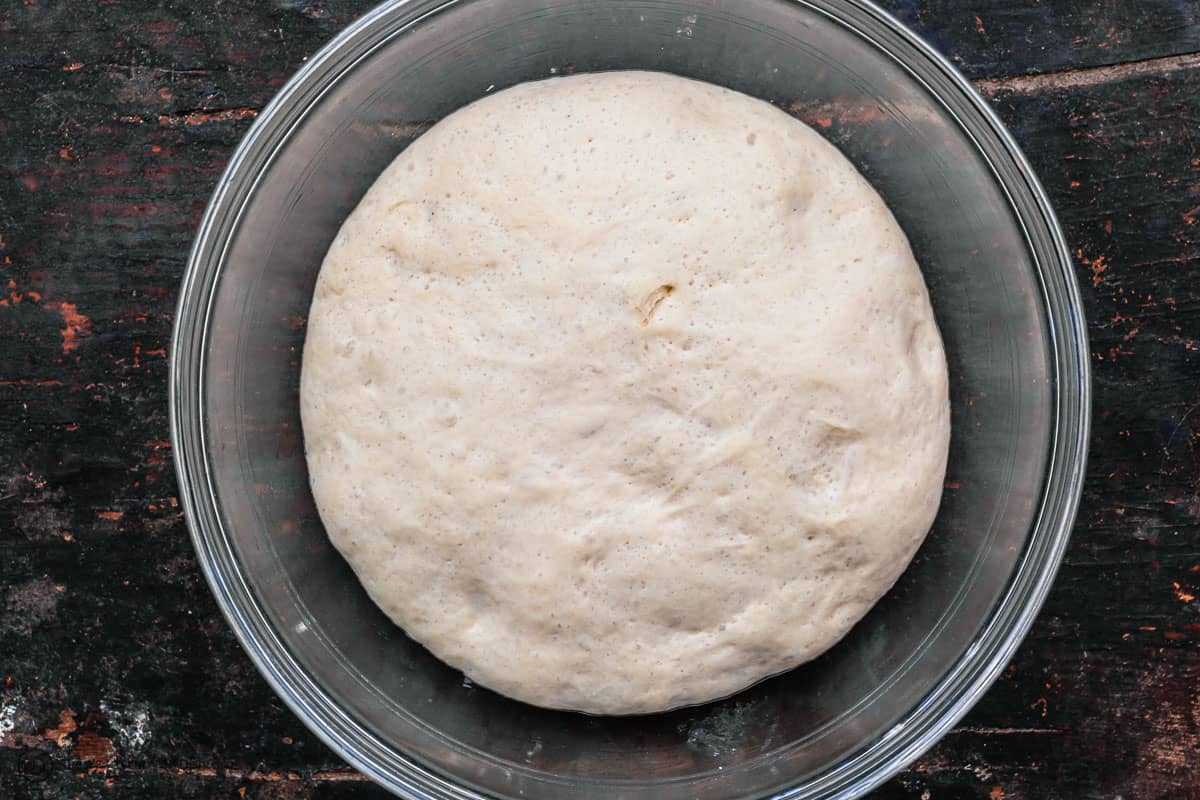
Cover the mixing bowl tightly with plastic wrap, then cover it with a kitchen towel. Put the bowl in a warm (not hot) place. Leave it for 1 hour or until the dough rises to double its size.
Step 5: Divide the dough
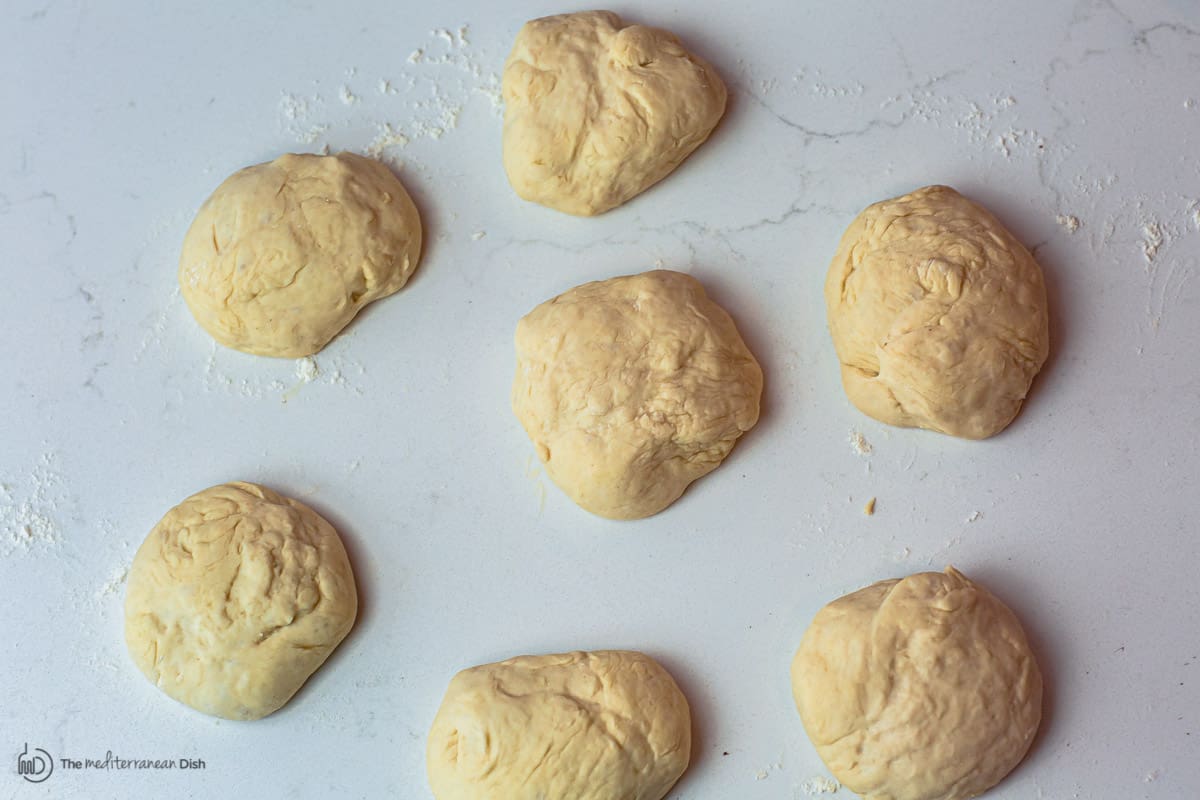
Gently deflate the dough and place it on a clean work surface. Divide the dough into 7 to 8 equal pieces and shape them into balls. Cover with a towel and leave them for 10 minutes or so.
Step 6: Shape the pitas
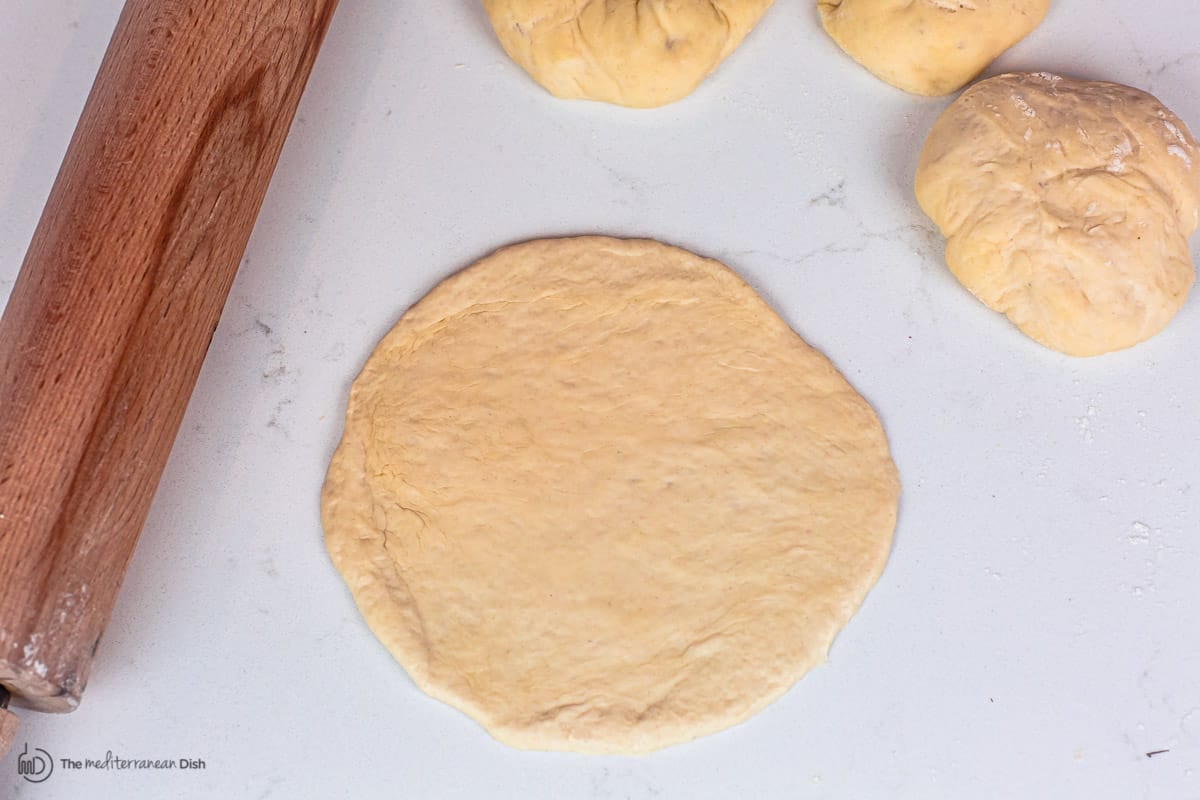
Using a floured rolling pin, roll one of the pieces into a circle that’s 8-9 inches wide and about a quarter inch thick. It helps to lift and turn the dough frequently as you roll so that dough doesn’t stick to your counter too much. (If dough starts to stick, sprinkle a tiny bit of flour). If the dough starts to spring back, set it aside to rest for a few minutes, then continue rolling. Repeat with the other pieces of dough.
Tip: Once you get going, you can be cooking one pita while rolling another, if you like.
You have two options for baking the pita from here.
Step 7: Bake in the oven OR on stovetop
To bake pita in the oven: Heat the oven to 475 degrees F and place a heavy-duty baking pan or large cast iron skillet on the middle rack to heat. Working in batches, place the rolled-out pitas directly on the hot baking baking sheet (I was only able to fit 2 at a time).
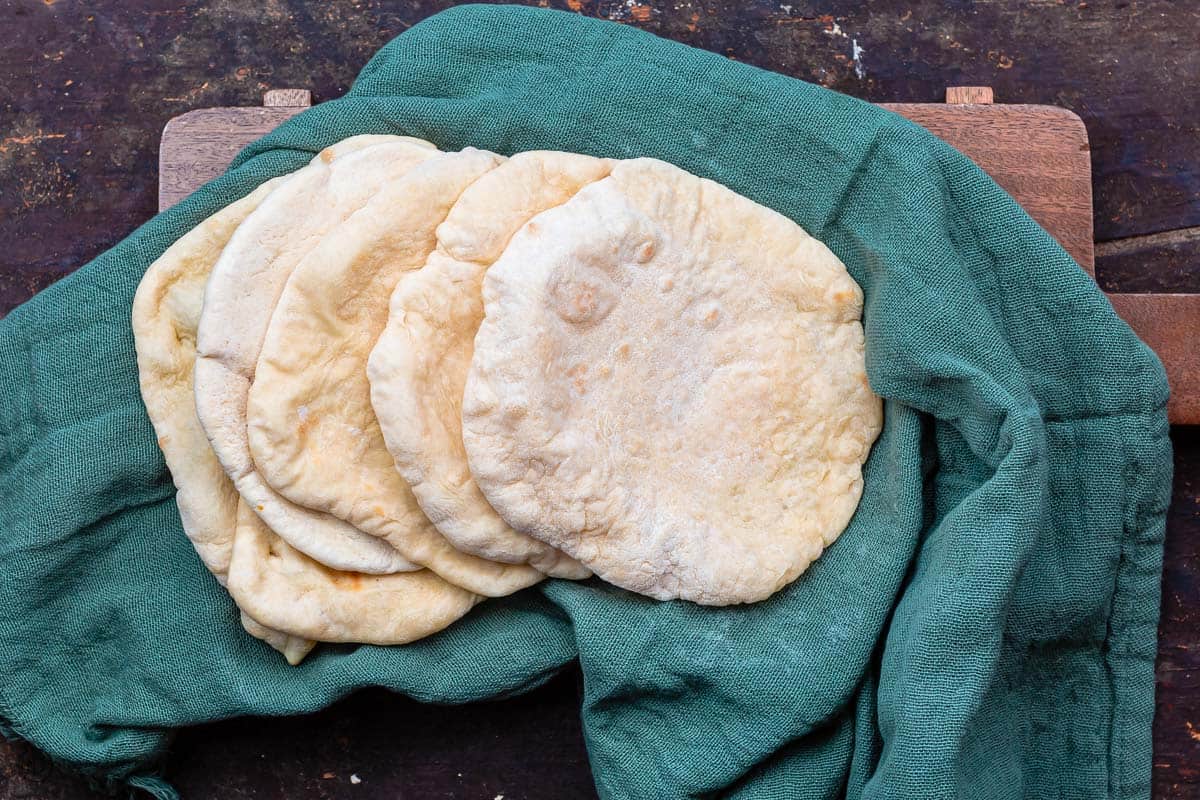
Bake for 2 minutes on one side, and then, using a pair of tongs, carefully turn pita over to bake for 1 minute on the other side. The pita will puff nicely and should be ready. Remove from the oven and cover the baked pitas with a clean towel while you work on the rest of the pitas.
To cook pita in a skillet (stovetop): Heat a cast iron skillet over medium-high heat. (Test by adding a couple drops of water to the skillet, the skillet is ready when the beads of water sizzle immediately). Drizzle a tiny bit of extra virgin olive oil and wipe off any excess. Working with one pita at a time, lay a rolled-out pita on the skillet and bake for 30 seconds, until bubbles start to form.
Using a spatula, flip the pita over and cook for 1-2 minutes on the other side, until large toasted spots appear on the underside. Flip again and cook another 1-2 minutes to toast the other side. The pita is ready when it puffs up forming a pocket
Tip: Sometimes, with this stovetop method, the pita may not puff or may only form a small pocket. Try pressing the surface of the pita gently with a clean towel. Keep baked pita covered with a clean towel while you work on the rest.
Can the dough be prepared ahead?
Yes, you can prepare the dough ahead of time. Once it has risen, you can store it in the fridge until you need it!
If you don’t want to bake all 8 pitas on a given day, you can bake 1, 2 or however many you need at a time. Save the rest of the dough in the fridge for later (if stored properly, the dough will keep in the fridge for up to 1 week).
Can I make gluten free pita bread using this recipe?
Many of you have asked if this recipe can be made with gluten free flour. YES!
You can simply replace the flour here with the same amount of an all-purpose gluten free flour. Bob’s Red Mill all-purpose gluten free flour or Bob’s Red Mill 1 to 1 baking flour (<–affiliate link) will work in this recipe.
Why won’t my pita puff?
Note that pita will not stay puffy once it sits out of the oven for a bit. We want it to puff during the baking process so that it forms a pocket to hold all sorts of tasty items. But let’s just agree that even pitas that don’t puff and end up more like a flatbread without a pocket are still delicious.
That said, the main reason pita won’t puff has to do with baking temperature–the oven or the skillet aren’t hot enough. Make sure both are well-heated before cooking.
Storage and freezer instructions
Baked pita bread is best enjoyed fresh and hot-out-of the oven. But, you likely won’t finish 8 loaves of pita in one sitting unless you’re hosting a big dinner party. Good news is, pita bread will store well for a few days in an air-tight bag. Warm it up in your oven or toaster oven or even over open flame.
You can freeze pita bread for later use! Here’s what you do:
- Cool pita bread completely
- Store in zip-top bags. Make sure to push all the air out. Layer wax paper between the pitas, this makes it easy to pull just one pita at a time, if you like.
- Freeze for up to 3 months
- Warm frozen pitas up in a medium-heated oven. No need to thaw.
More bread and cake recipes here. For all recipes, visit us here.
JOIN MY FREE E-MAIL LIST HERE.
SHOP OUR ONLINE STORE FOR QUALITY OLIVE OILS, ALL-NATURAL SPICES AND MORE.
Print
Homemade Pita Bread Recipe
- Total Time: 1 hour 48 minutes
- Yield: 8 whole pitas 1x
Description
My family’s authentic, fool-proof pita bread recipe is easy to make and requires a few ingredients you may already have on hand! Mix up the very simple dough, let it rise, and experience the magic of fresh, warm, perfectly puffy homemade pita bread. Baking and stovetop instructions included!
Ingredients
- 1 cup lukewarm water
- 2 tsp active dry yeast
- 1/2 tsp sugar
- 3 cups all-purpose flour, divided (or 1 1/2 cup all-purpose flour and 1 1/2 cup whole wheat flour)
- 1 to 2 tsp kosher salt (I used Diamond Crystal kosher salt)
- 2 tbsp extra virgin olive oil (I used Private Reserve Greek extra virgin olive oil), more for the bowl
Instructions
- Make sponge: In a large mixing bowl add the lukewarm water and stir in yeast and sugar until dissolved. Add 1/2 cup flour and whisk together. Place the mixing bowl in a warm place, uncovered to form a lose sponge. Give it 15 minutes or so, the mixture should bubble.
- Form the pita dough: Now add salt, olive oil and almost all the remaining flour (keep about 1/2 cup of the flour for dusting later). Stir until mixture forms a shaggy mass (at this point, the dough has little to no gluten development and just looks like a sticky mess and you can easily pull bits off). Dust with a little flour, then knead the mixture inside the bowl for about a minute to incorporate any stray bits.
- Knead the dough: Dust a clean working surface with just a little bit of flour. Knead lightly for a couple minutes or so until smooth. Cover and let the dough rest for 10 minutes, then knead again for a couple more minutes. The dough should be a little bit moist, you can help it with a little dusting of flour, but be careful not to add too much flour.
- Let the dough rise. Clean the mixing bowl and coat it lightly with extra virgin olive oil and put the dough back in the bowl. Turn the dough a couple times in the bowl to coat with the olive oil. Cover the mixing bowl tightly with plastic wrap then lay a kitchen towel over. Put the bowl in a warm place. Leave it alone for 1 hour or until the dough rises to double its size.
- Divide the dough. Deflate the dough and place it on a clean work surface. Divide the dough into 7 to 8 equal pieces and shape them into balls. Cover with a towel and leave them for 10 minutes or so to rest.
- Shape the pitas. Using a floured rolling pin, roll one of the pieces into a circle that’s 8-9 inches wide and about a quarter inch thick. It helps to lift and turn the dough frequently as you roll so that dough doesn’t stick to your counter too much. (If dough starts to stick, sprinkle a tiny bit of flour). If the dough starts to spring back, set it aside to rest for a few minutes, then continue rolling. Repeat with the other pieces of dough. (Once you get going, you can be cooking one pita while rolling another, if you like). You have two options for baking the pita from here.
- To bake pita in the oven: Heat the oven to 475 degrees F and place a heavy-duty baking pan or large cast iron skillet on the middle rack to heat. Working in batches, place the rolled-out pitas directly on the hot baking baking sheet (I was only able to fit 2 at a time). Bake for 2 minutes on one side, and then, using a pair of tongs, carefully turn pita over to bake for 1 minute on the other side. The pita will puff nicely and should be ready. Remove from the oven and cover the baked pitas with a clean towel while you work on the rest of the pitas.
- To cook pita on stovetop: Heat a cast iron skillet over medium-high heat. (Test by adding a couple drops of water to the skillet, the skillet is ready when the beads of water sizzle immediately). Drizzle a tiny bit of extra virgin olive oil and wipe off any excess. Working with one pita at a time, lay a rolled-out pita on the skillet and bake for 30 seconds, until bubbles start to form. Using a spatula, flip the pita over and cook for 1-2 minutes on the other side, until large toasted spots appear on the underside. Flip again and cook another 1-2 minutes to toast the other side. The pita is ready when it puffs up forming a pocket (sometimes, with this method, the pita may not puff or may only form a small pocket. Try pressing the surface of the pita gently with a clean towel). Keep baked pita covered with a clean towel while you work on the rest.
Notes
- Make ahead note: You can prepare the dough ahead of time. Once it has risen, you can store it in the fridge until you need it! If you don’t want to bake all 8 pitas on a given day, you can bake 1, 2 or however many you need at a time. Save the rest of the dough in the fridge for later (if stored properly, the dough will keep in the fridge for up to 1 week).
- For Whole Wheat Pita: Use 1 1/2 cup whole wheat flour and 1 1/2 cup all-purpose flour
- For Gluten Free Pita: Replace the flour here with the same amount of an all-purpose gluten free flour. Bob’s Red Mill all-purpose gluten free flour or Bob’s Red Mill 1 to 1 baking flour (<–affiliate link) will work in this recipe.
- Leftover storage and freezing instructions: Baked pita bread is best enjoyed fresh and hot-out-of the oven. But, baked pita bread will store well for a few days in an air-tight bag. Warm it up in your oven or toaster oven or even over open flame. You can also freeze baked pita for up to 3 months; warm up in a medium-heated oven from frozen.
- Visit our online shop to browse quality Mediterranean ingredients, including extra virgin olive oils and all-natural and organic spices
- Prep Time: 1 hour 45 mins
- Cook Time: 3 mins
- Category: Pita Bread
- Method: Baked
- Cuisine: Mediterranean
*This post first appeared on The Mediterranean Dish in 2014 and had recently been updated with new information and media for readers’ benefit. Enjoy!
Thank you for this delicious recipe. I would like to refrigerate the dough after it rises to make another day. After it rises should I refrigerate in a plastic ziplock bag or in a bowl with plastic wrap. Also should I let dough come to room temp before making balls for pitas. Thanks!
Hi, Jessica. I typically go the bowl with plastic wrap route :). And, yes, recommend letting the dough come to room temperature before shaping and moving on.
What a lovely bread. Thank you for sharing the recipe!! I baked at 500 degrees to help it pop. It did!
Yay! Thanks, Tesia!
I only had instant yeast, so I just did 1.5-tsp mixed with the 2 cups flour, salt, oil, and 1 cup water. I ditched the sugar and half cup of flour that was used for the active yeast (I assume this was just to help feed the yeast and less for flavor). Otherwise, I followed the rest of the recipe exactly.
I used the cast iron method (opting for a Dutch oven), and everything came out great! The pita is super airy and flavorful.
Awesome! Thanks for sharing, Jeanni!
Hi! I tripled the recipe but it did not work with one cup of water like the recipe says. Should I triple the amount of water too?
Hi, Neveen. Yes, you’ll want to increase the water accordingly.
Hello – Can you freeze the unbaked dough? If so, should it be frozen in balls before rolled out, or after rolled in discs? Then should it be thawed before baking or baked while still frozen? I thought this way it would taste fresher than freezing after it is already baked?
Thank you,
Debbie W.
Hi, Debbie! I think it’s probably possible to freeze the dough, but I have never tried it myself. What I typically do is I bake the whole batch, and once my pita cools, I’ll package and freeze what I don’t plan to use. When I need it, I’ll thaw it out in the fridge overnight and simply warm it up in the oven.
This recipe was amazing!!! I slightly modified the end part by heating my oven at maximum with a cast iron pan inside for about 30 minutes, putting the dough in, the baking for 5 minutes without flipping. Our house has a very cheap oven that takes 5 minutes to get back to temperature if the door is open. This made them puff up every time
Thanks, Shalom!
First time making pita bread. Not all of the pitas popped but those that didn’t we’re still delicious. I mixed with whole wheat next time I’m going to try all purpose baking flour.
I tried this recipe today and was so elated how soft, chewy, and delicious the pita came out. I had to tell my husband and kids to leave a couple for school snack the next day.
Being able to make pita from home has alleviated my frustration from trying to find them in stores that are close to being all natural (no preservatives).
Thank you for sharing your recipe.
Thank you, Maylyne! So glad to hear it!
Looking forward to trying this recipe! Can I bake the pitas on a pizza stone instead of a pan?
Hi, Gigi. I’ve never tried this myself, but other commenters have with success! One suggestion was to bake at 425 degrees F on a pizza stone.
I made pita bread this afternoon and pita chips. They are wonderful! Thank you for sharing your recipes with us!
My Pleasure, Hannah! Glad you are enjoying them!
Hi I need to make 70 pita breads for an event this weekend. Do you recommend multiplying the ingredients to get the number required or is it better to do several small batches? Thanks Emma
Hi, Emma. I have not made a big batch like that myself, so I’m not sure how well it would work. I would probably stick with doing several small batches.
Interesting Mediterranean site from malta.
I made this along with chicken shwarma and tzitiki sauce and zatar bread for dinner tonight . OMYummy!!! I’ve tried so many of your recipes and being Lebanese, your recipes are spot on!!!
Thank you so much, Dawna!
Can i use bread flour?
Hello! Yes, you can use bread flour here. It may be a little thicker, but should still taste yummy!
Hi , can I use same recipe for zaatar fatayer? Thank you
Hi, Aida. I have not personally used this specific recipe for fatayer, so I can’t be totally sure. But, after doing some research into various fatayer recipes, I think it may work. I you give it a try, please stop back and let us know your thoughts.
Loved it ❤️ forgot the salt 😂
Oops! Glad you still enjoyed the recipe :).
I love this recipe and make a batch each week to replace sliced bread from the store.
I make the stove top version on a gas range with a non stick pan. I found rolling out the dough and cooking while still cold gives me a perfect puff every time.