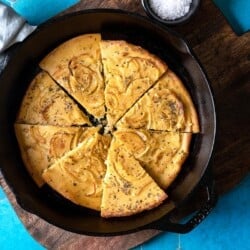
Farinata is an iconic Italian street food with crispy edges and a custardy center. This savory chickpea pancake is made without wheat so it’s a great gluten-free appetizer, snack, or side dish. Whether you avoid gluten or eat it like candy this Italian speciality is sure to please.
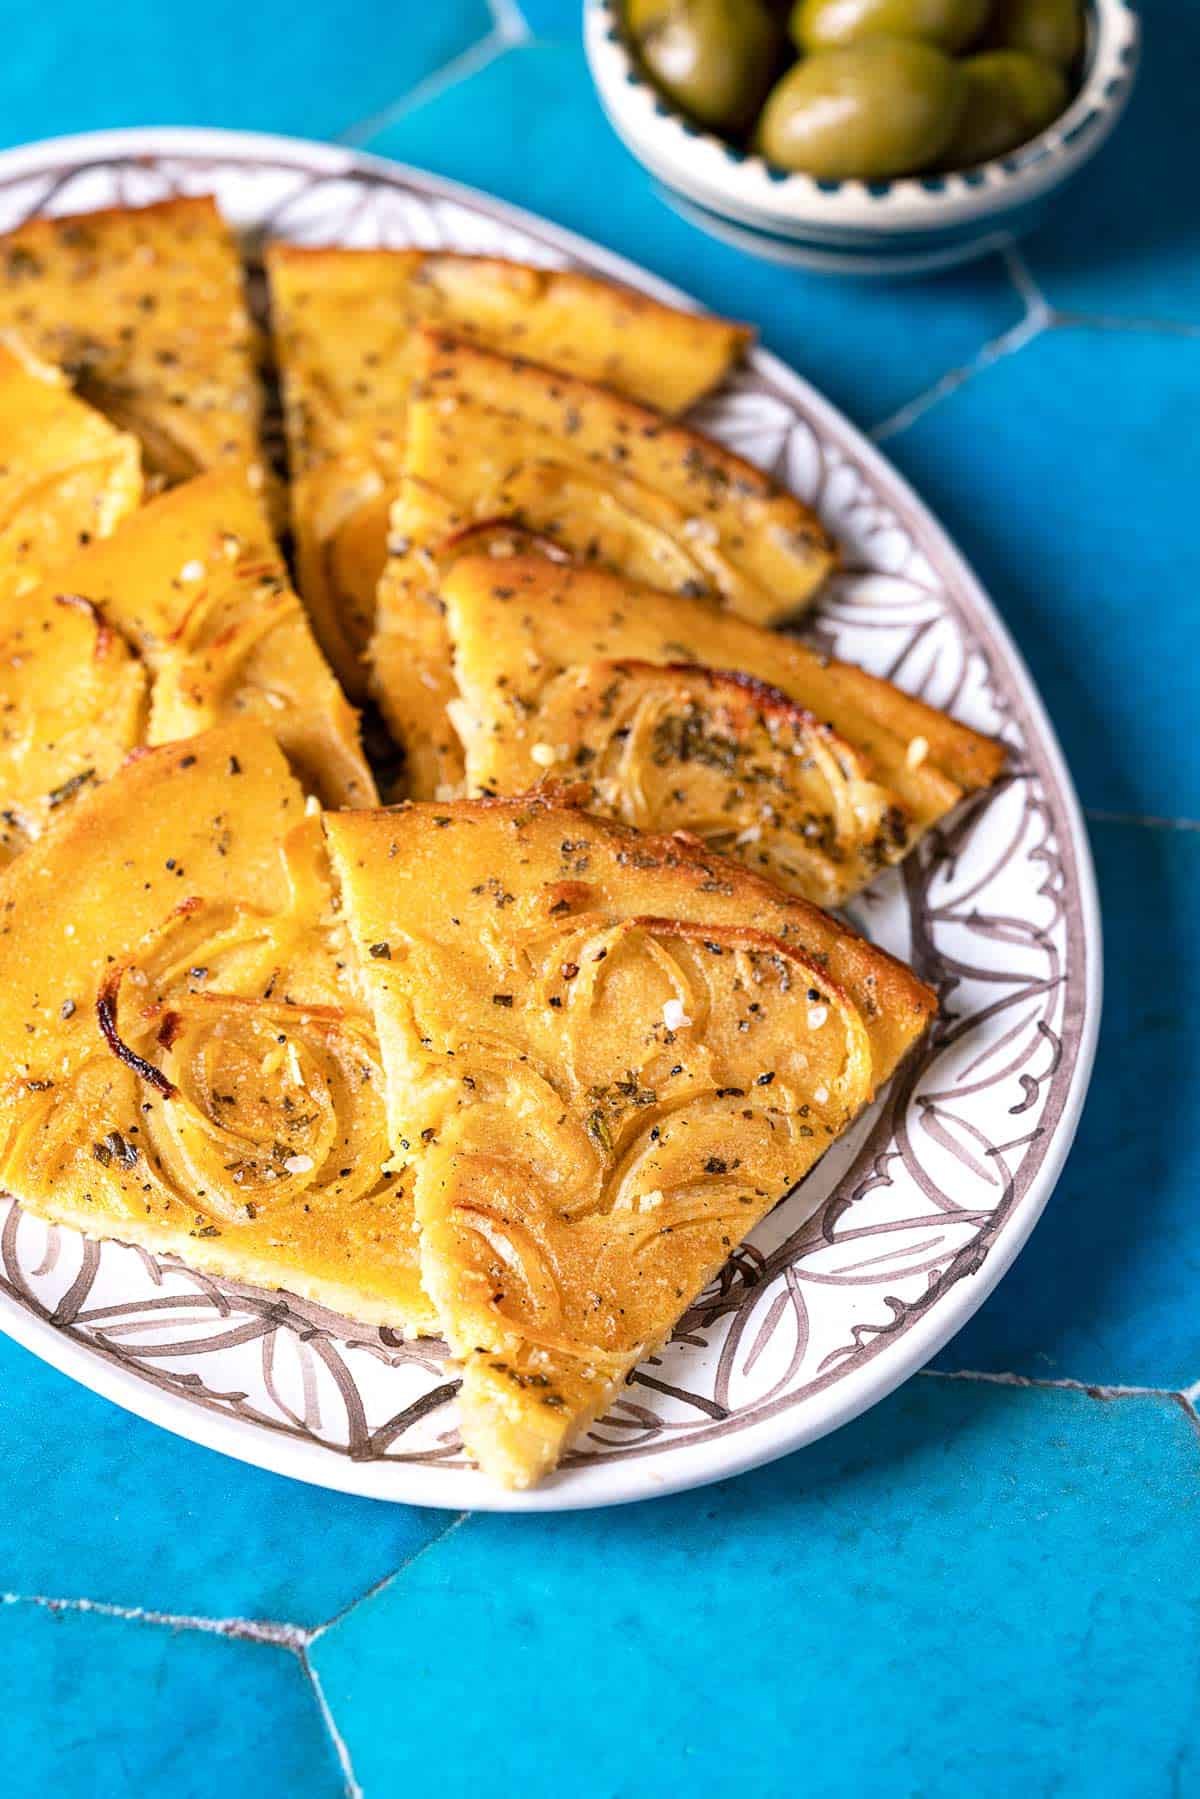
Farinata is often described as a chickpea pancake, though that really doesn’t do it justice. The naturally gluten-free and deliciously crispy-edged, custardy wonder that is farinata is a popular street food of Genoa, Italy. Plus, it’s endlessly adaptable!
It’s a great example of cucina povera, meaning “poor kitchen.” Similar to other classics like Cacio e Pepe and Panzanella Salad, farinata demonstrates the Italian talent for turning inexpensive ingredients into delicacies we savor to this day.
Made with just chickpea flour, water, olive oil, and salt, farinata is a naturally gluten free, dairy free, and vegan delight. It’s fairly easy to make, you just need to plan ahead: give yourself at least 4 hours to allow the flour to hydrate while you go about your day. Once you get the hang of making it add different herbs or vegetables to keep it interesting.
I like to mix the batter in the morning then bake farinata in the afternoon to enjoy as a snack. Or, if you’re having a dinner party, throw it in the oven right when guests arrive. Simply bake, slice into squares, and pass the farinata around—the unique texture and flavor is sure to amaze your friends and family.
Table of Contents
A Stroll Down the Alleyways of Genoa
Not many people know that Genoa is home to some of Italy’s most delicious street foods.
Wander along the carruggi, the narrow-cobbled streets of this cosmopolitan port city along Italy’s northern Mediterranean coast, and you will come upon vendors selling slices of dimpled focaccia, paper cones filled with fried shrimp and calamari, and—my favorite—hot slices of freshly baked farinata.
The batter for farinata is traditionally poured into a wide, shallow cast iron or copper pan, and baked in a very hot oven. What emerges is almost magical—soft and creamy in the center, with a delicate lacy crust.
Chickpea flour gives it a golden color and an appealing vegetal flavor. In Italy it is sold hot out of the oven in focaccerie and other food shops.
History of Farinata
Farinata’s origin is a little murky. One legend claims that Roman troops occupying Genova, in need of quick and cheap nourishment, “baked” the pancakes in the sun right on their shields.
The other holds that the Genovese fleet encountered stormy seas upon returning victorious from the battle against Pisa in 1284. Bags of chickpea flour and barrels of oil tipped over and mixed with the salty sea water, resulting in a slurry, which the hungry soldiers dried and “baked” on deck.
It’s likely that neither story is true.
What’s more likely is that farinata originated in Liguria (the region that includes Genoa and the Italian Riviera), with versions seen from Piedmont to Sardinia, as well as Tuscany, where it’s called cecina, and across the French border in Nice, where it is known as socca.
Ways to Adapt Farinata
While farinata is delicious plain, you can also embellish with herbs, spices or thinly sliced vegetables. The key is to go easy on these embellishments, for the earthy flavor of the farinata itself is its greatest asset.
- Sprinkle rosemary into the batter
- Grind fresh pepper on top as it emerges from the oven.
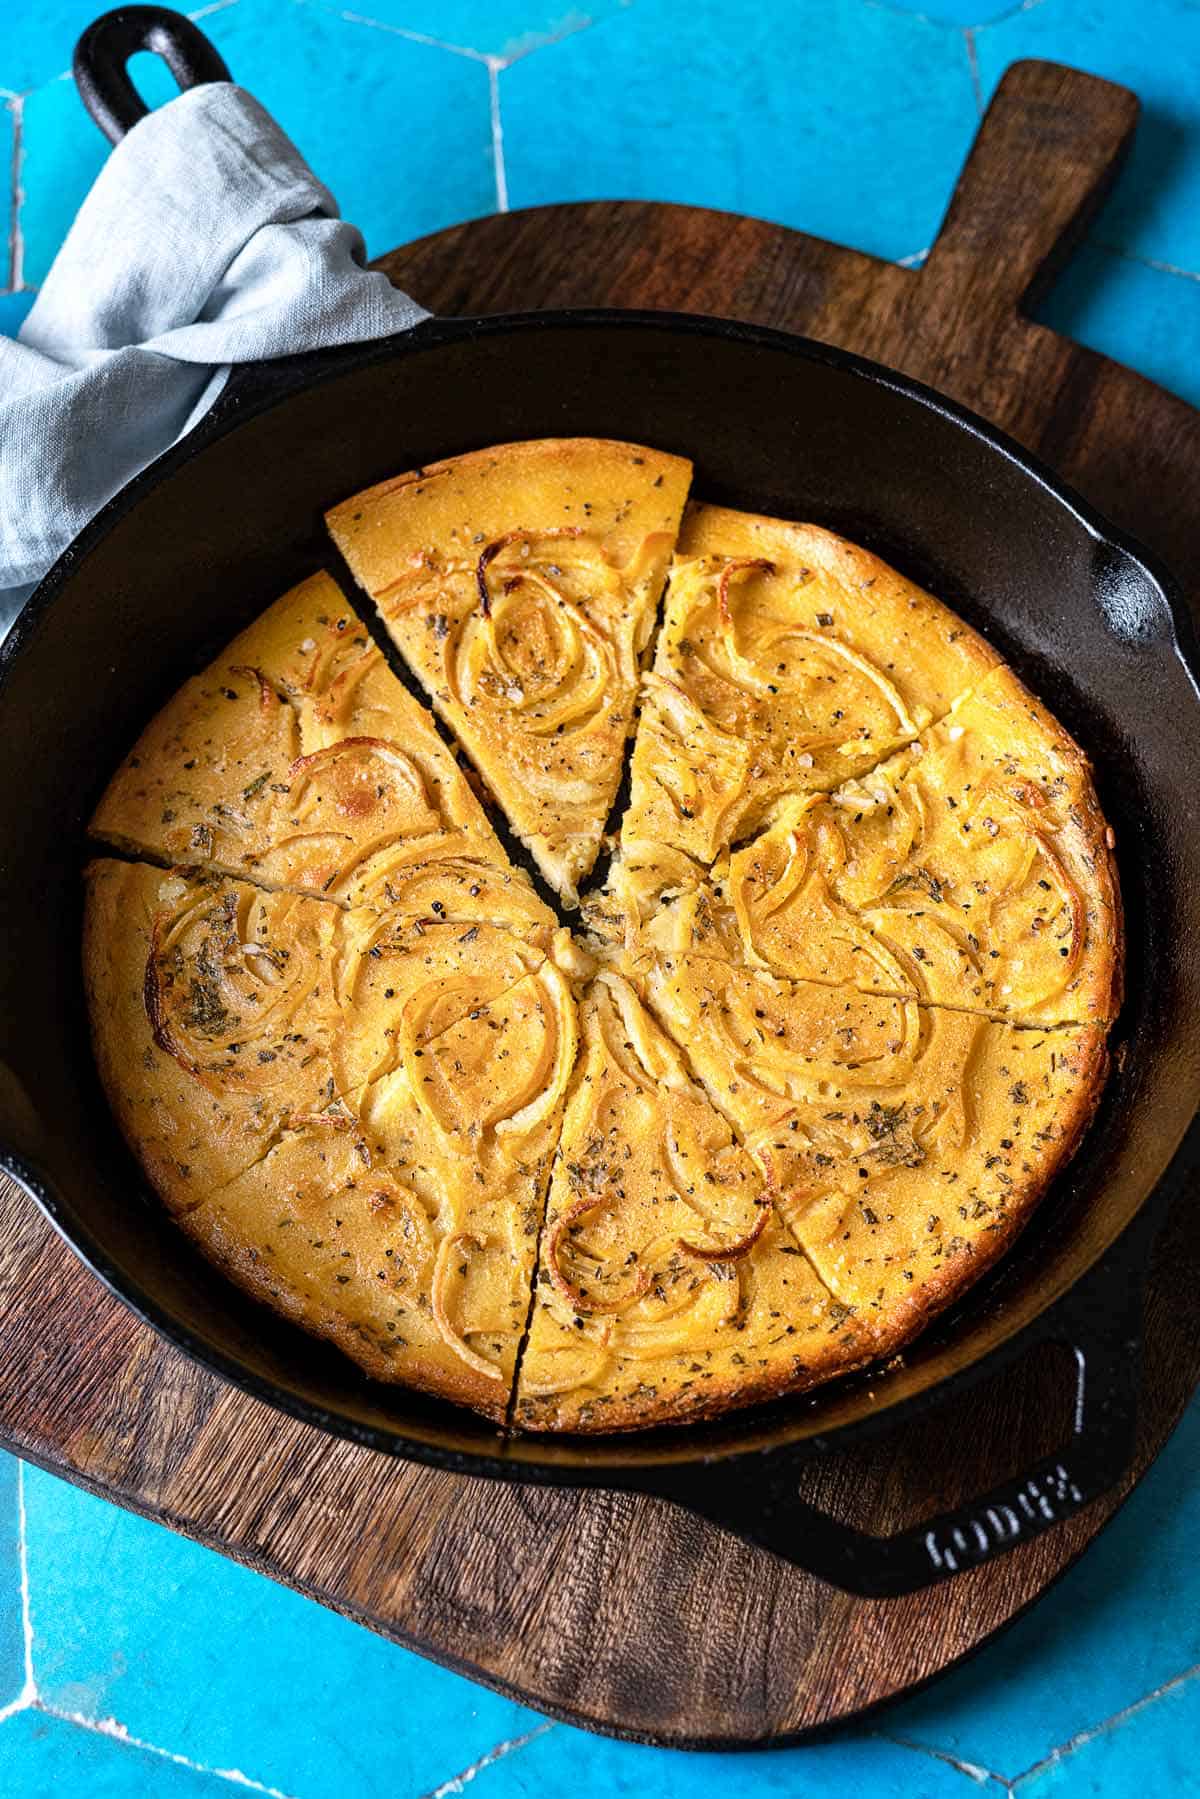
- Scatter thinly sliced onion on top of the batter right before baking. The onion bakes right into the pancake, blackening in spots and adding a touch of caramelized sweetness. (This is my absolute favorite addition!)
- Thinly sliced fennel or baby artichokes scattered on top are also delicious.
What’s in this Farinata recipe?
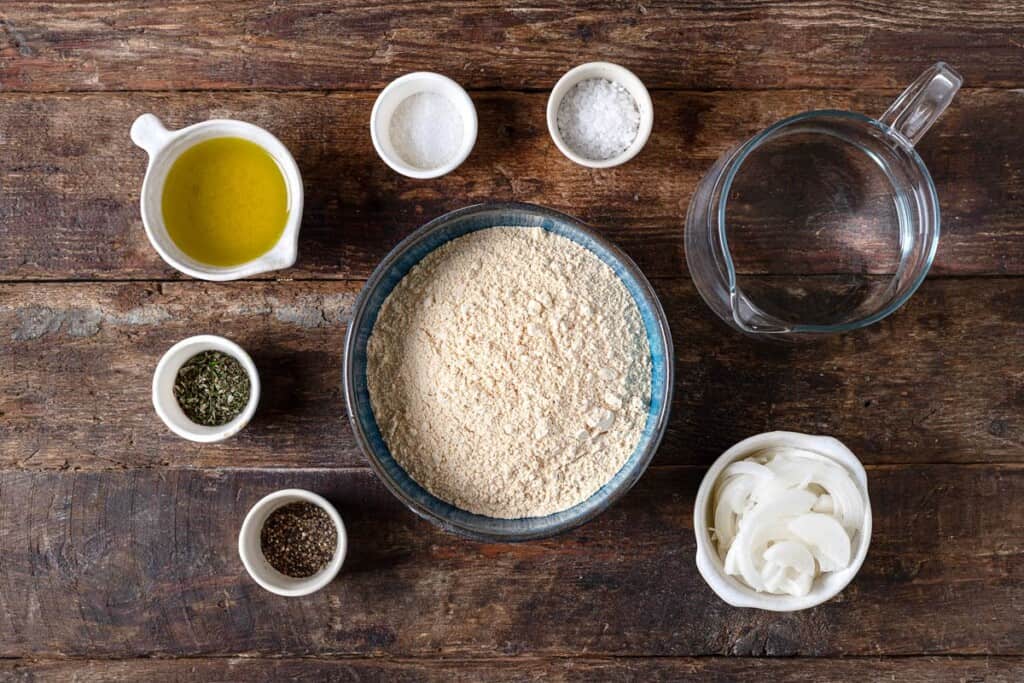
Because there are so few ingredients in farinata, make sure they are high quality. It makes all the difference in this recipe.
- Chickpea flour: This naturally gluten-free flour is made from finely ground dried chickpeas. It has a pale golden color and an appealing vegetal flavor. It’s also a good source of protein, fiber, and folate. You can find chickpea flour in the baking aisle of most supermarkets. Store chickpea flour in a tightly sealed bag or sealed container. It will keep in the pantry for up to 6 months or in the freezer for 1 year.
- Sea salt: Fine sea salt dissolves readily and rounds out the flavor of the batter. Kosher salt works here too.
- Water: The ratio of water to chickpea flour in weight is about 3:1. For 200 grams (2 scant cups) chickpea flour, you’ll need 600 g (2 1/2 cups) water. Room temperature or tepid water is best, so that the chickpea flour can absorb the liquid. I prefer spring water or filtered water to avoid any off taste from tap water, but if you love the taste of your tap water go ahead and use it.
- Extra virgin olive oil: Because olive oil is an integral part of this recipe, it needs to be of good quality. Opt for olive oil with a mild, buttery flavor that doesn’t overwhelm the flavor of the chickpea flour, like our Nocellara from Agrigento, Sicily.
- Flaky sea salt: Garnishing the farinata with a pinch of flaky sea salt as soon as it comes out of the oven gives it an appealing finish in terms of both texture and flavor.
- Toppings & Seasonings: Fresh rosemary and black pepper give a savory, fragrant quality to the farinata, while yellow onion lends a caramelized sweetness. Both are optional. Farinata is a blank canvas of sorts. You can choose to serve it plain and let its intriguing flavor speak for itself. Try experimenting with your own favorite herbs and toppings. A good rule of thumb when it comes to farinata, though, is that less is more.
How to Make Farinata
The key to making good farinata is to let the batter rest—ideally four or more hours. This allows the chickpea flour to absorb the liquid resulting in farinata that is custardy and not dry.
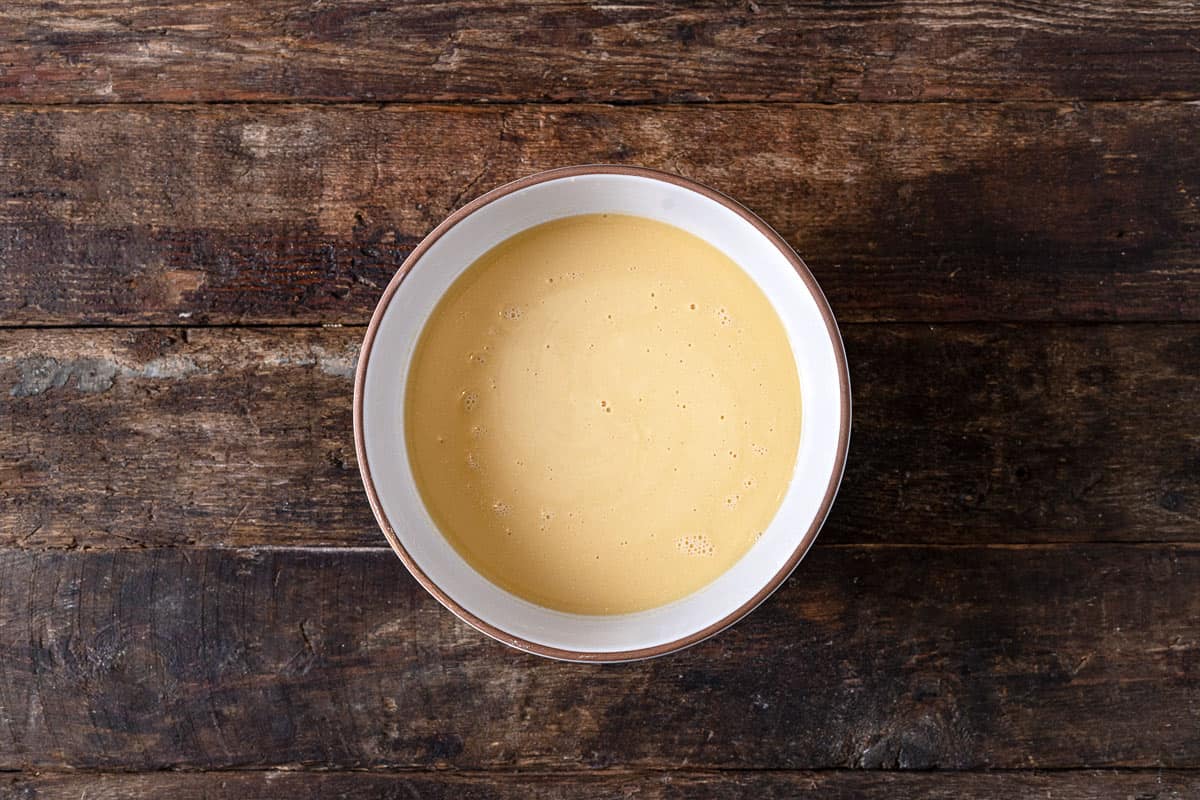
- Mix the batter: In a large bowl, combine 2 scant cups of chickpea flour and 1 teaspoon of fine sea salt. Slowly whisk in 2 1/2 cups of tepid or room-temperature filtered water or spring water. I whisk constantly here to avoid lumps. Set the batter aside to rest for at least 4 hours. Whisk it every couple of hours and skim off any foam that floats to the top.
- Preheat the oven: Arrange one oven rack on the bottom level of the oven and a second on the top level, 4 to 6 inches from the broiler. Preheat the oven to its highest setting (but not ‘broil’). My oven heats to 500°F, but some ovens only heat to 450°F. Both settings are fine, just adjust your cook time accordingly.
- Prepare your : Right before you bake the farinata, placeheat a wide, shallow oven-safe skillet (about 14-inches wide, or 2 shallow 9-inch skillets) in the lower part of the oven for 10 minutes before you plan to bake your farinata.
- Pour in the oil: Once your skillet is heated, carefully slide it out of the oven (use oven mitts!) and place it on the stove or a heat-proof surface. Pour 1/4 cup olive oil into the skillet and swirl to coat.
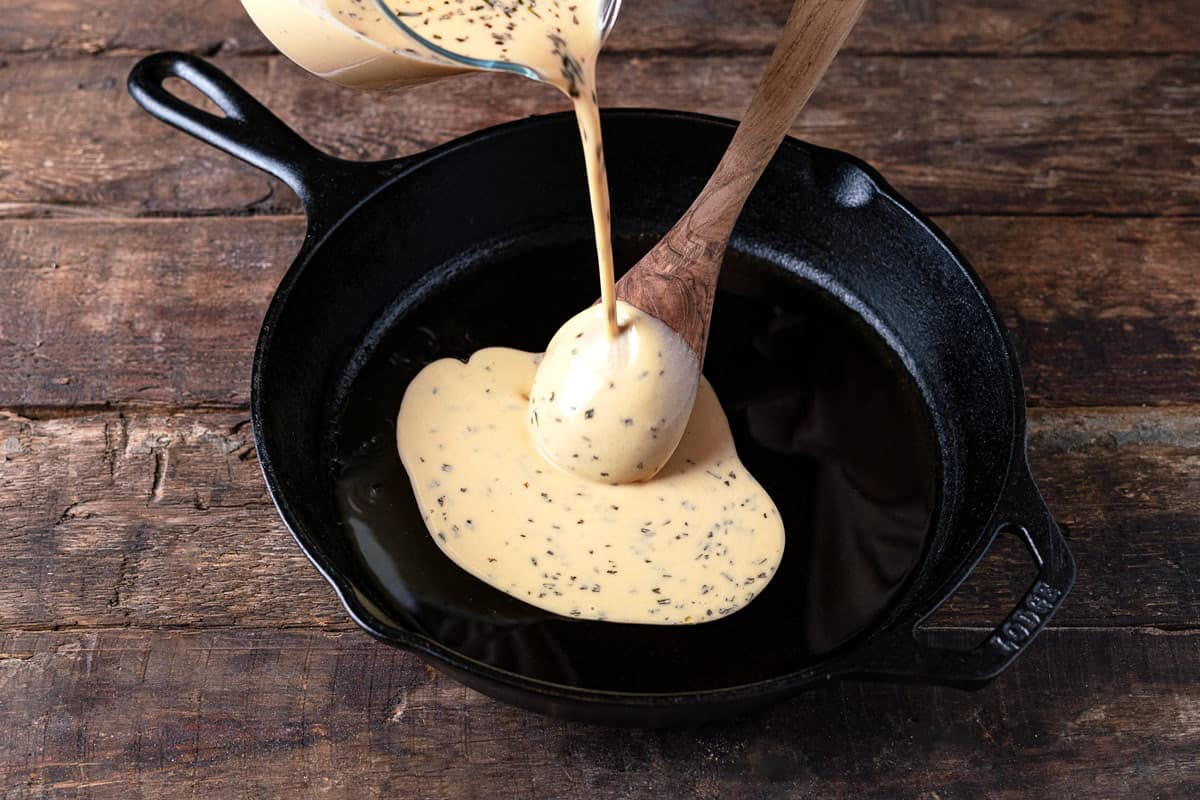
- Pour in the batter: Now comes the fun part. Take a wooden spoon in one hand. While grasping the handle, position the spoon so it is hovering right over the skillet at a 45-degree angle. You just want it to touch the surface of the olive oil. Very slowly pour the batter over the back of the spoon and into the skillet. Don’t overfill your skillet. The batter shouldn’t be more than a 1/3 inch deep. If it is too thick, the farinata will be heavy, rather than light and creamy in texture. Pouring it over the spoon will prevent the batter from breaking through the coating of olive oil on the bottom of the skillet.
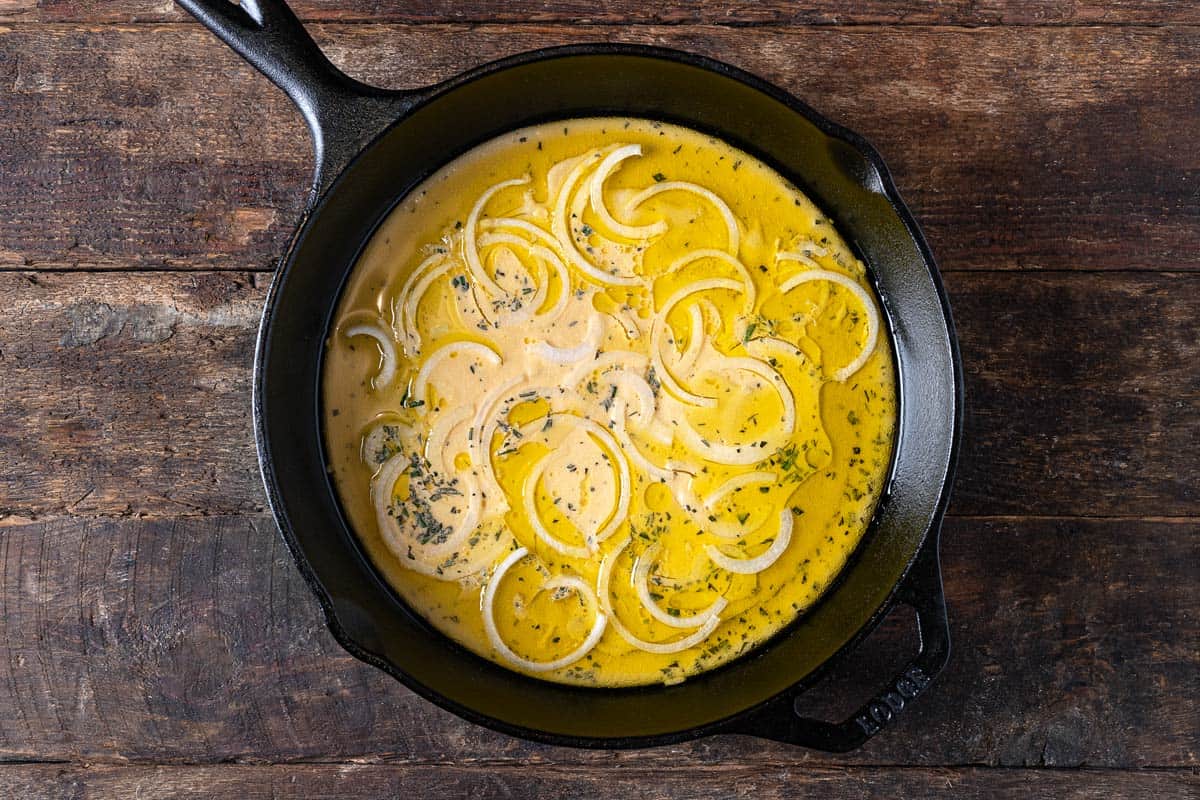
- Coat the batter in oil: You will see some of the olive oil rise to the surface. Using the wooden spoon, gently coax the olive oil by “pulling” it towards the center of the skillet so that it nearly covers the surface of the batter. Don’t worry if it doesn’t cover the entire surface. This maneuver may sound difficult, even impossible to do, but it’s actually pretty simple, and it works. The oil forms a bottom and top “seal” that prevents the batter from sticking to the bottom of the skillet and also helps to form a lightly crisp top.
- Add any toppings: If you are putting any toppings, such as thinly sliced onion, now is the time to do it. I like to scatter half of a thinly sliced sweet yellow onion. If you can get your hands on a Maui or Vidalia onion—even better!
- Bake and broil the farinata: Carefully return the skillet to the lower part of the oven and bake for about 15 to 20 minutes, until the surface is just set and beginning to turn golden on top. It bakes quickly, so keep an eye on it; an overbaked farinata can be solid and stodgy. Using oven mitts, transfer the skillet to the top part of the oven and turn on the broiler. Broil the farinata for 3 to 4 minutes, until it is golden brown on top.
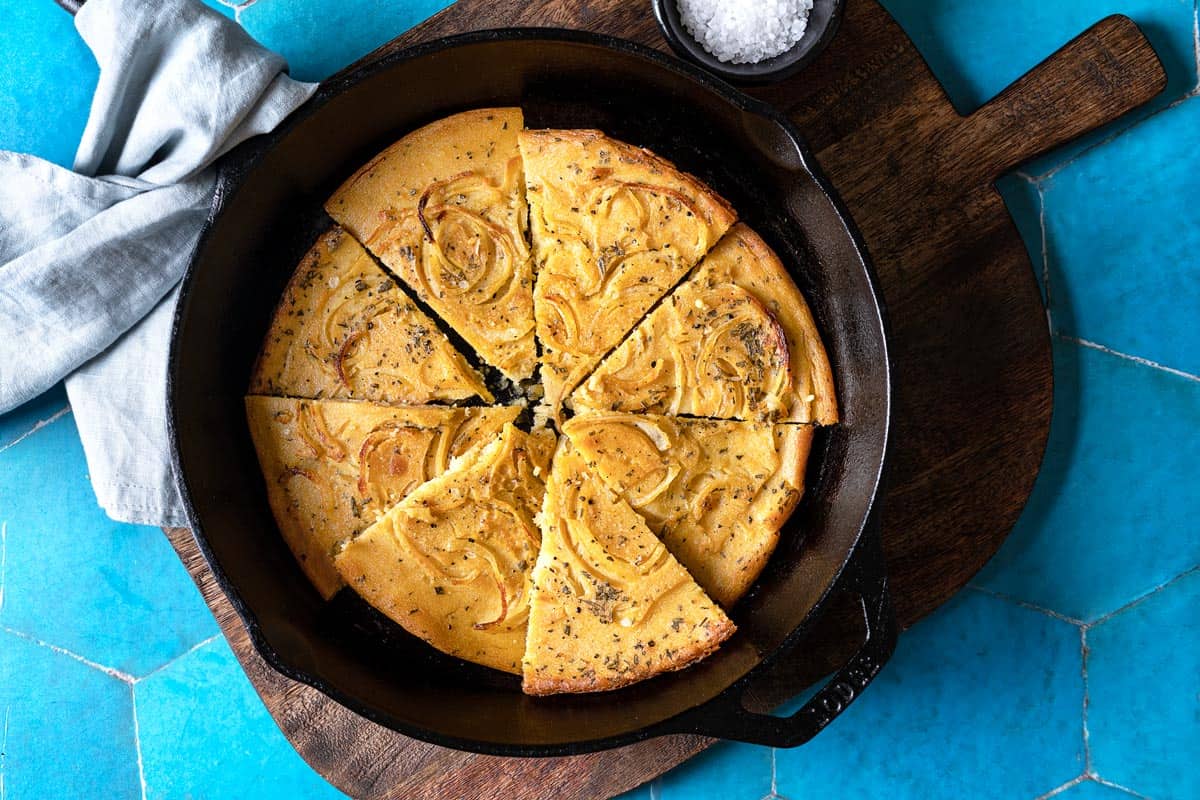
- Finish and serve: Remove it from the oven and sprinkle with a pinch of flaky sea salt. Cut into squares or wedges and serve hot.
Tips for Making Farinata
Farinata can be tricky to make without clear instructions. This recipe offers a simple guide to making farinata, but I’ve outlined additional tips before you get started.
- Don’t get too fancy. Plenty of recipes call for adding toppings such as cheese, grilled or roasted vegetables, even seafood. Avoid going overboard. The beauty of farinata is its simplicity and that unique, creamy chickpea flavor. A little rosemary stirred into the batter or sliced onion on top is my ideal version.
- Remove and slice. If you’ve created a proper bottom “seal” of olive oil, you shouldn’t have trouble removing the farinata, especially if your skillet is nonstick or well-seasoned. Use a pizza wheel or a knife to slice the farinata into squares, rectangles, or wedges, and then lift them out of the skillet with an angled spatula.
- Enjoy while it’s hot. Farinata is best soon after it comes out of the oven. It loses its delicate crispy-creamy texture as it cools. However, as much as I love freshly baked farinata, I also like leftovers at room temperature. It does become a bit floppy, but you can really taste the earthy chickpea flavor.
- Make-ahead. You can prepare the batter up to 2 days ahead. Let it sit out on the countertop for a few hours, then transfer it to a tightly sealed container and refrigerate. Let it come to room temperature and give it a good whisk before baking.
What to Serve with Farinata:
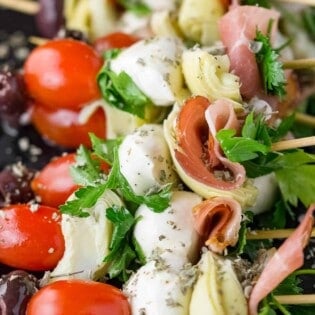
While farinata is classified as a street food, there are lots of ways to enjoy it. It makes a great party appetizer, served in small squares to accompany cheese, prosciutto and salami, and olives or these Antipasto Skewers. Or, really wow your guests and serve with another favorite Italian appetizer: Arancini (Italian Fried Risotto) or a simple fresh salad, like Peach Salad with Arugula, Basil, and Goat Cheese.
Don’t relegate this recipe to the snack table only. You can also serve it as a side, or gluten-free bread substitute, perhaps alongside Roasted Whole Chicken or a bowl of Simple Vegetarian Minestrone. I especially like it paired with grilled sausages and peppers.
Italian Appetizer Recipes We Love
Sides and Small Plates
Roasted Fennel with Parmigiano Cheese
Appetizer and Mezze
Easy Antipasto Skewers
Browse all Mediterranean recipes.
Visit Our Shop.
Nocellara Olive Oil
Drizzle the Italian way. Extra virgin olive oil from 100% Nocellara del Belice olives.
Farinata (Italian Chickpea Pancake)
Ingredients
- 2 scant cups chickpea flour
- 1 teaspoon fine sea salt
- 2 1/2 cups water, at room temperature
- 1/4 cup extra-virgin olive oil
- 1 teaspoon minced fresh rosemary, (optional)
- 1/2 sweet yellow onion (like Maui or Vidalia), thinly sliced (optional)
- Flaky sea salt
- Freshly ground black pepper, (optional)
Instructions
- Make the batter: Whisk together the chickpea flour and fine sea salt in a large bowl. Slowly pour in the water, whisking constantly to avoid lumps. Set the batter aside to rest for at least 4 hours. Whisk periodically and use a spoon to skim off any foam that rises to the surface.
- Preheat the oven and skillet: Arrange an oven rack on the bottom shelf and one on the top shelf. Preheat the oven to its highest setting, just below broil. When the oven is ready, place a 14-inch pizza pan or cast-iron skillet on the bottom rack of the oven to heat for 10 minutes. If using the rosemary, stir it into the batter. Otherwise, give the batter a final whisk.
- Pour the oil: Using oven mitts, remove the hot skillet from the oven and set it on the stovetop or a heat-proof surface. Pour in the olive oil, gently swirling the skillet if necessary to distribute the oil.
- Pour the batter: Holding a long wooden spoon by the handle, position it at a 45-degree angle so it’s just touching the surface of the oil. Slowly pour the batter over the back of the spoon in a steady stream so that the batter flows into the skillet without disturbing the oil on the bottom. Some of the oil will pool to the surface as you pour.
- Coat the batter: Using the spoon, “pull” or drag the oil on the surface in towards the center of the skillet to cover the surface of the batter (the oil may not cover the entire surface of that batter; this is fine). If using the onion, scatter the slices evenly over the surface.
- Bake, then broil: Using oven mitts, carefully return the skillet to the bottom shelf of the oven, taking care not to let the batter slosh around. Bake for 15 to 20 minutes, until the farinata is just set and beginning to turn pale gold on top. Transfer the skillet to the top shelf of the oven and turn on the broiler. Broil for 3 to 4 minutes, until the surface of the farinata is golden-brown.
- Finish, slice, and serve: Remove the skillet from the oven and sprinkle with flaky sea salt and freshly ground pepper, if using. Use a pizza wheel or knife to cut the farinata into squares or rectangles and transfer to a warmed serving plate. Serve hot.
Notes
- Don’t forget to arrange your oven racks before preheating the oven.
- Make sure to use a shallow skillet, about 14-inches wide, or 2 shallow 9-inch skillets. If your skillet is too deep the top of the farinata won’t brown.
- You can prepare the batter up to 2 days ahead. Let it sit out on the countertop for a few hours, then transfer to a tightly sealed container and refrigerate. Let the batter come to room temperature and give it a good whisk before baking.
- Visit our shop to browse quality Mediterranean ingredients including olive oils, honey, jams and spices.


This was so easy and so good! I had a different recipe for farinata, but then saw yours and really appreciated the detailed instructions–worked like a charm. I’ll be making this often!
Great to hear! Thanks, Lisa!
This would be a great one for you to do a video .
Thanks for the suggetion, Dooz! We’ll look into it!
Tried making this again tonight. I had to add a lot more water than the recipe called for. The result was a mess, though tasty! My farinata was a crumble mess. This is my second attempt, same result. Are there different types of chickpea flour? Cooked too long, too short?
Anyway, the mess was delicious and went great with your chicken tagine.
Any thoughts or what to watch out for next try?
Sounds like you haven’t incorporated the flour properly as the batter should be thick and smooth. Do the opposite recommended and whisk the flour into water instead, leaving it for 4+ hrs or even overnight will help.
Hi Newell, Devin here from the Mediterranean Dish team. Sorry to hear your farinata batter was too thick. Did you use packed cups? It may be that you had a bit too much flour to start. You’re looking for scant cups, just under 2 cups in total. I agree with Antonio that making sure the batter is well hydrated will help as well. Hope this helps- please let us know how it turns out if you make this again!
Made this tonight, had never tried it before but have to say it was amazing. Served it with Greek shrimp kabobs and peach and arugula salad. Everybody loved it.
Have found so many amazing recipes on your site and your cookbook. So happy I found you.
thanks. the recipe is perfect. reminiscing the time when i first tasted this in cinque terre.
So glad it brought back some good memories for you, Rodel!
I just had Farinata in Riomaggiore about 2 weeks ago, and was excited to try making it. It was too oily for my liking. I put some dried Rosemary and candied onions in mine. I will try it again with less than half the oil.
If you make half the recipe, it will fit and cook in a 10″ skillet.
Yes, Lawrence. That should be just fine. Hope you enjoy the recipe!