
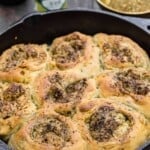
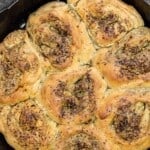
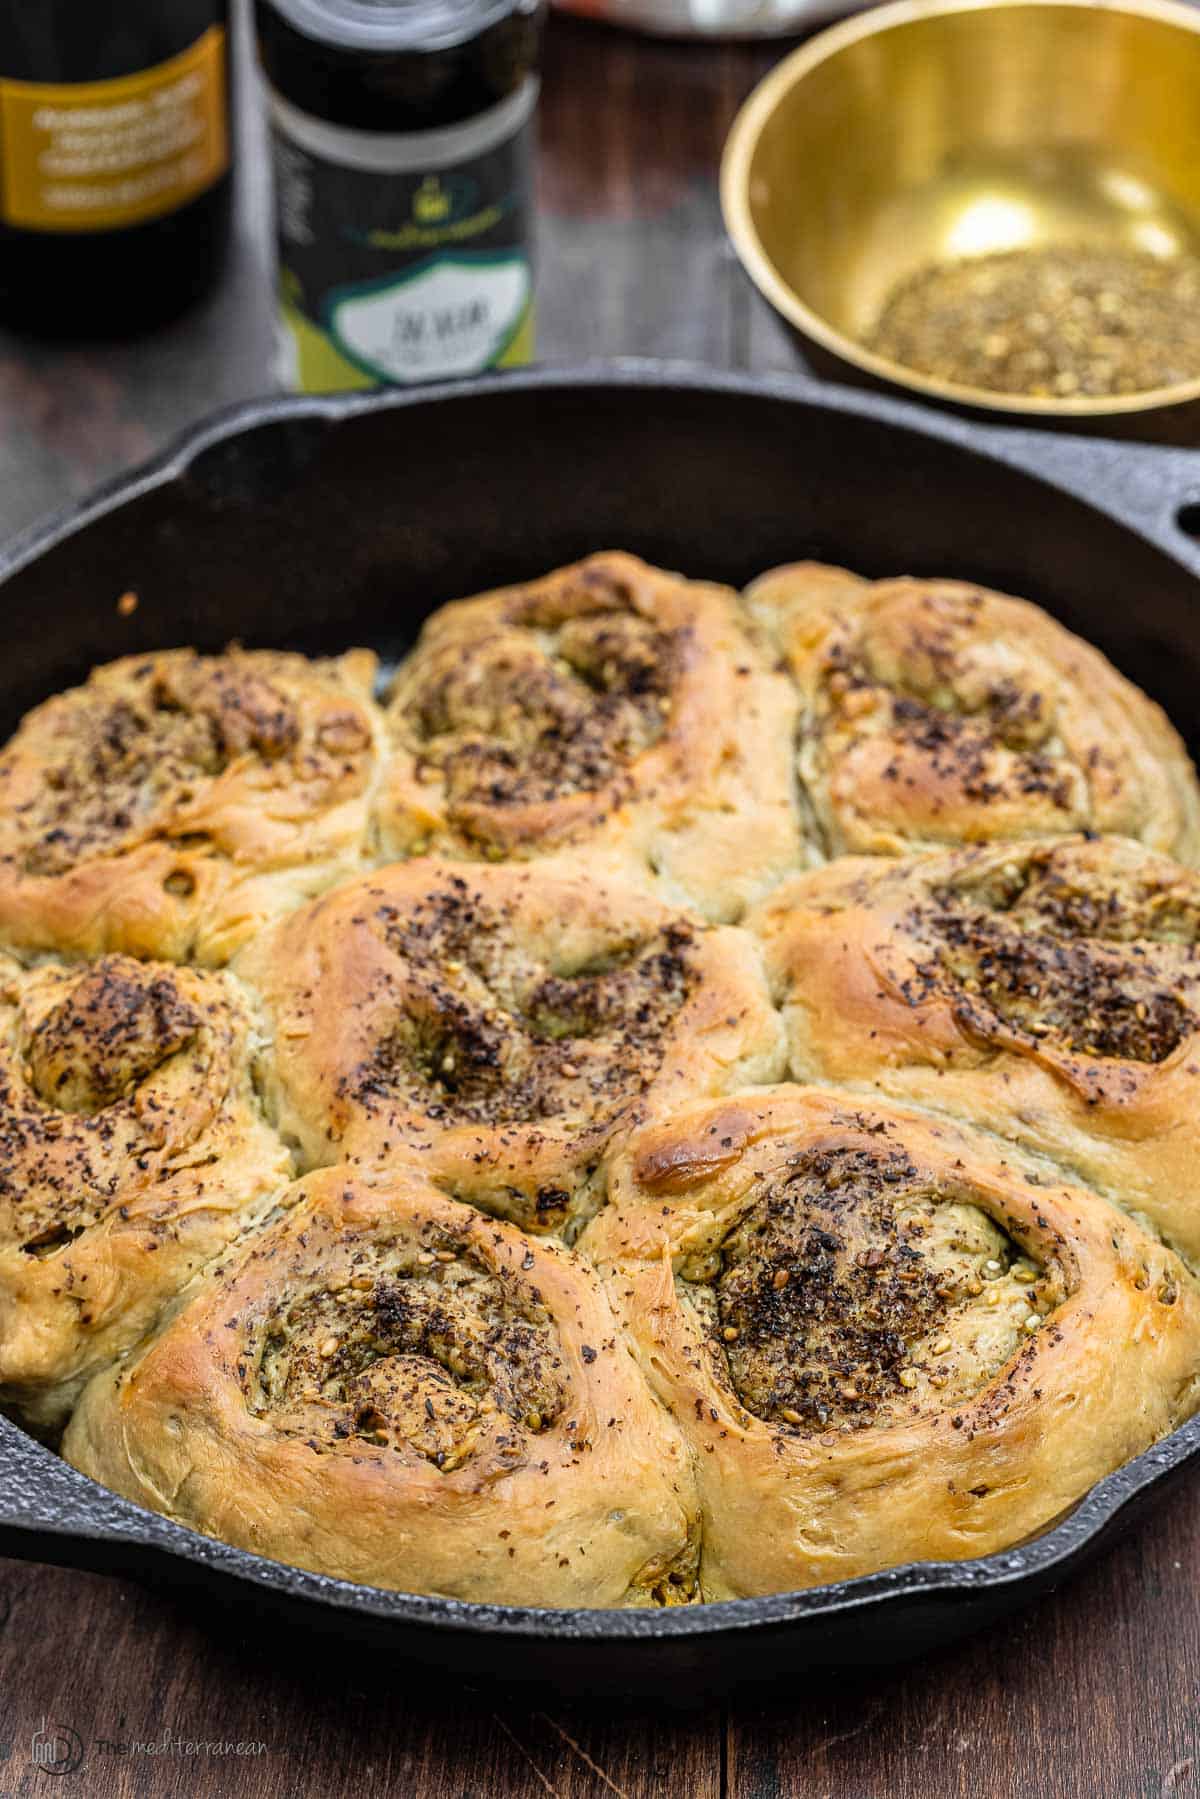
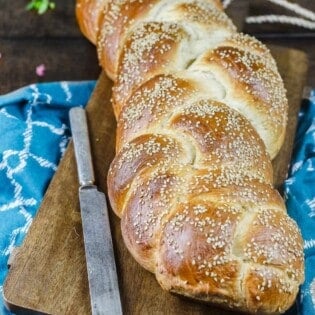
You’ve never had bread rolls like this! Za’atar bread rolls baked in a cast iron skillet are fluffy, airy, and addictively soft on the inside with just a bit of a crusty edge. Enjoy them as a savory breakfast roll, in the evening with soup or as an afternoon snack! This recipe is from my friend Georgina Hayden’s new cookbook, Nistisima, and I can’t wait for you to try it.
Yeast rolls with za’atar!
Take a plain homemade bread roll to the next level with these za’atar bread rolls from my friend Georgina Hayden’s new cookbook, Nistisima, which is filled with delicious vegan recipes! Perfectly comforting and loaded with flavor, these yeast rolls are great as a snack on their own or for breakfast served with whipped labneh, baked eggs, or loaded hummus. They’re sort of like a softer, pull-apart version of za’atar manaqish (za’atar bread).
These rolls are so easy! Simply make the dough and let it rise until it has doubled in size. Once it’s ready, roll out the dough, sprinkle it with a generous amount of za’atar and a little Aleppo pepper, roll it up into a tight spiral log, then cut it into individual rolls and let it rise again. (If you’ve ever made cinnamon rolls then you know how to roll and cut za’atar rolls.) Bake the rolls in the oven until golden and the addictive smell of freshly baked bread loaded with spices wafts through the house. Nothing brings people to the table faster than the sent of freshly baked bread rolls.
This recipe comes together with little effort, but you do need stick around the house to give the dough time to rise. Save them for a day when you don’t have much on your plate and you can enjoy the rhythmic process of making, shaping and baking. Serve them for breakfast or pair these rolls with your favorite lunch or dinner!
In this post
- Yeast rolls with za’atar!
- What you’ll need to make these za’atar rolls
- How to make breakfast rolls
- What is the difference between active and instant yeast?
- How to know if your yeast is good?
- Can you substitute instant yeast for active dry yeast?
- What to serve with them
- How to store bread rolls
- More bread recipes
What you’ll need to make these za’atar rolls
This bread roll recipe starts with the basics: flour, yeast, sugar, and salt, but once the dough is made we use za’atar and Aleppo-style pepper to kick things up a notch and add Mediterranean flair. Here’s what you’ll need:
- Sugar: Sugar helps the dough rise faster by providing easy food for the yeast. Sugar also helps to produce rolls with a tender crumb.
- Yeast: You’ll need active dry yeast here.
- Flour: I used all-purpose flour, but bread flour would also work (it’s a good alternative if you want a chewier roll).
- Fine sea salt: Salt stops the dough from rising too fast — a slower rise means more flavorful dough.
- Extra virgin olive oil: Fats, like extra virgin olive oil, help control the elasticity of the dough by keeping the strands of gluten that form as you knead short. Adding a fat also gives you softer breads, which is exactly what we want for these breakfast rolls.
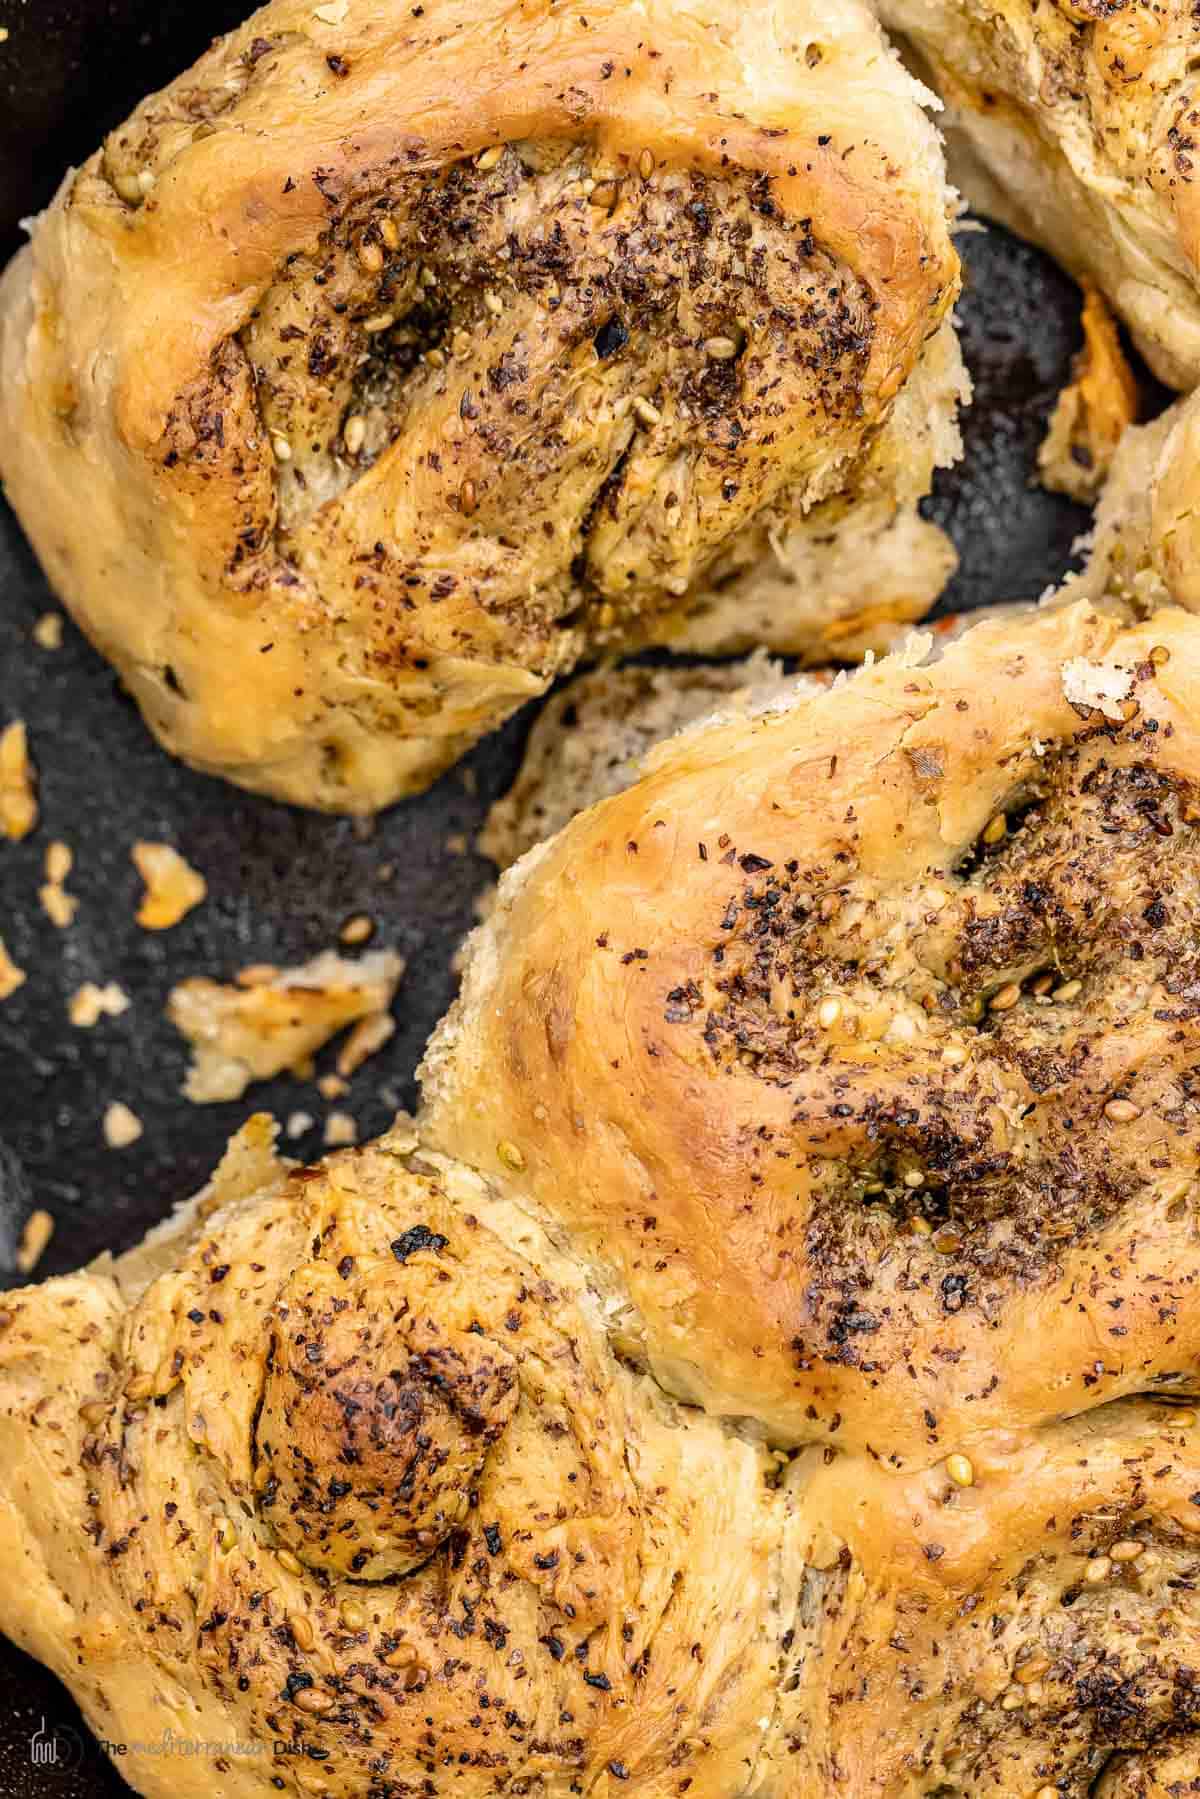
- Za’atar: What sets these yeast rolls apart is the generous amount of za’atar, which give them an earthy, subtly citrusy flavor with plenty of nuttiness from toasted sesame seeds.
- Aleppo pepper: You need just 1/2 teaspoon Aleppo-style pepper flakes to sprinkle on the dough for just a hint of heat and raisin-like sweetness.
How to make breakfast rolls
Za’atar bread rolls are a bit of a labor of love, and definitely better saved for when you have some time on your hands. Here’s how you make them:
- Make the dough. First, activate the yeast. To a large measuring liquid measuring cup add 1 tablespoon sugar and 2 ½ teaspoons yeast. Whisk in 1 ¼ cups warm water (110°F max temperature) and set it aside for a few minutes, until it gets foamy. Grab a large mixing bowl and add 3 ¾ cups flour. Then whisk in ¾ teaspoon fine sea salt. Once this is done, make a well in the center and pour in the yeast water and 2 tablespoons extra virgin olive oil. Mix until well combined. You need a moist, somewhat sticky, dough, so keep more water on hand in case you need more.
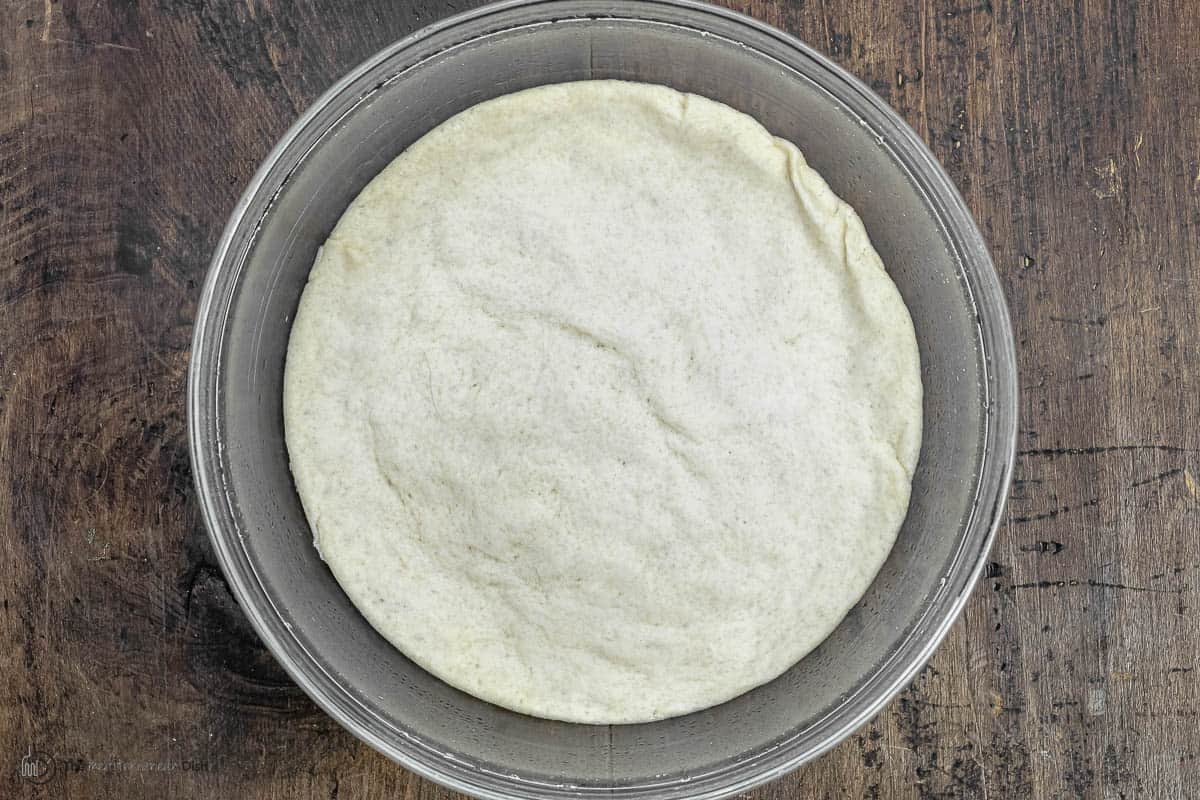
- Allow the dough to rise. Lightly dust a clean, flat surface with flour. Transfer the dough to the flour-dusted surface. (Keep the mixing bowl close by; you’ll need it again!) Knead the dough for 8 to 10 minutes until it is smooth and elastic. After washing and drying the bowl, lightly oil it and move the dough back to the bowl. Drizzle a bit more olive oil on top and leave the dough until it doubles in size. Depending on how warm your kitchen is, this could take 1 hour to 1 ½ hours.

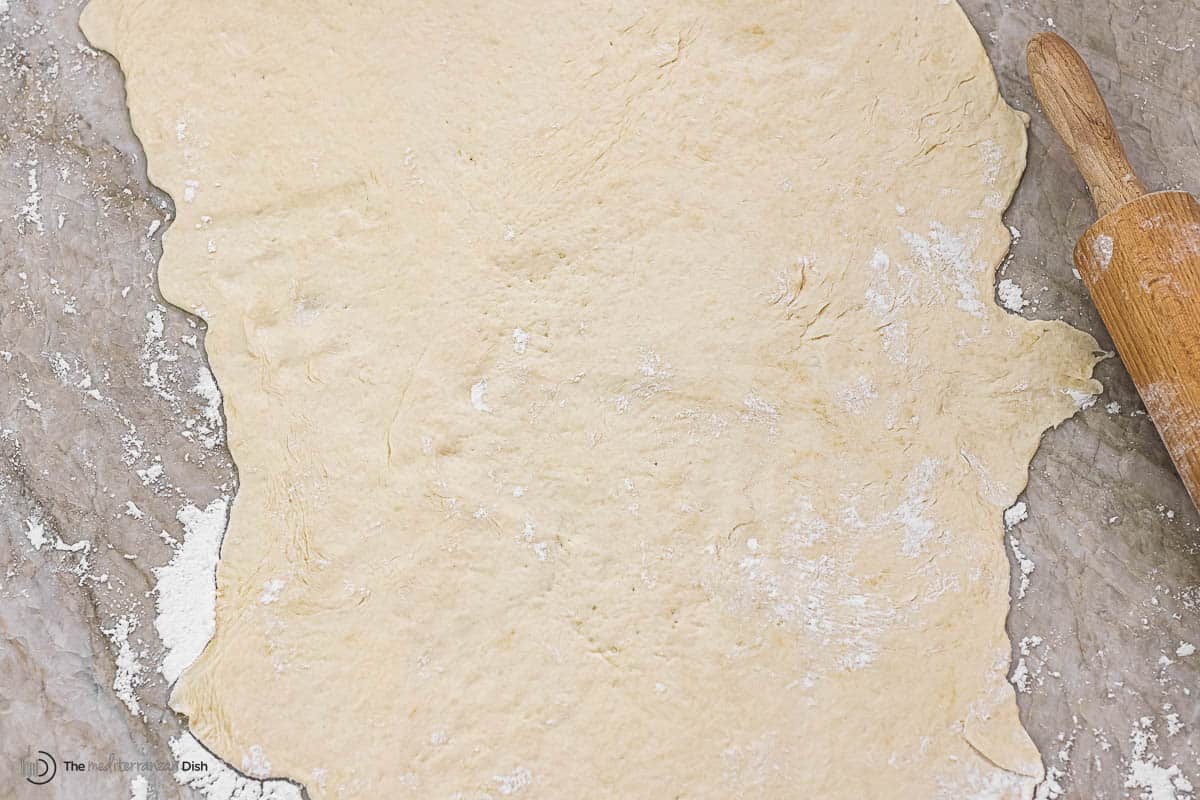
- Roll out the dough. Turn the risen dough out onto a clean floured surface, knock it back, and roll into a rectangle that’s about 10 x 16 inches in size. The dough will be rolled quite thin.
- Add seasoning. Brush the dough with a little EVOO before sprinkling on 6 tablespoons of za’atar and ½ teaspoon Aleppo pepper flakes. Leave a ½-inch border around the edges. Using the back of a tablespoon, gently pat the spices into the dough to help them stick.
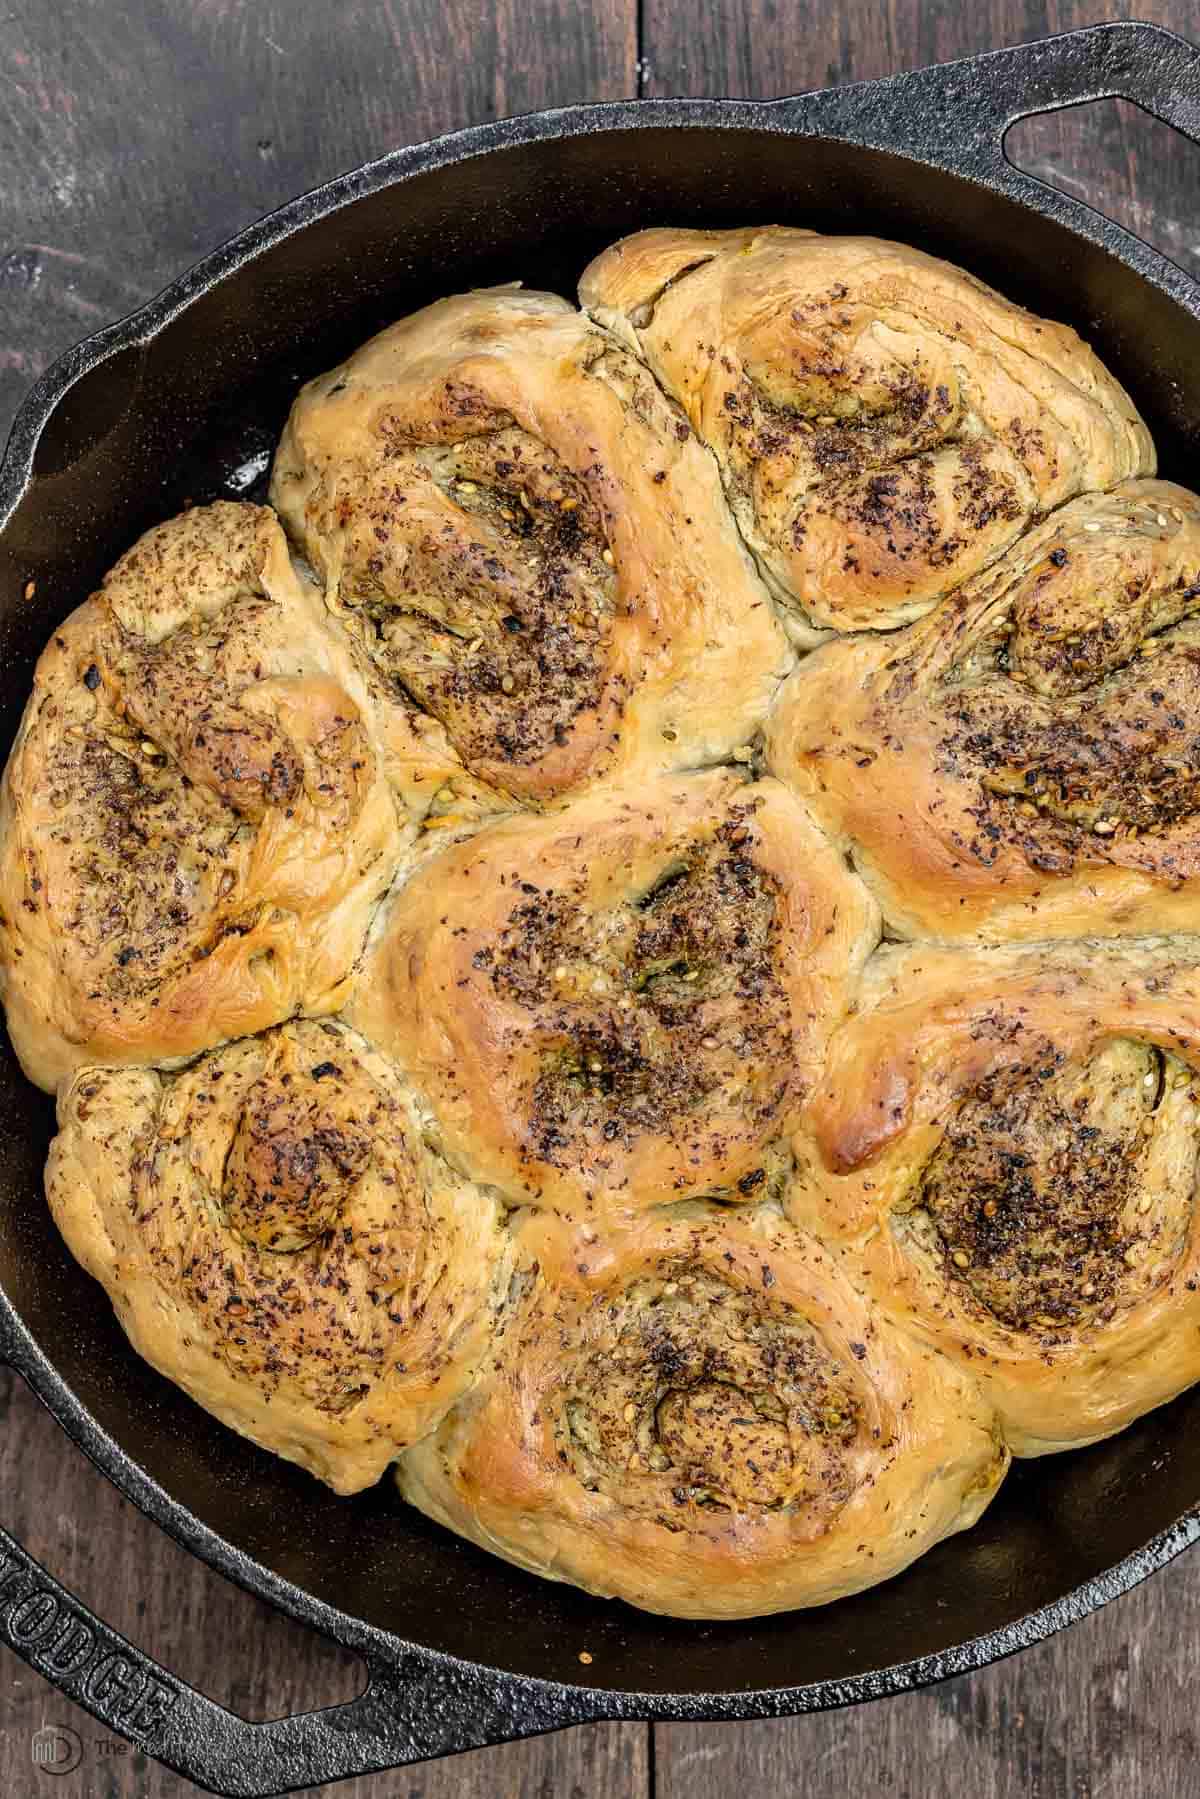
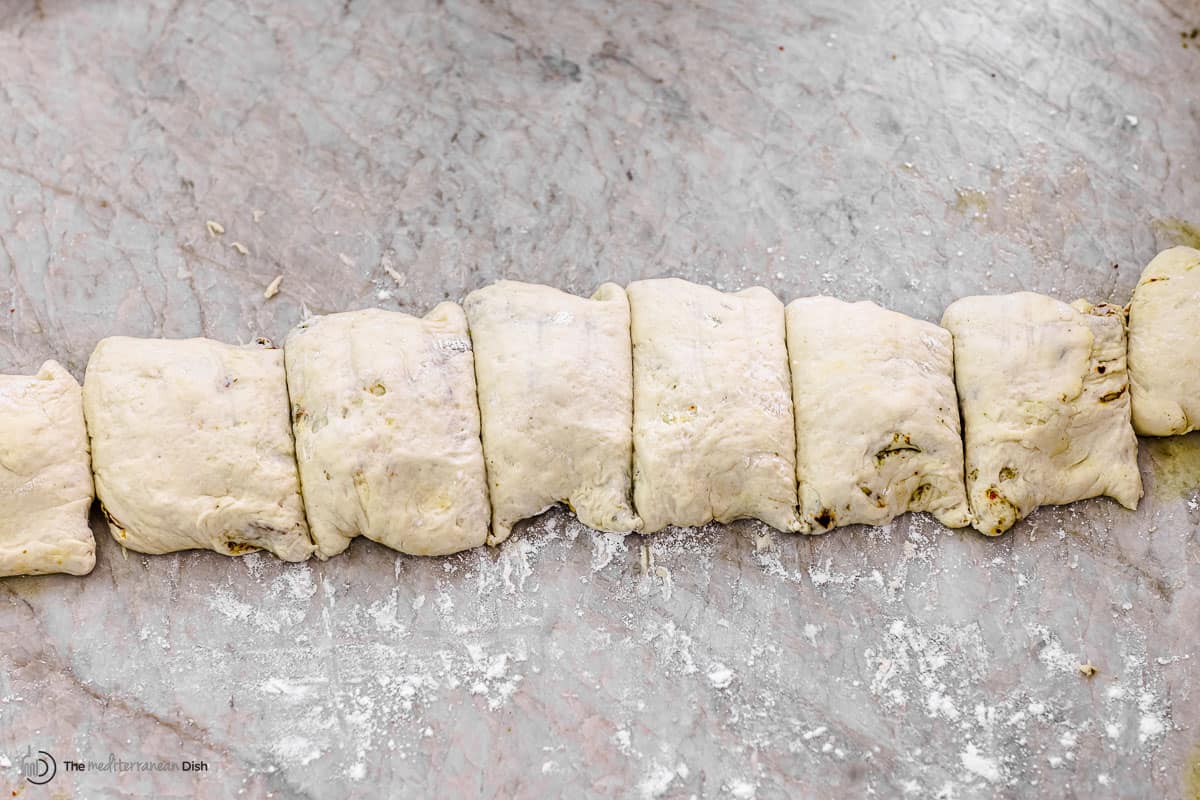
- Roll the dough into a log and cut. Roll the dough up tightly on the short side. Trim off the excess at the end. (This will be approximately the ½-inch you did not season with spices.) Cut the dough into 8 to 9 rolls that are about the same size.
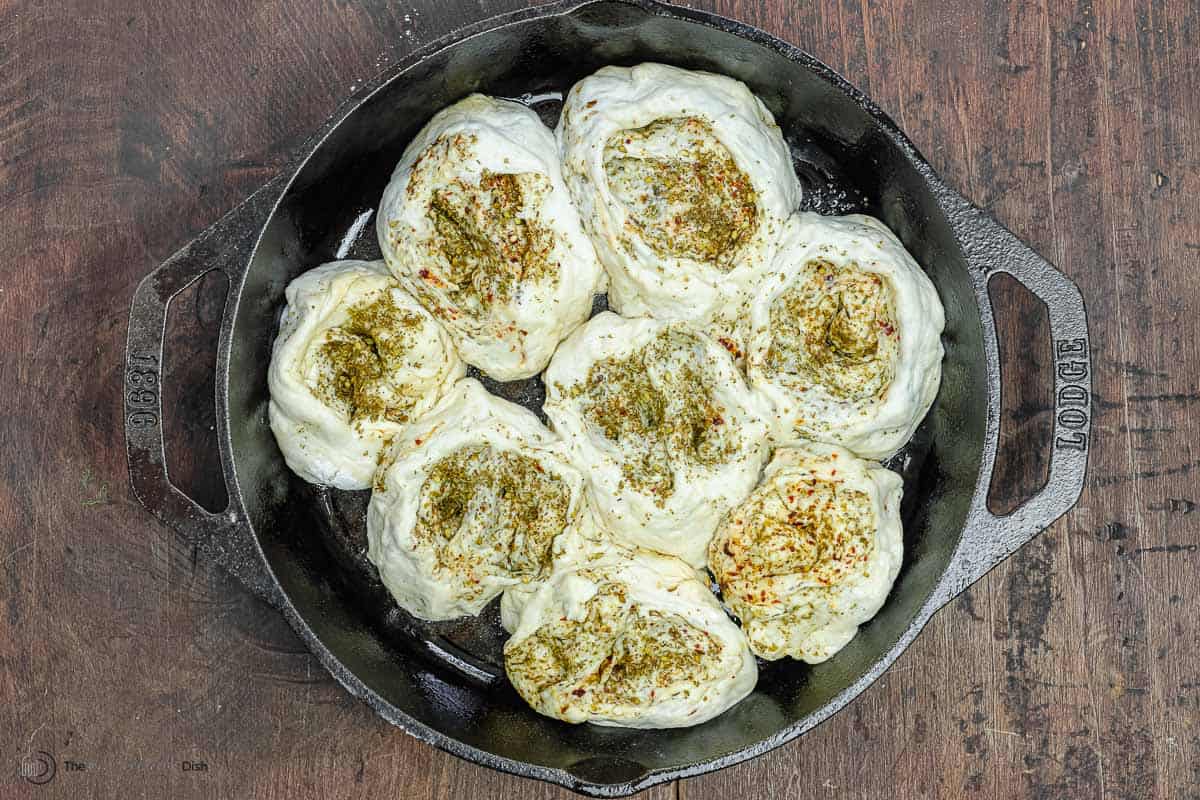
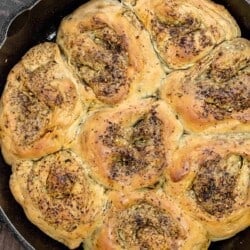
- Add some oil to the base of a 10-inch cast iron skillet (coat the entire bottom lightly with oil). Carefully arrange the sliced dough, swirl facing up. Cover and set aside for about 30 minutes, until the rolls have doubled in size. They will look sort of like unbaked cinnamon rolls here.
- Bake and serve the yeast rolls. Bake the rolls in a 400°F heated oven for 25 to 30 minutes until golden. Once they’re done, immediately drizzle them with olive oil and leave them to absorb in the skillet for about 10 minutes before serving.

What is the difference between active and instant yeast?
Working with yeasted dough can feel intimidating. This is especially true if you’ve never done it before, but follow a few simple tips and you’ll be a pro in no time! This recipe calls for active dry yeast, but you can substitute instant yeast if it’s all you have.
- Active yeast has larger granules than instant yeast and should be activated with warm water (110°F maximum temperature) prior to use. It creates dough with a slower rise time, but a more developed flavor.
- Instant or Rapid Rise yeast is a finer than active dry yeast and can include additional dough conditioners. Skip the proofing process and add the yeast directly to the flour. The dough will rise faster when using instant yeast.
How to know if your yeast is good?
If a recipe that uses yeast for bread, cake, or loukoumades (Greek donuts) doesn’t rise, ninety percent of the time something is happening with yeast. It’s usually one of two things: the yeast is old and no longer active or it was killed during the proofing process. The good news is it’s easy to solve both of these problems.
First, make sure your yeast hasn’t expired. To test the freshness of both active and instant yeast combine 1 teaspoon of sugar with water between the temperature of 105°F and 110°F. Add the yeast and set it aside for 5 minutes. If it’s foamy the yeast is alive and you can proceed with the recipe. If foamy yeast isn’t visible on the surface of the water then replace the yeast with a fresh jar before you begin baking.
Consider proofing yeast as a safety measure so you don’t go through the whole recipe only to realize the yeast is old and the bread rolls will never rise. If you bake often and know the yeast is good, skip the proofing step and just add the yeast to the flour.
Yeast is a living organism. When we buy it at the store it’s just dormant. Once it’s combined with warm water it wakes up, but if the water used to proof the yeast is too hot it can kill it. If it’s too cold it doesn’t activate in the water. The perfect temperature of liquid for proofing yeast is between 105°F and 110°F. Keep the yeast alive with the proper water temp for fluffy rolls every time.
Can you substitute instant yeast for active dry yeast?
The short answer is yes! If you’re dying to make za’atar bread rolls and you only have instant yeast on hand never fear! Just follow these tips:
- Reduce the amount of yeast required in the recipe by 25 percent. In this recipe use just under 2 teaspoons of instant yeast.
- Cut the rise time by about 15 minutes. Rise time, however, is also impacted by the warmth of your kitchen. Keep an eye on the dough — once it’s doubled (regardless of the time) move onto the next step.
- If you know the yeast you have is good, skip the first step of dissolving the yeast in water, and instead add the instant yeast directly to the flour. You still need this to be a fairly wet dough, however, so add the water you would have used to activate the active dry yeast (1 ¼ cup) to the dough so you don’t lose that moisture.
What to serve with them
I enjoy these skillet rolls the most at breakfast time with some za’atar fried eggs, labneh, or marinated feta. For a breakfast on the go, a plain za’atar roll is the perfect choice! But don’t think this is a breakfast only kind of recipe! If I have any rolls on hand at dinner time they work great to sop up sauces or soak up the last bit of broth from a favorite soup recipe. Try them with chicken stew, mushroom chicken, garlicky shrimp and greens, or even braised leeks.
How to store bread rolls
- To store: To keep the homemade bread rolls as fresh as possible, let them cool completely, then wrap them snugly in foil and pop the wrapped rolls into a zip top bag. They will stay soft and fresh (at room temperature) for about 2 days.
- To freeze: Follow the same process as above, and make sure you’re using freezer-safe bags. The rolls can be frozen for up to 3 months. Warm them up from frozen in the oven at 350°F until soft and heated through, about 15 minutes.
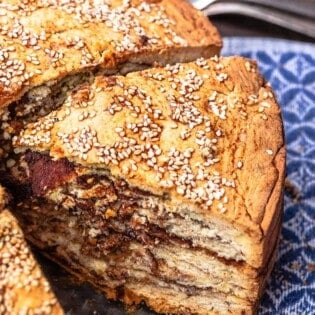
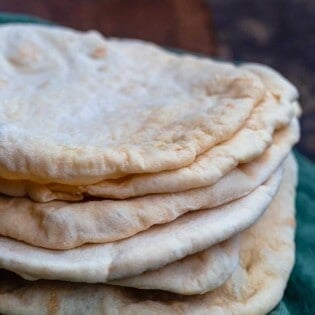
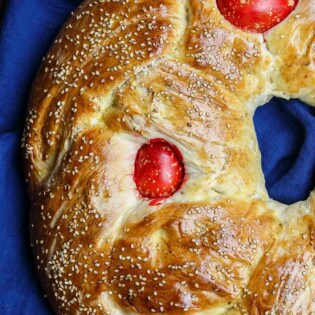
More bread recipes
Browse all Mediterranean recipes.
Visit Our Shop.
Ingredients
- 1 ¼ cups water, warm (for yeast)
- 1 tablespoon sugar
- 2 ½ teaspoons yeast
- 3 ¾ cups flour
- ¾ teaspoon fine sea salt
- 2 tablespoons extra virgin olive oil, plus more for later
- 6 tablespoons za’atar
- ½ teaspoon Aleppo pepper
Instructions
- In a large liquid measuring cup add the warm water (105-110°F). Add the sugar and yeast to the water and whisk it together. Set it aside for about 5 minutes until the yeast is foamy.
- Place the flour in a large mixing bowl and whisk in the salt, then make a well in the center. Mix in the yeast water and the extra virgin olive oil until well combined – add more water if needed; you want a moist dough, it shouldn’t be too dry.
- Transfer the dough to a flour-dusted surface and knead for around 8 to 10 minutes, until smooth and elastic. Wash and dry the mixing bowl, then lightly oil it.
- Return the dough to the bowl, drizzle with a little more olive oil, and leave it to rise for around 1 to 1 ½ hours (this will depend on how warm your kitchen is), until doubled in size.
- When the dough has risen, turn it out onto a clean surface, knock it back, and roll into a rectangle about 10 x 16 inches. Brush over a layer of olive oil and evenly sprinkle the za’atar and Aleppo pepper, leaving a ½-inch border around the edges. Pat the spice mixture gently into the dough with the back of a tablespoon.
- Starting with a short side, roll the dough up as tightly as you can. Trim off the uneven excess bits at the end. Slice the dough into 8 to 9 pieces. Pour enough oil to just cover the base of a 10-inch cast-iron skillet and pop in the slices, swirl facing up. Cover and set aside for the rolls to double in size, about 30 minutes.
- Meanwhile, preheat the oven to 400 degrees F. When the buns have roughly doubled in size, bake for 25 to 30 minutes, until golden. As soon as they come out of the oven, drizzle generously with olive oil and leave to absorb in the skillet for 10 minutes before serving.
Notes
- I used active dry yeast in this recipe, but you can use instant yeast as well. Simply reduce the amount of yeast by 25%. But still add water to the dough so it does not end up dry.
- What to serve with yeast rolls: Pair them with fried eggs, labneh, or marinated feta for breakfast. Or, use them to sop up the sauce in braised leeks or Greek shrimp!
- How to store leftovers: Wrap the rolls in foil and then place them into a Ziploc bag. Store them at room temperature. They will last about 2 days.
- Visit our Shop to browse quality Mediterranean ingredients including extra virgin olive oils, organic spices (like the za’atar and Aleppo pepper used in this recipe), and more!
Hi Suzy
My question is if I could use 00 flour, and do I us the same amount? I’m pretty new with that flour.
Yes and Yes :). The texture might be a little chewier and more delicate, but still delicious!
This look delicious but I’m wondering if I could make them circles & cut them to shape into crescent rolls?
Hi, Irla. Crescent rolls start in the shape of a triangle, not a circle, and they are baked on a baking sheet which means they hold their shape when heated. The dough for this is more like a cinnamon roll. I’m not sure how they would hold their shape outside of a baking dish or pan. You can definitely give it a try, but we just don’t have any way of knowing if it works without testing ourselves.
Has anyone tried Gluten-free flour? If so what kind? I would love to give this a try!
Hi, Karen. We have not, but would also love to know if it worked for anyone, so please let us know if you give it a try!
Do you bake in the oven covered or not?
Thanks
Hi, Bob. No need to cover here! Enjoy!
Is all purpose flour ok or bread flour only?
Either will work here. Enjoy!
Haven’t tried it yet, but wondering what you would suggest for baking if a cast iron skillet is not available?
Thanks and can’t wait to try!
Hi, Eve. Really, any baking pan will work fine here if you don’t have cast iron.
Okay, I am ruefully laughing at myself as I write this because I learned this evening, the hard way, that the back of a gas stove is NOT the place to allow your dough to rise!! It was doubled in size, I worked it into rolls, everything looked terrific! I popped them in the oven, and they raised beautifully, looked perfect… until I took them out and allowed to cool. Bang! Flat as a pancake!!! Since the only baking expert in my family, my mother-in-law, is no longer with us, I called my sister-in-law, who has had the longest access to her wealth of knowledge. “Oh, yep…” she laughed. “You allowed the dough to rise in too warm an area… Ask me what happened the first time I had Carol (our mother-in-law) over for dinner… Same. Exact. Thing. And, God bless Carol, she explained what happened, laughed, and made it okay! And I married Tom, anyway!!!” lol
In these summer months, a kitchen counter (unless you have your a/c on full-blast) is probably just fine, or possibly a bathroom that doesn’t get as much cold air, is a great place to allow dough to come to a rise!!! The back of a gas stove, over a pilot light? Not so much!!! HOWEVER…!!! They TASTED amazing!!! That’s what it’s all about, yes???
Gotta say, I’m NOT an amateur baker… but I guess it goes to show how much yeast baking I do in the summer – i.e., pretty much zilch, obviously!!! I stick to my 2-ingredient quick-bread, and don’t heat up the house!!! lol (we live out in the country; I get enough heat in the kitchen this time of year because the chiles are ripening, the raspberries have just exploded, and the tomatoes are about to implode, the bushes are so laden-down!!! Can you say: Canning season????).
Anyway, 100% PROPS to the recipe!!! ZERO props to the one who overheated her yeast!!! lol 🙂 Even flat, though, gotta say, they were delicious!!! Dipped them Suzi’s homemade hummus (#icecubesrock!!!), as, um, (red-faced, quite embarrassed…) -er, flat-bread… Still, amazing!!! *face palm* lol Won’t be making that mistake again!!!
LOL! No worries, Chrissie! Happens to the best of us!
Very cute story!
Hi! Really looking forward to trying this recipe. Can you knead with a stand mixer using a dough hook?
Hi, I just made them with the dough hook to mix and knead. I used a lot speed for 8 minutes. They turned out perfect!
Hi! I am so excited to try this recipe. I have tried the za’atar manaquish before, and they are delicious. These rolls look delicious. And thanks for sharing about the book!!
Thanks, Cindy! Hope you love the rolls :).