


Bring a bright, beautiful burst of color to your table with this easy beet hummus recipe! Roasting a red beet from scratch gives hummus–perhaps one of the Mediterranean’s most-loved dish–another layer of sweet, savory, and earthy flavor.
Growing up in Egypt, I was raised on hummus. I eat it for breakfast, lunch, dinner, and everything in between. Add a fresh salad and warm Pita and I could not be happier! And while I’ve historically been a purist about the Traditional Hummus I learned to make in Port Said, every once in a while I find a twist that inspires me to rethink my rigid hummus rules. This beet hummus is one of those times!
The roasted red beet adds a sweet and savory quality that reminds me of the pomegranate molasses in classic dips like Muhammara, it still very much fits into the Mediterranean flavor profile. I also keep all the same depth with warming spices like cumin and coriander, along with a hit of lemon and garlic.
It’s creamy, savory, sweet, goes with everything and will make just about any mezze spread even more beautiful. What’s not to like?
Table of Contents
Beet Hummus Ingredients and Substitutions
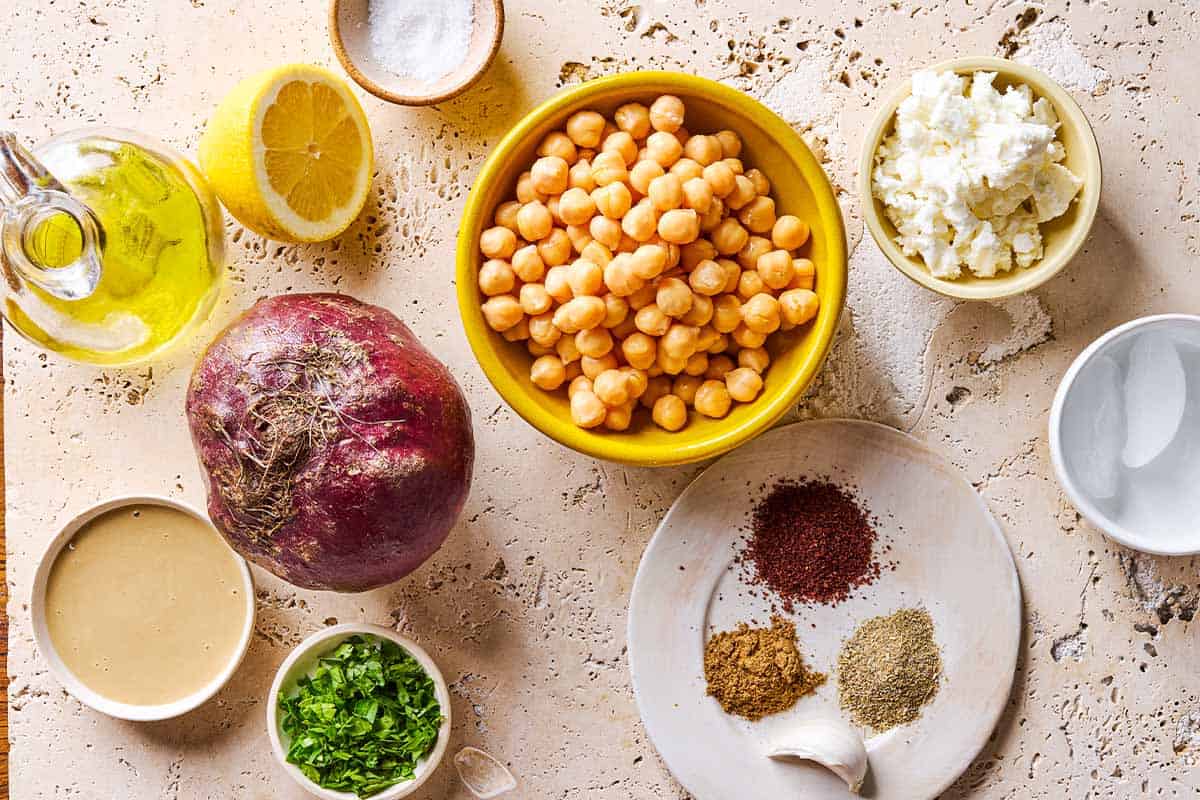
Most of the ingredients in this easy beet hummus recipe are Mediterranean diet pantry staples–almost all of which you can stock up on at our shop! You’ll need:
- Beet: Roasting a beet from scratch will give you the richest flavor and most vibrant color, but feel free to substitute with a can of beets to save time.
- Chickpeas: I usually use canned chickpeas to save time, but for a special treat try using 1 1/2 cups of chickpeas you’ve cooked from scratch (more info below).
- Tahini paste: A vegan paste made from ground sesame seeds that gives hummus its signature creamy, nutty, rich flavor.
- READ MORE: What Is Tahini?
- TRY IT: Order organic tahini from our shop.
- Garlic adds its signature savory flavor.
- Lemon adds acidity for balance, but lime juice works well here too.
- Seasoning: Cumin and coriander add a typical Mediterranean warming quality. Sumac brings a tannic, tart layer. Salt enhances the flavor.
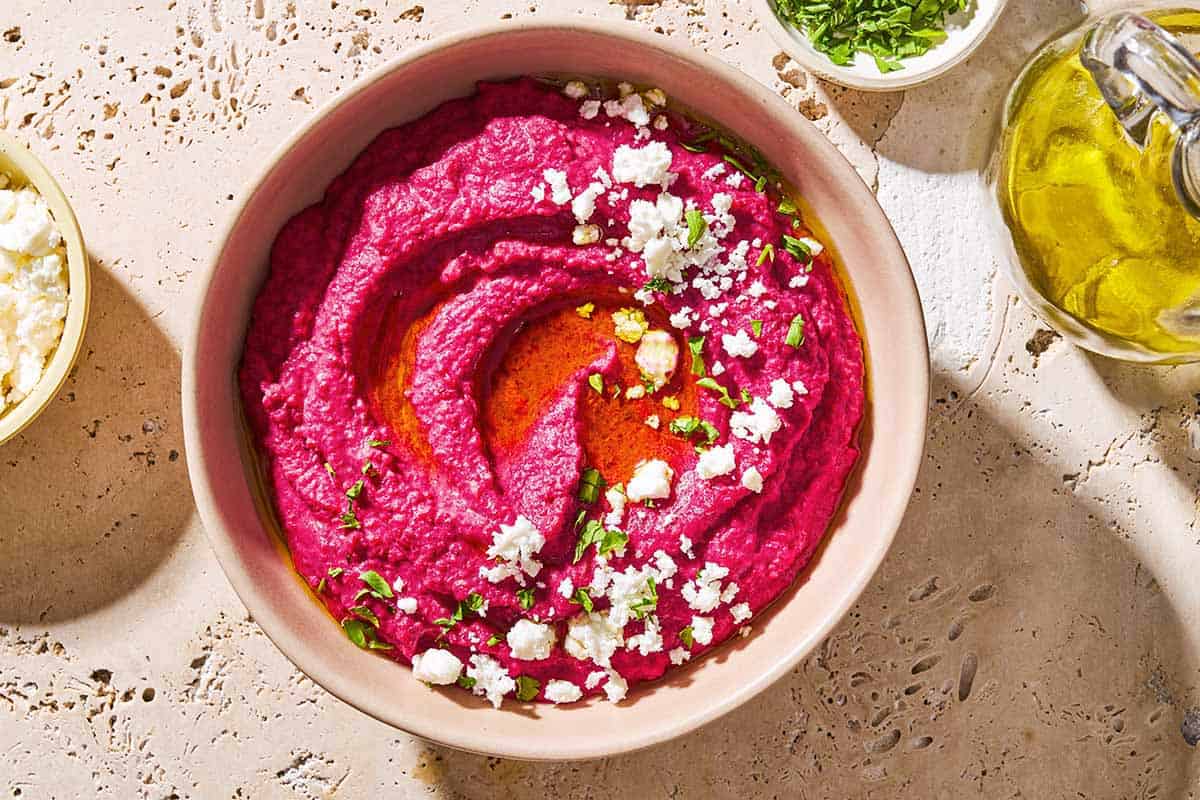
- Extra virgin olive oil: Finish with a drizzle of your best finishing oil for added richness and flavor.
- Feta is optional, but I like it as a garnish both for more visual appeal and added creaminess.
- Parsley is also optional, the freshness and color is always worth the extra minute of chopping for me.
Ingredient Spotlight
The chickpea, or garbanzo bean (same thing), may seem like a simple legume, but perhaps the most powerful staple of Mediterranean cuisine. We adore the chickpea, orbiting around this tan bean like it’s the sun to our planet! It’s the main ingredient for our crispy Falafel, creamy Hummus, weeknight pantry pasta (Pasta E Ceci), afternoon crispy snack (Fatteh), and so much more.
There’s a lot to love about these little legumes: they’re firm yet tender, delicate yet satisfying, and very flexible. They’re a blank canvas to make crispy, creamy, crunchy, spicy, and smoky. Plus, they’re an excellent source of plant-based protein, rich in dietary fiber, and packed with essential vitamins and minerals, including folate, iron, phosphorus, and manganese—see their full nutritional breakdown at the USDA.
Most days I turn to the trusty can of chickpeas to save time, but making them from scratch is a special treat. If you go the extra mile to peel them, your beet hummus will have a rich and creamy texture that will totally blow your mind (though, again, most days I go for a can which is also delicious!).
- READ MORE: Learn How to Cook Chickpeas from Scratch.
- TRY IT: Order authentic Mediterranean chickpeas from our shop.
How to Make This Beet Hummus Recipe
If you have the time, roast the beet from scratch to get a more complex depth of flavor, fluffier texture (as there’s less water), and bright red color, as canned beet will be more of a muted pink. Here are the steps:
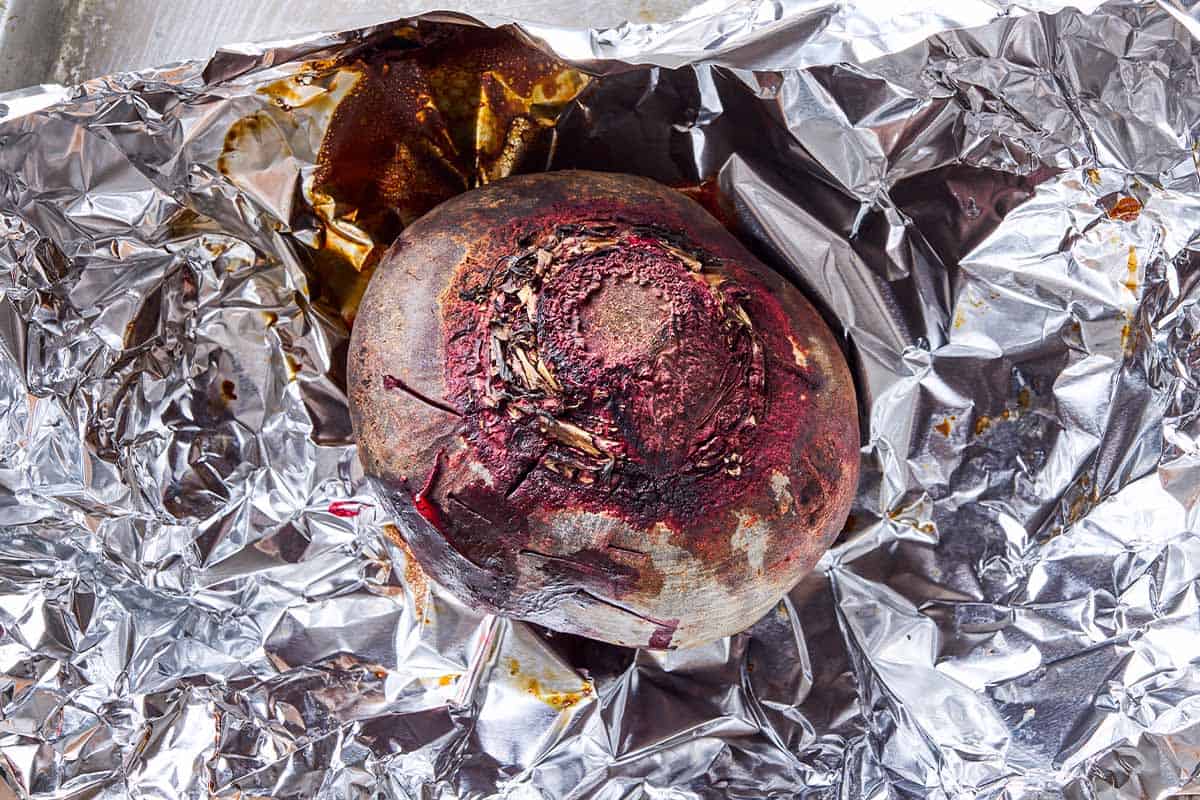
- Roast the beet. Preheat your oven to 400°F. Scrub and dry a large red beet, then coat it with a drizzle of olive oil. Wrap in aluminum foil and place it on a sheet tray. When the oven is hot, roast the beet until it’s knife-tender, about 45 minutes depending on the size of your beet. Set aside to cool.

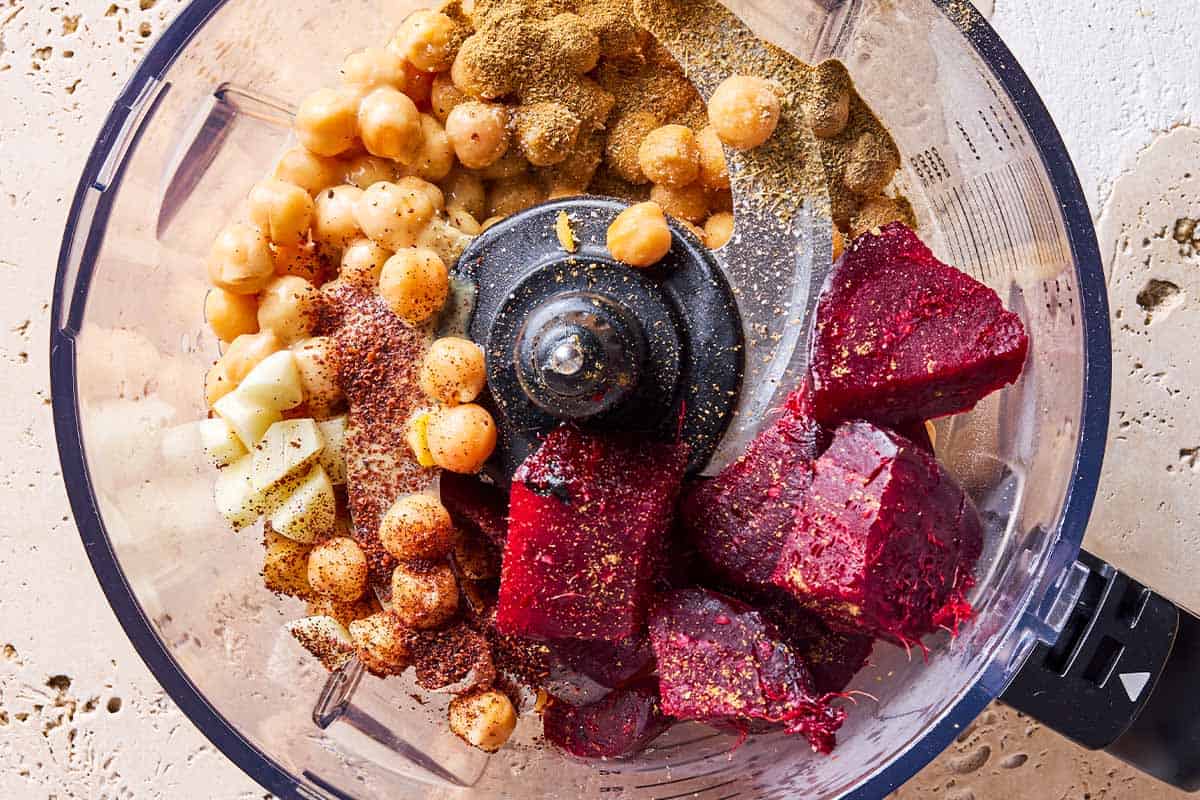
- Season the beet hummus. When the beet is cool, peel, chop, and add to the large bowl of a food processor fitted with blade. Add 15 ounces of drained and rinsed chickpeas, 3 tablespoons tahini, 1 chopped garlic clove, and the juice of 1/2 lemon. Season with a pinch of salt and 1/2 teaspoon each of ground cumin, coriander, and sumac (if using).
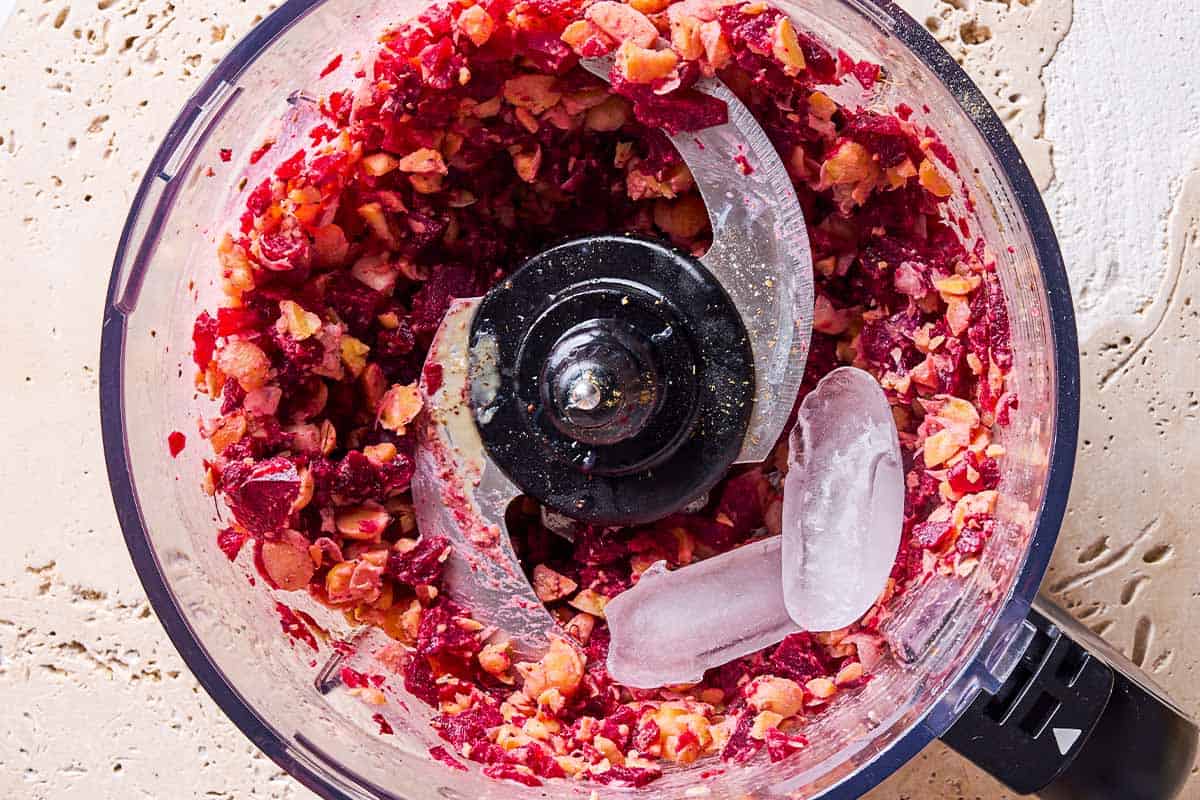
- Combine. Pulse to combine the ingredients, then turn to low speed. While the food processor is running, add 2 ice cubes–this helps whip the beet hummus to a nice creamy consistency.
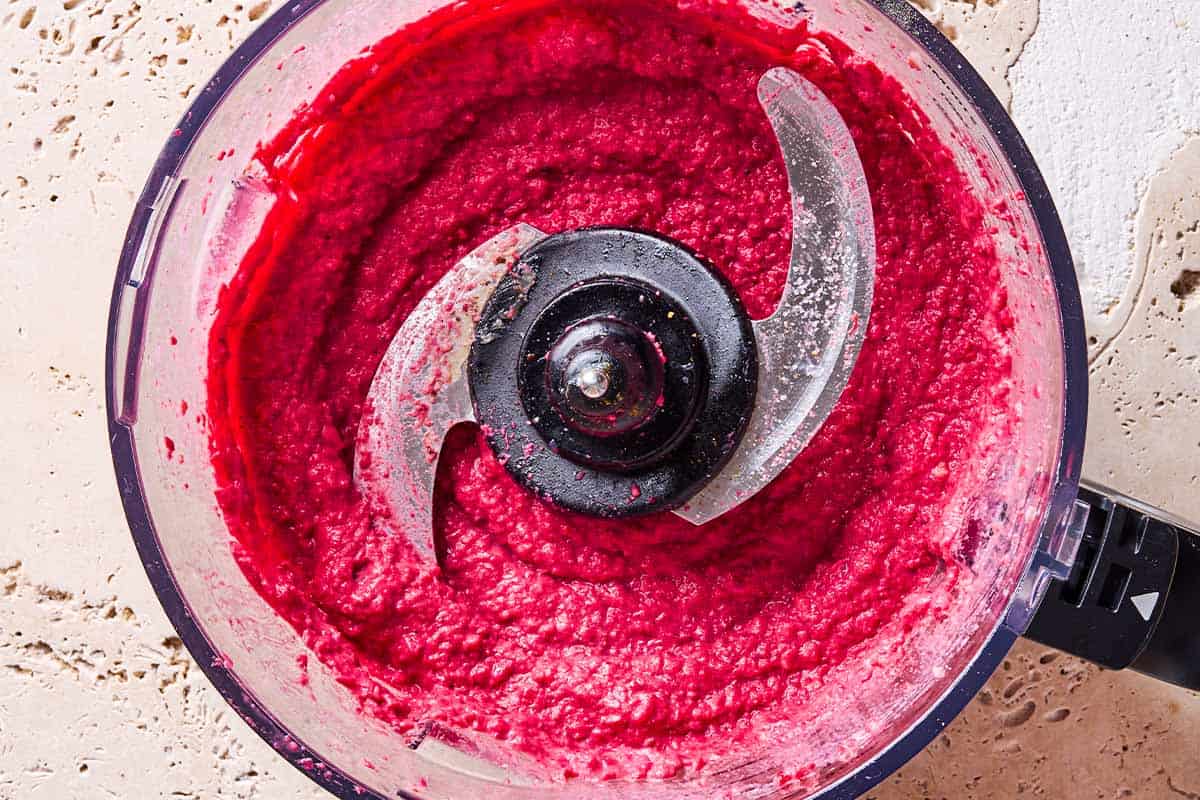
- Taste and adjust seasonings to your liking. Run processor again if the hummus is too thick, adding a little more ice as it runs (you can let it run for 4 minutes or so until you reach your desired creamy texture. Add more lemon juice or salt to taste.
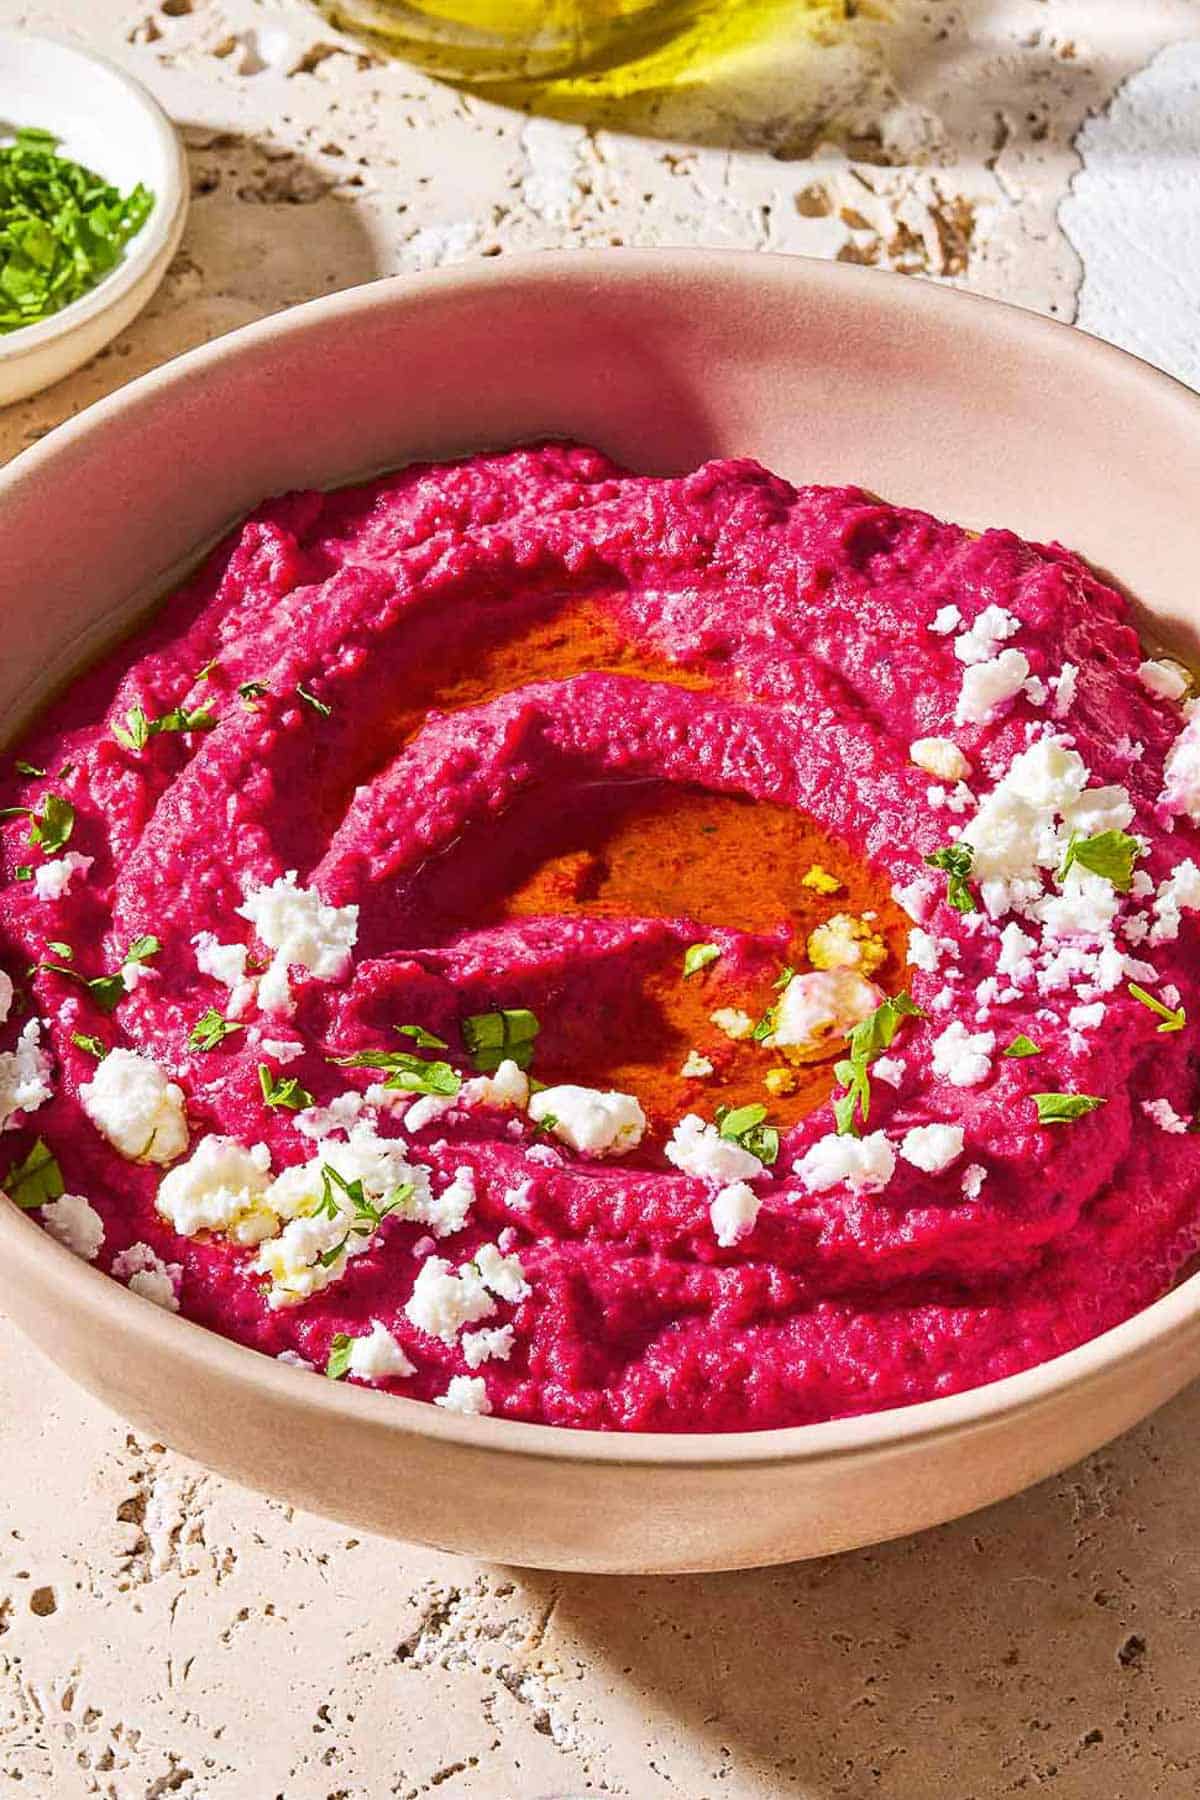
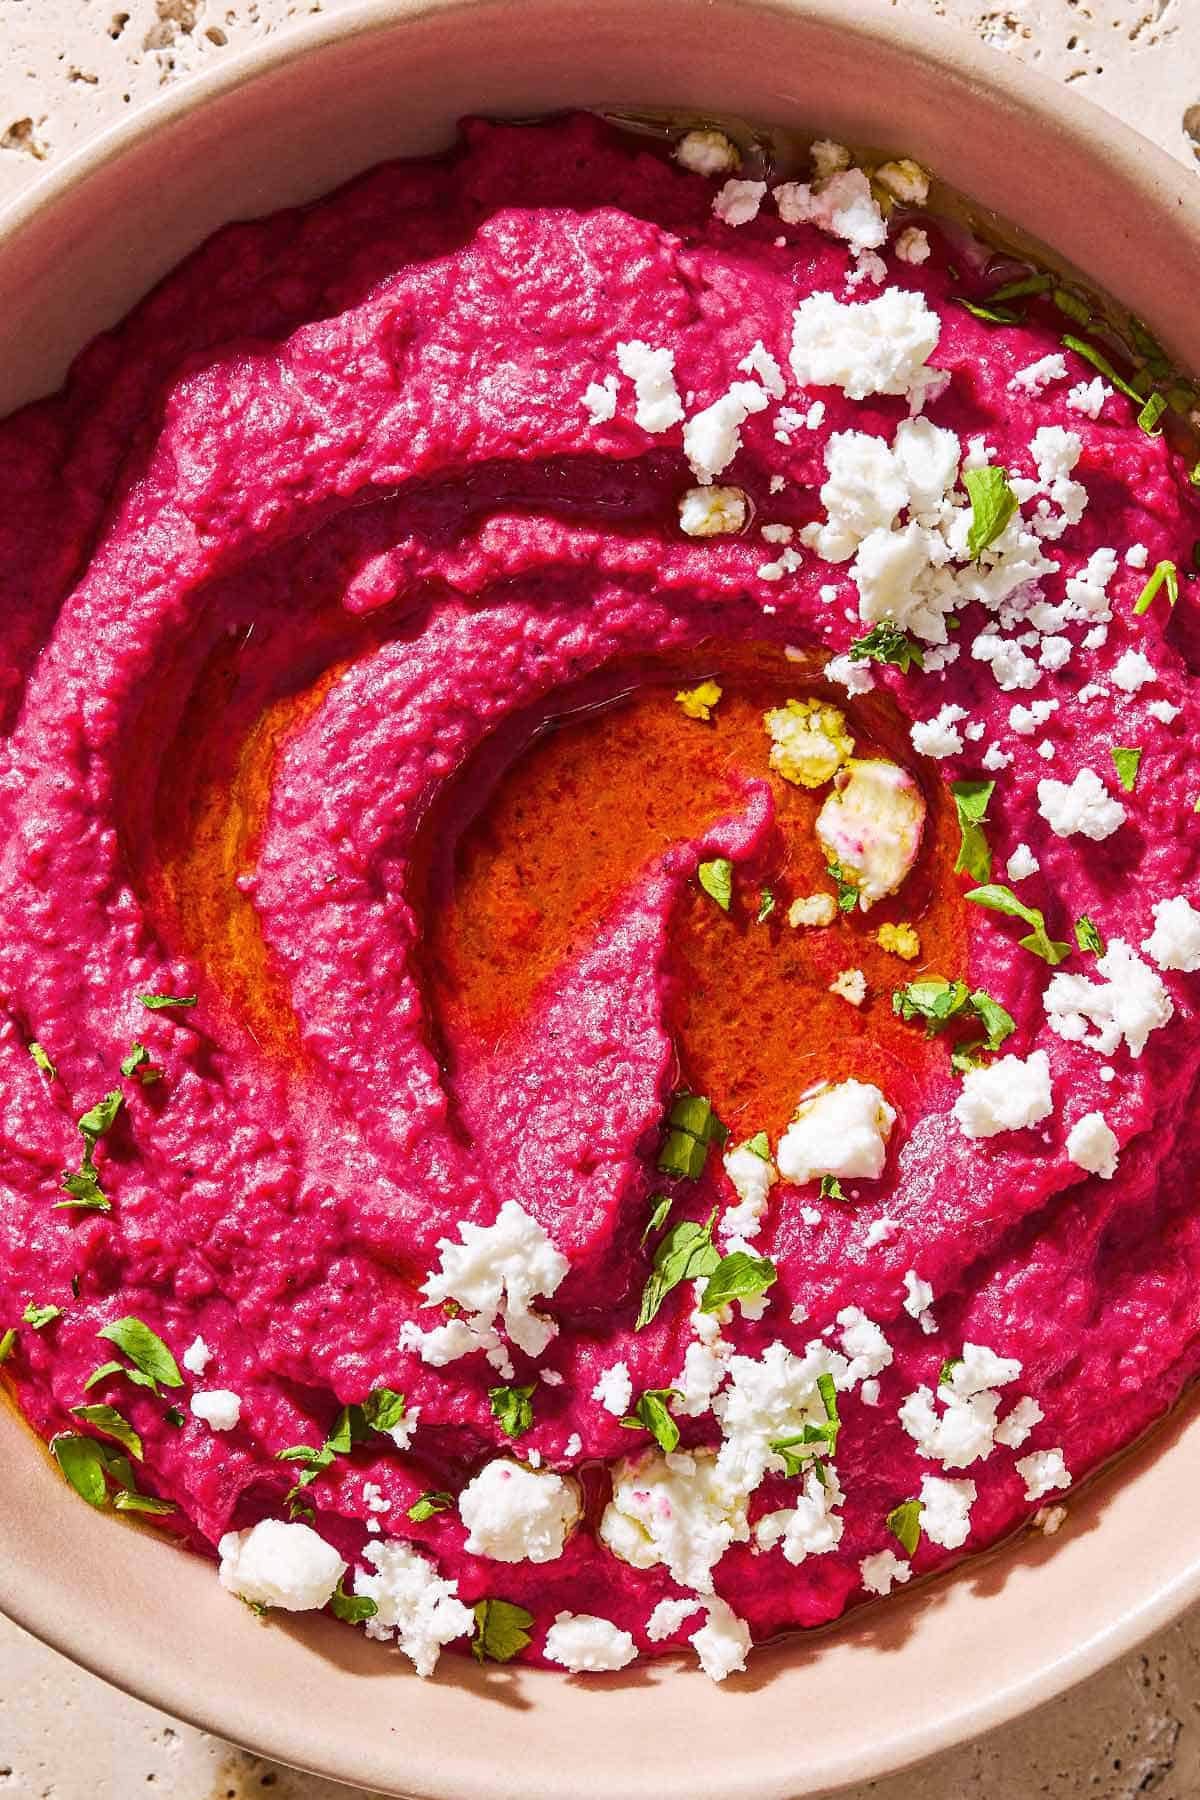
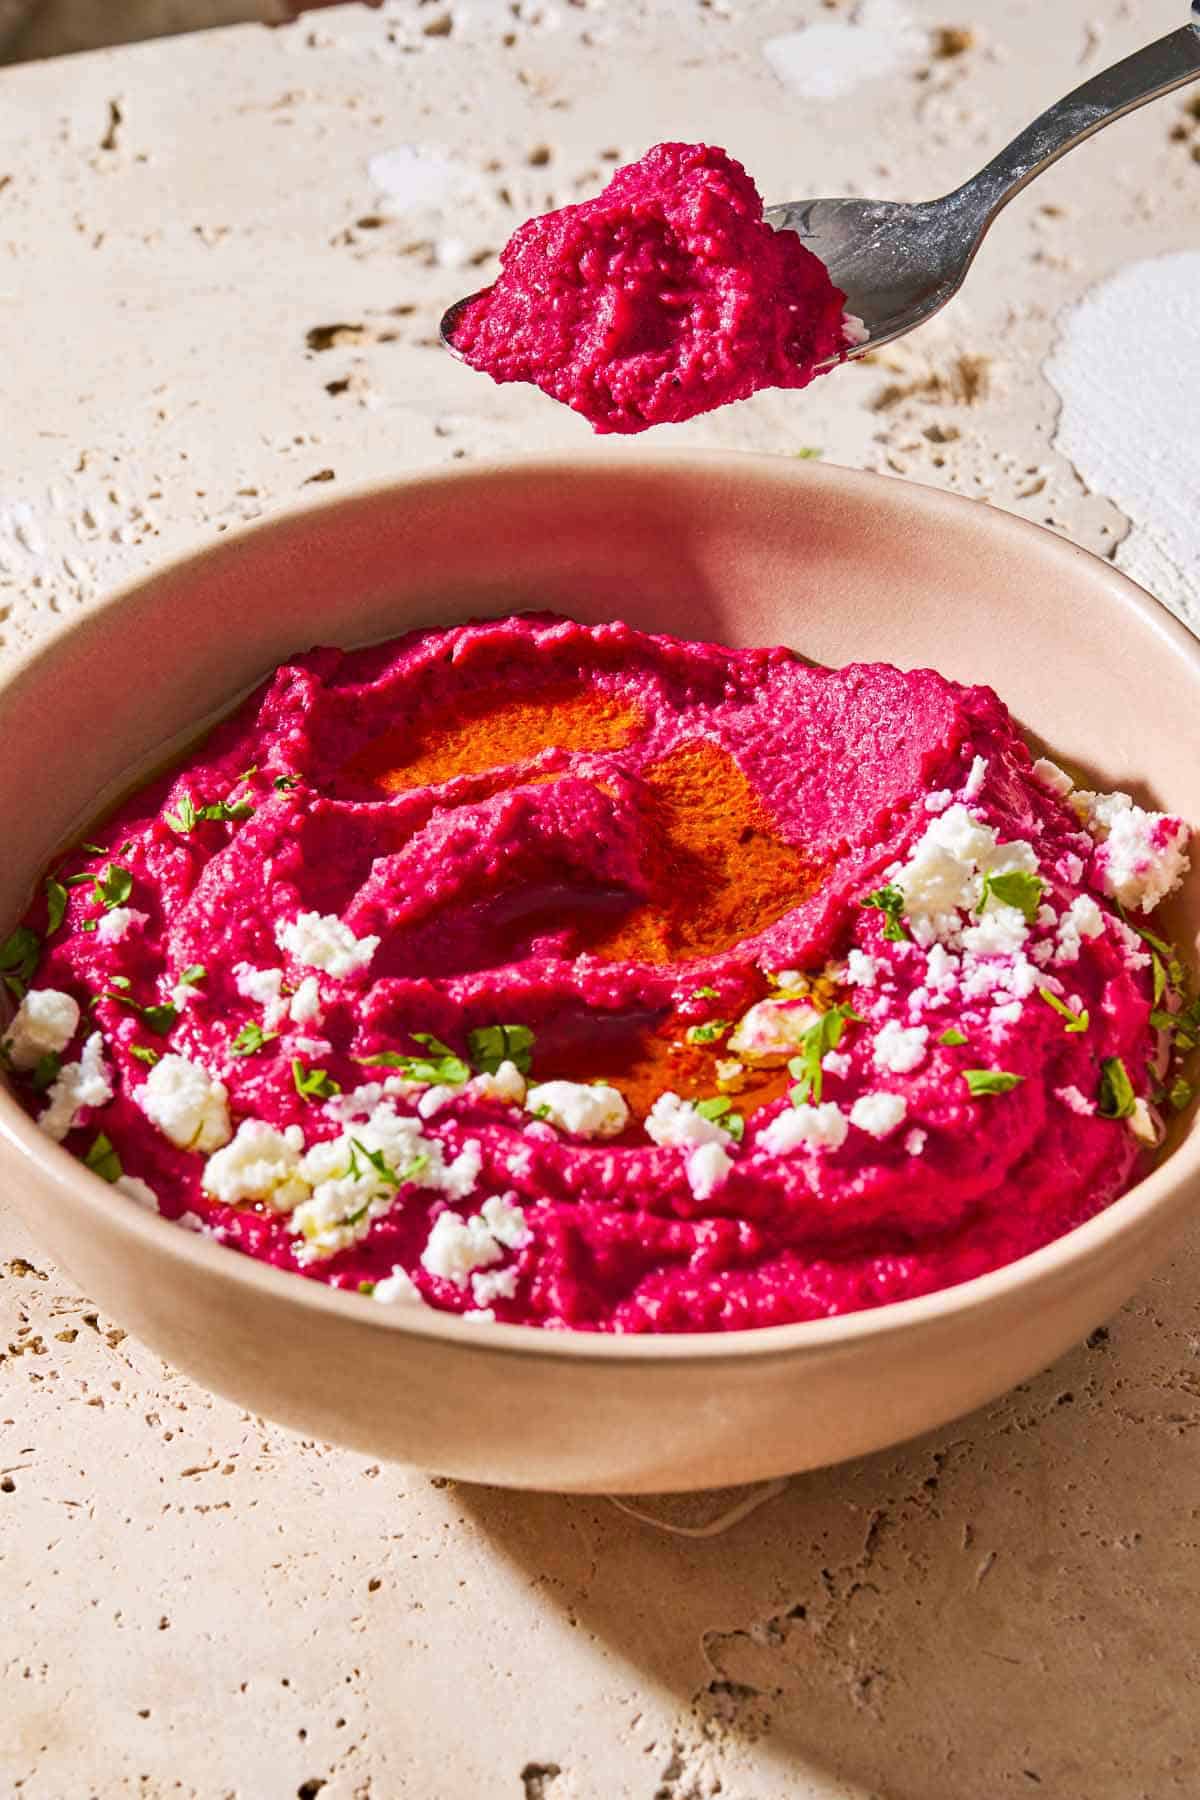
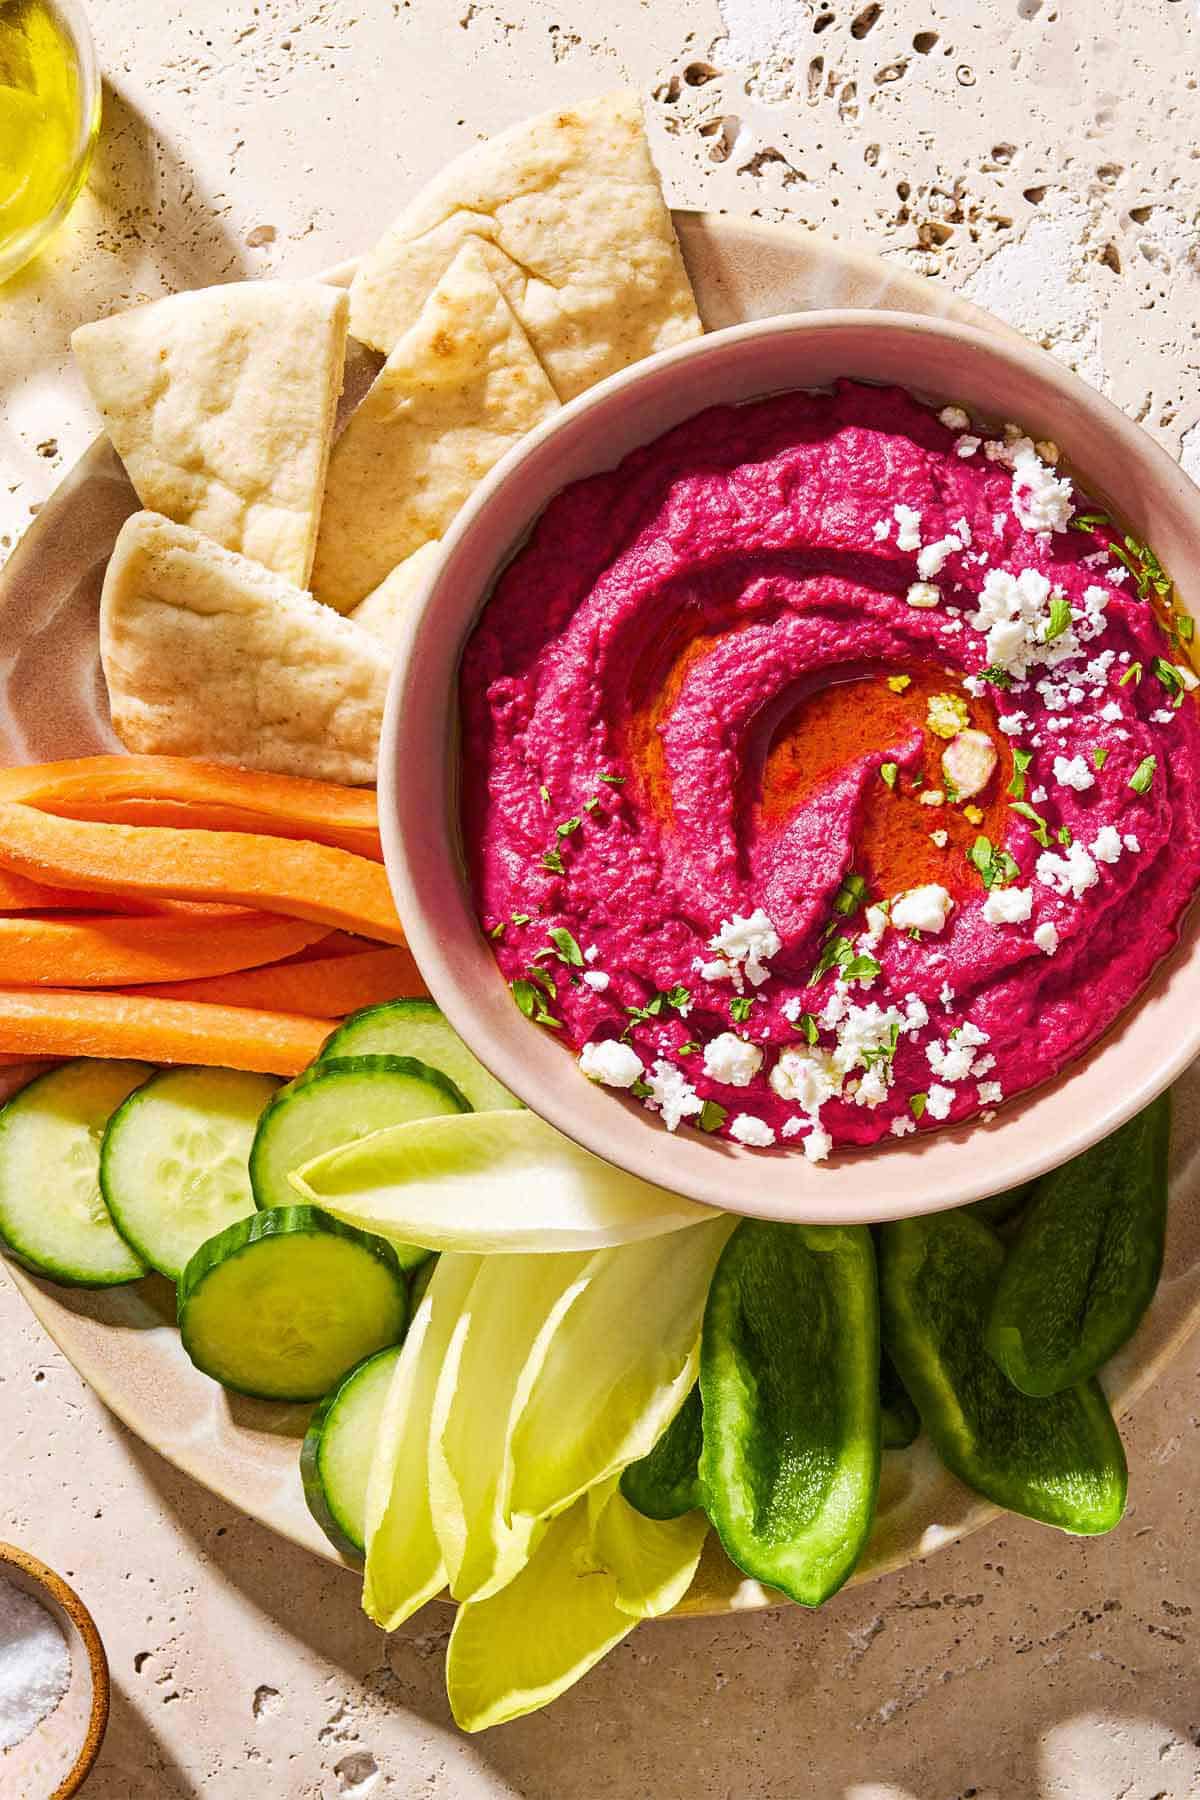
- Transfer beet hummus to a bowl. Drizzle with extra virgin olive oil. Sprinkle feta and parsley on top. Serve with pita wedges or homemade pita chips and veggies for dipping.
Can I Use Different Varieties of Beets?
I usually go for a red variety for this beet hummus recipe, as they have a beautiful color and more robust flavor. But you can certainly experiment with making hummus with all sorts of beets, from golden to striped.
Just keep in mind they will have a less assertive flavor—you may want to go easy on the garlic to start and add more to taste. You could also roast a golden beet, peel, and slice it as a garnish to make your beet hummus extra pretty!
What to Serve with Beet Hummus
You can get very creative with this versatile recipe. Skip the whipped feta on this Veggie Sandwich and spread on beet hummus for what might just be the prettiest vegan sandwich ever made. Or keep it classic with Pita Bread, Pita Chips, or Crudité and mix and match with different hummus recipes like this Roasted Carrot Hummus with Harissa.
A Chickpea Rainbow! More Hummus Recipes

Appetizer and Mezze
Pumpkin Hummus

Appetizer and Mezze
Roasted Garlic Hummus

Dips and Condiments
Roasted Red Pepper Hummus
Appetizer and Mezze
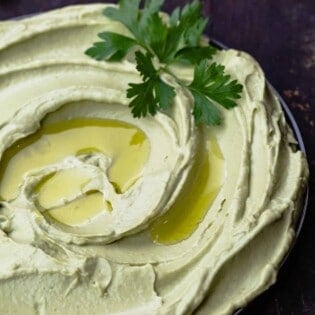
Extra Creamy Avocado Hummus Recipe
Browse all Mediterranean Recipes
Visit Our Shop
Beet Hummus
Add As A Trusted Google Source
Ingredients
- 1 large red beet, scrubbed and dried (or use 1 can of beets)
- Kosher salt
- 1 (15.5 ounce) can chickpeas, drained and rinsed
- 3 tablespoons tahini paste
- 1 small garlic clove, chopped
- 1/2 lemon, juiced, plus more to taste
- 1/2 teaspoon ground cumin
- 1/2 teaspoon ground coriander
- 1/2 teaspoon sumac (optional)
- 2 ice cubes, plus more if needed
- Extra virgin olive oil, for drizzling
- Crumbled feta cheese, for garnish (optional)
- Chopped parsley, for garnish (optional)
Serving Suggestions
- Pita chips
- Pita bread
- Raw veggies (carrot sticks, endive spears, bell pepper wedges, sliced cucumbers)
Instructions
- Roast the beet. Preheat your oven to 400°F. Coat the beet with a drizzle of olive oil, wrap in aluminum foil, and place on a sheet tray. When the oven is hot, roast until knife-tender, about 45 minutes depending on the size of your beet. Set aside to cool.
- When the beet is cool, peel and chop. Add to the large bowl of a food processor fitted with blade, along with the chickpeas, tahini, garlic, and lemon juice. Season with the cumin, coriander, sumac (if using), and a pinch of salt.
- Combine. Pulse to combine the ingredients, then turn to low speed. While the food processor is running, add 2 ice cubes–this helps whip the beet hummus to a nice creamy consistency.
- Taste and adjust seasonings to your liking. Run processor again if the hummus is too thick, adding a little more ice as it runs (you can let it run for 4 minutes or so until you reach your desired creamy texture. Add more lemon juice or salt to taste.
- Transfer beet hummus to a bowl. Drizzle extra with virgin olive oil. Sprinkle feta and parsley on top. Serve with pita wedges or homemade pita chips and veggies for dipping.
Video
Notes
- Shop this recipe: Visit our shop to browse quality Mediterranean ingredients including the olive oil, tahini paste, cumin, and spices used in this recipe.
- Storage: Store in an airtight container in the fridge for up to 4 days.
- What about canned beets? Roasting a beet from scratch will give you the richest flavor and most vibrant color, but feel free to substitute with a can of beets to save time.
Nutrition
Bundle and Save!
Four of our best-selling signature olive oils, perfect for everyday use.

*This post has recently been updated with new information for readers’ benefit.
Delicious! Quantity is huge – can I freeze it?
Hi, Susan! Hummus does freeze, though the consistency will not be quite the same as when it was fresh.