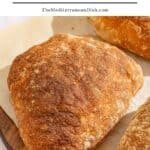


The secret to Barcelona’s best pan con tomate is the bread! Here’s how to make pan de cristal, glass bread, at home.
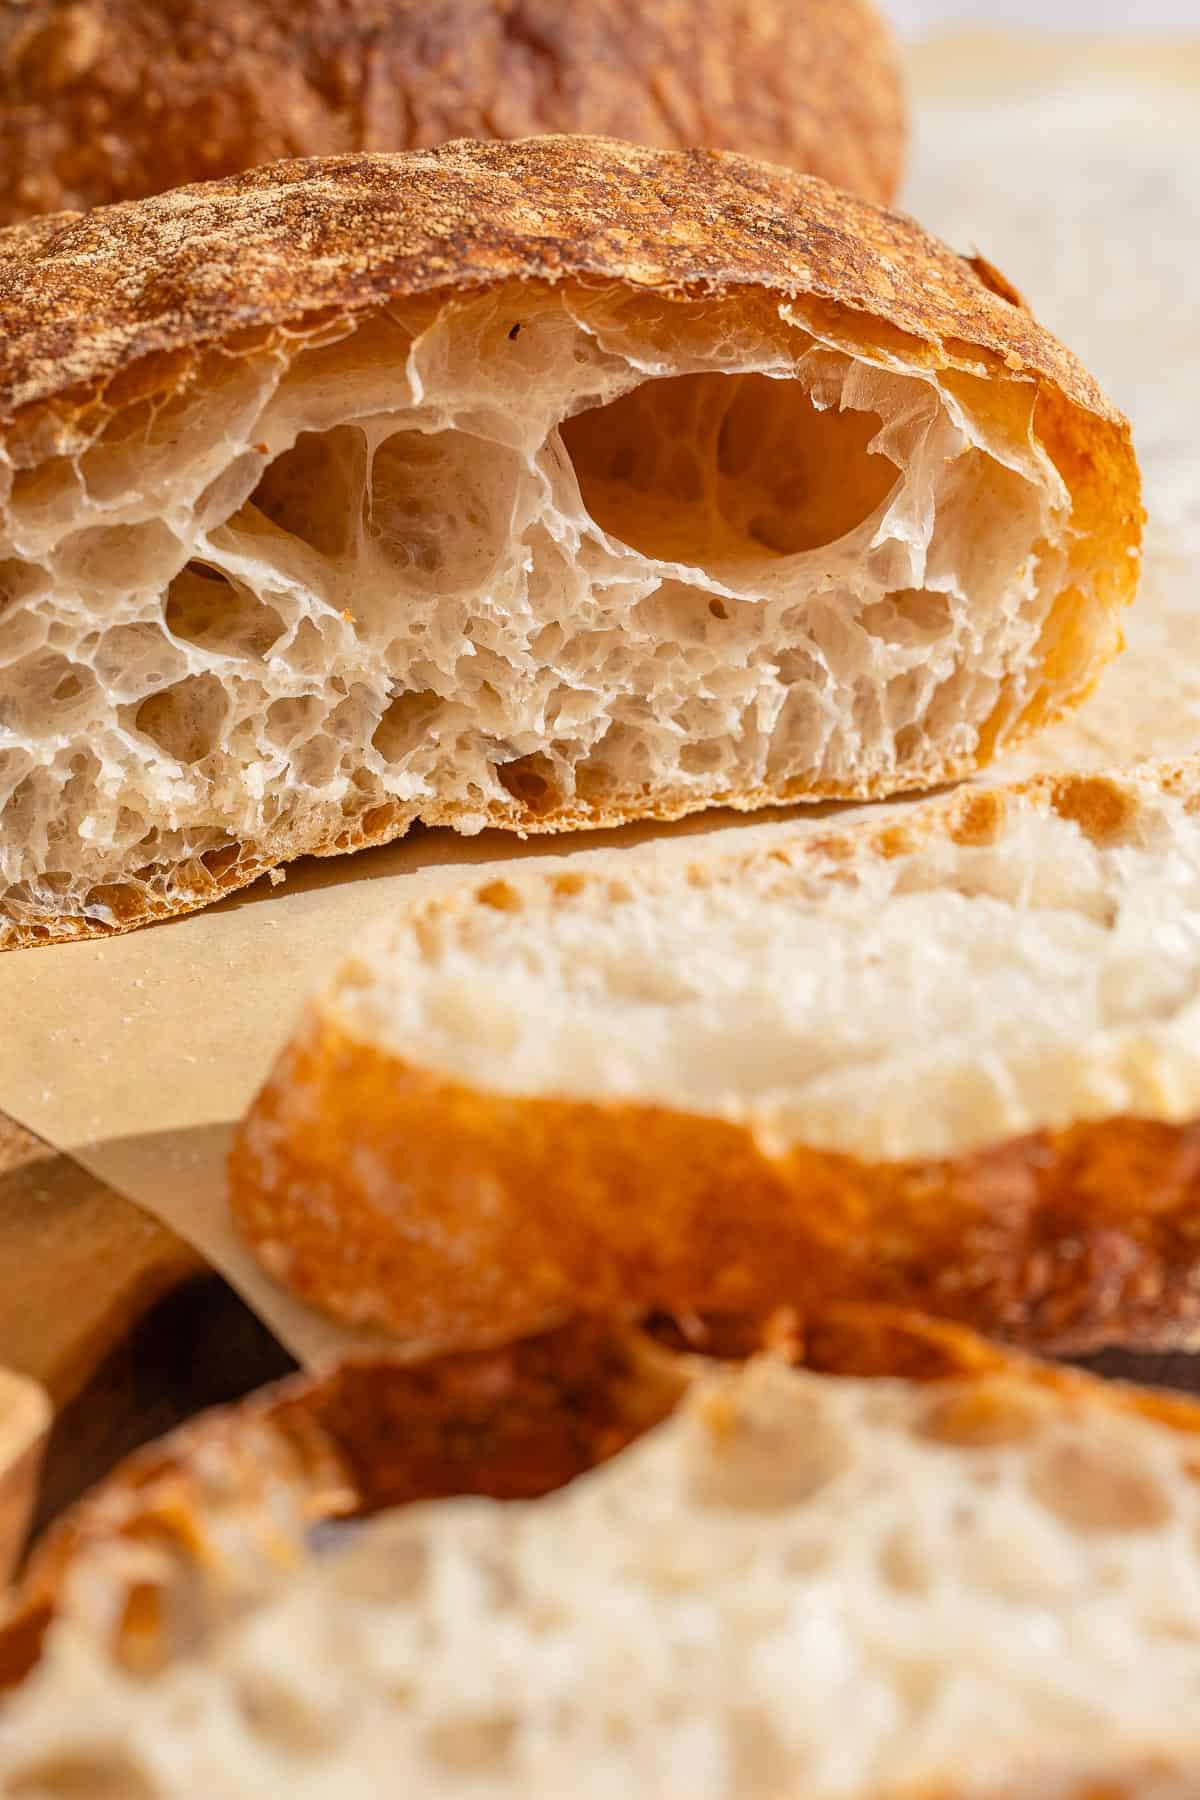
If you’ve visited Barcelona, chances are you’ve been captivated by pan de cristal. Order pan con tomate—Catalan toast with tomato—and you’ll find some stand out for the base of crisp and flaky bread with a soft, lacy interior full of large air bubbles that soaks up the tomato and olive oil topping without a hint of sogginess.
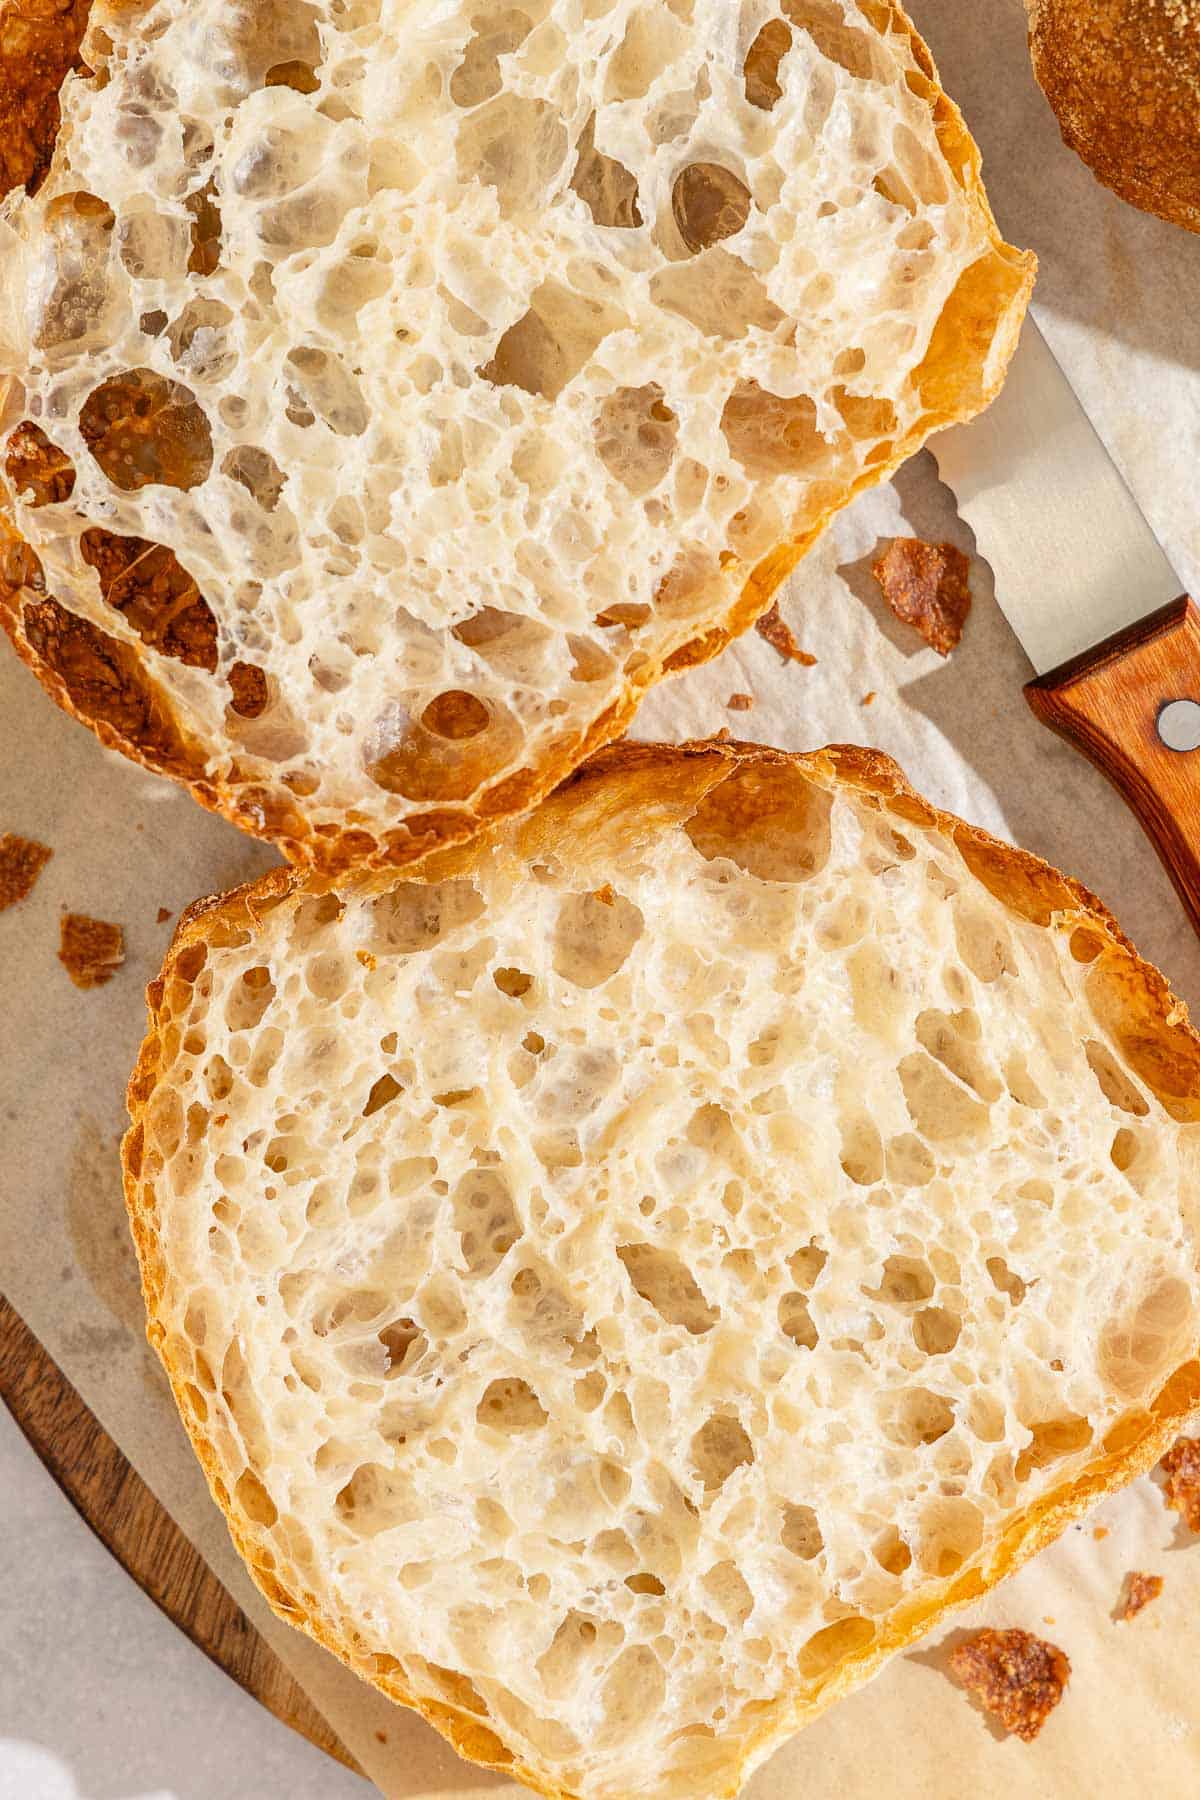
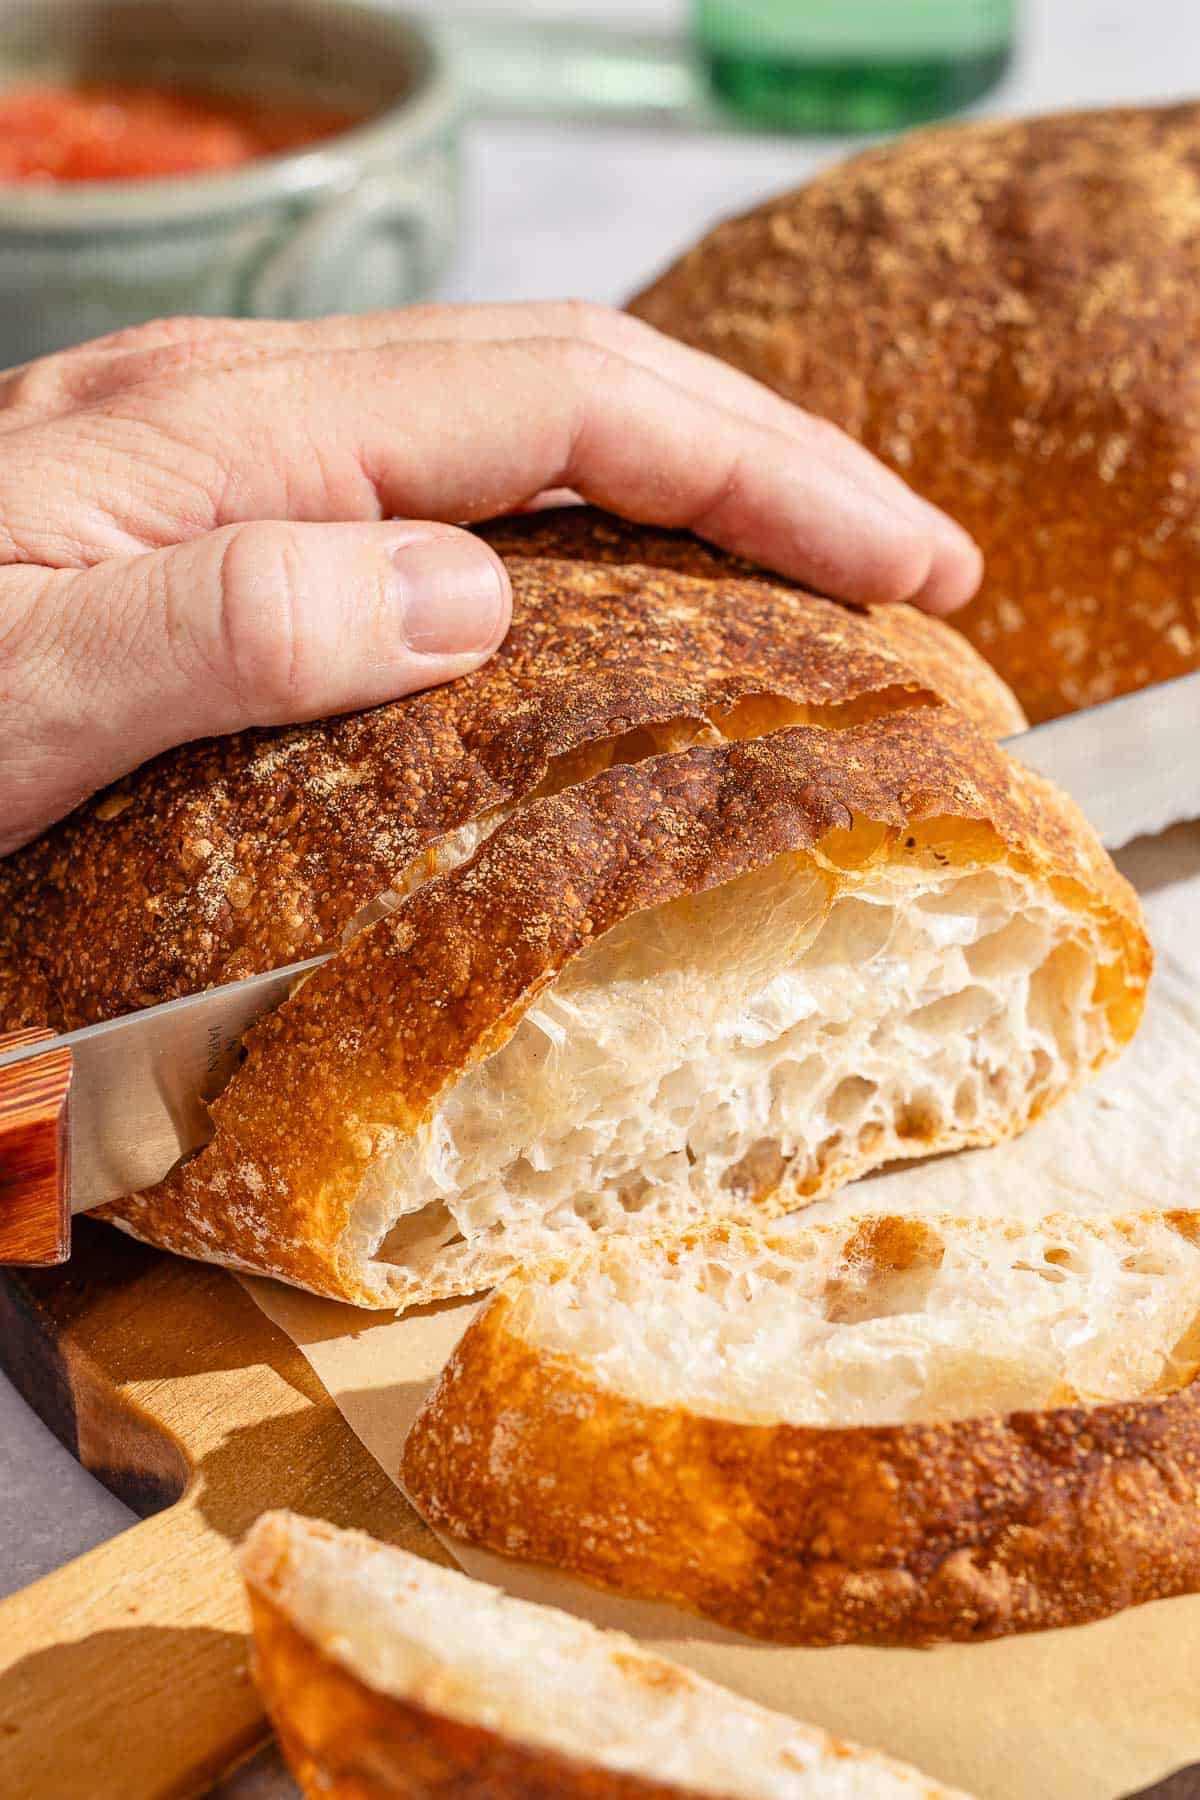
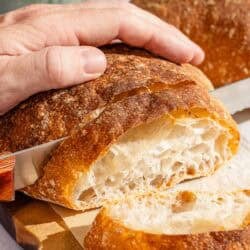
The secret is glass bread, pan de cristal, or pa de vidre in Catalan. It has a thin, crisp crust and a soft, airy, and lacy interior full of large air bubbles. The name comes from how the crust shatters as you bite into it.
Although I can easily find pan de cristal at my local bakery, I developed this pan de cristal recipe to challenge myself and recreate that signature airy crumb. Over time, I developed a method of adding the water in stages throughout the kneading process to tame the sticky dough. Along the way, even the loaves that fell flat rewarded me with crisp crusts and wispy interiors. This is the version I now recommend to anyone who wants to recreate the Barcelona experience back home.
What is Pan de Cristal?
Because of its prevalence across Barcelona and Catalonia, pan de cristal feels like a timeless offering of traditional Catalan bakeries. However, it’s a relatively new addition. It was created in 2004 in Barcelona by baker Jordi Nomen, who sought to develop a bread with an ethereal, almost nonexistent crumb.
Pan de cristal is typically made from 100% hydration dough, or equal parts flour and water, baked freeform. At first glance, it’s difficult to see what makes it so special. Pick it up and you’ll find it to be shockingly light, and when sliced, it reveals its bubbly, feathery interior.
Ingredients for Pan de Cristal
- Bread flour: Because of this dough’s high-hydration, pan de cristal requires the high protein content of bread flour. Without enough gluten to add structure, the dough won’t be able to absorb all of the water or trap the air for the bubbly crumb.
- Active dry yeast: For this recipe, I like to add the water in stages, slowly increasing the hydration while building enough strength in the dough. Active dry yeast fits in conveniently in that process. You can substitute an equal amount of instant yeast if that’s what you have on hand.
- Salt: Without salt, bread tastes flat and lifeless. I typically use kosher salt, even for baking. If you’re using sea salt or table salt, reduce the amount to 1 teaspoon.
How to Make Pan de Cristal
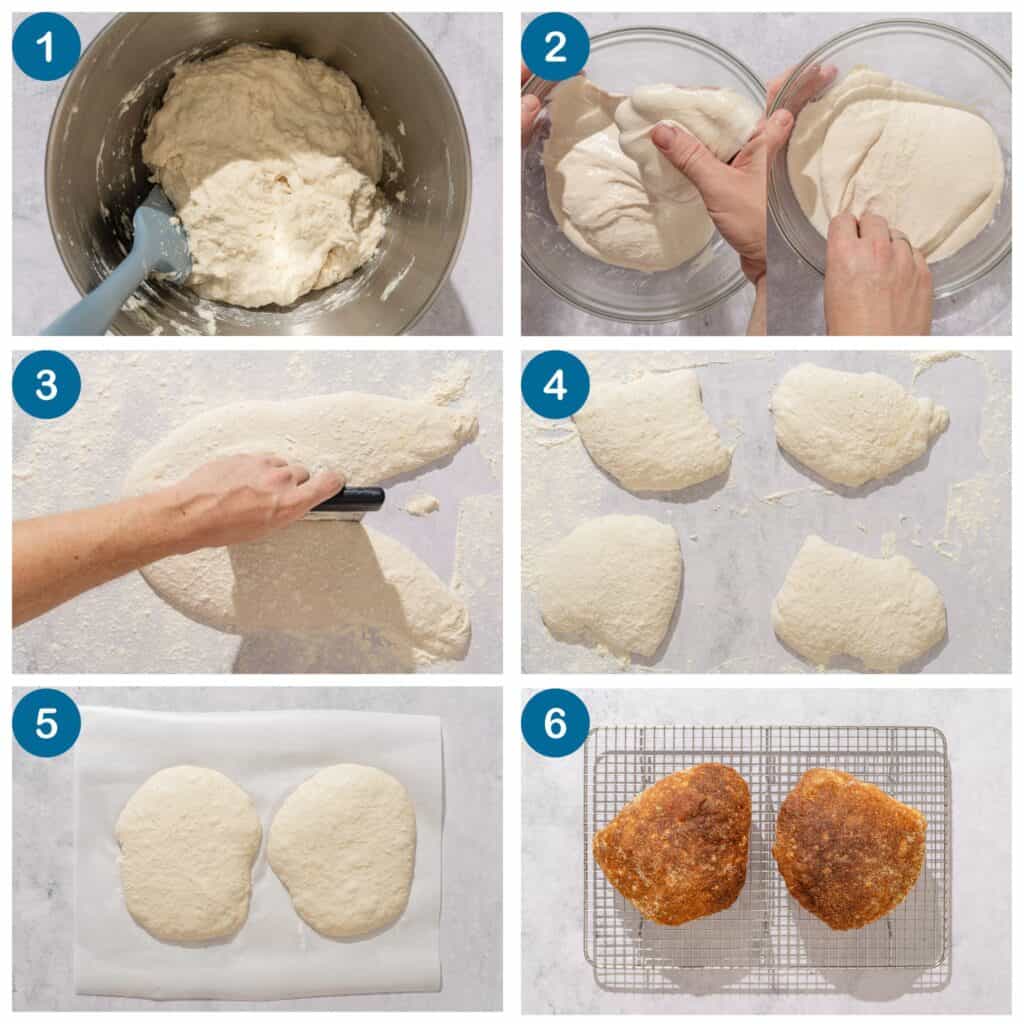
Pan de cristal is a high-hydration bread, meaning there’s a lot of water compared to the amount of flour. That makes it trickier to handle, and means it takes some time (and lots of kneading) to create enough structure for a successful bake. Here’s how to make it:
- Activate the yeast. In a small bowl, dissolve 3/4 teaspoon active dry yeast in 1/4 cup (60ml) of the water. Set aside.
- Mix the dough. To the bowl of a stand mixer fitted with the dough hook attachment, add 3 1/3 cups (400g) bread flour and 1 1/4 cups (300ml) of the water. Mix until no dry spots of flour remain, then knead on medium speed for 5 minutes. Stop the mixer and allow the dough to rest for 5 minutes.
- Add the yeast and salt. Pour in the yeast mixture and add 1 1/2 teaspoons kosher salt. Start the mixer on low, and, to avoid splashing, gradually increase the speed to medium-high. The dough may split, but it will soon come back together. Continue kneading on medium-high speed for 5 minutes. Stop the mixer and allow the dough to rest for 5 minutes.
- Add the remaining water (optional). If using, pour in the remaining 1 tablespoon plus 2 teaspoons of water. If you’re not accustomed to baking high-hydration loaves, omit this last addition of water the first time you try this recipe.
- Finish kneading the dough. Start the mixer on low and, to avoid splashing, gradually increase the speed to high. Continue kneading on high speed until the dough is smooth and shiny, gathers around the dough hook, and pulls away from the sides of the mixing bowl, 10 to 20 minutes. If the dough is not ready after 10 minutes, stop the mixer for 5 minutes before continuing, to give the mixer and the dough a rest. The dough should pass the windowpane test: grab a piece of dough and stretch it. If the dough stretches thin enough that you can see light through it, the dough is sufficiently developed.
- Rest the dough. Transfer the dough into a large bowl lightly greased with olive oil. Cover with plastic wrap and set in a warm spot in your kitchen for 30 minutes.
- Stretch and fold the dough. Wet your hands and fold the dough. Starting on the side of the bowl opposite you, scoop your fingers under the dough, stretch it up, then fold it toward you over the top of the bowl. Rotate the bowl a quarter turn, and repeat. Repeat twice more to complete four folds, a full rotation around the bowl. Cover the bowl, and let the dough rest 30 minutes longer. Repeat this process two more times, resting the dough for 30 minutes each time.
- Finish first rise. After the third set of stretch and folds, allow the dough to rise at room temperature for 1 1/2 hours longer. The dough should have at least doubled in bulk, have a slightly domed top, and have visible bubbles.
- Divide the dough. Set two pieces of parchment paper next to your work surface. Dust your work surface heavily with flour. Gently turn the dough out onto the counter, being careful not to deflate the dough. Sprinkle the top of the dough generously with flour. Wet a bench scraper, or other sharp knife with water. Divide the dough into 4 pieces, separating the dough after each cut so it doesn’t stick back together. Use the bench scraper and your hand to place two pieces of dough on each sheet of parchment paper, leaving space between the loaves.
- Proof. Allow the loaves to rest, uncovered, at room temperature, for 1 1/2 hours. An hour before baking, place a baking stone on a rack positioned in the bottom third of the oven and preheat to 475°F (245°C).
- Bake. Use an upside-down baking sheet as a baking peel, and carefully slide one of the parchment pieces with two loaves onto the preheated baking stone. Bake the loaves for 20 minutes. Flip the loaves to crisp and brown the undersides and bake a further 5 to 10 minutes, until deeply browned. Remove the loaves from the oven and leave them to cool on a wire rack. Repeat with the remaining 2 loaves.
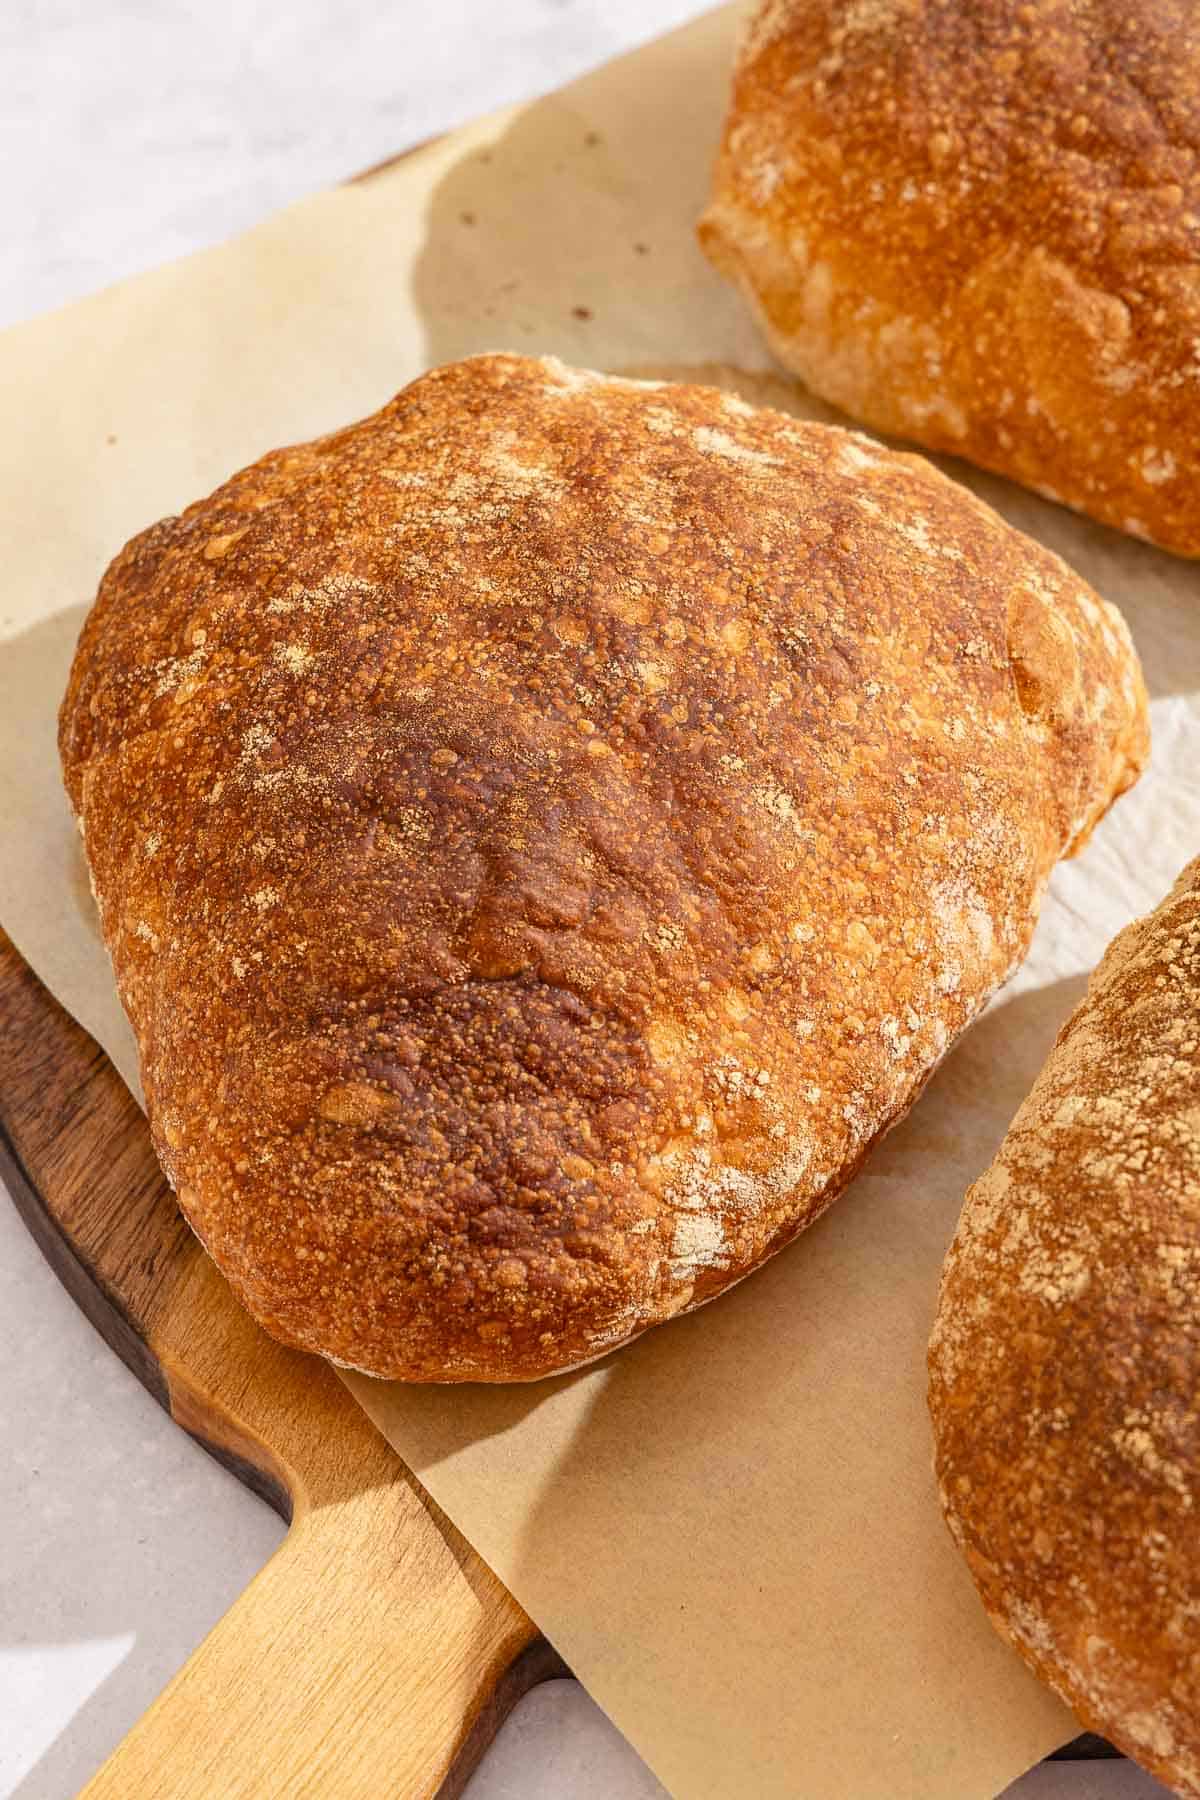
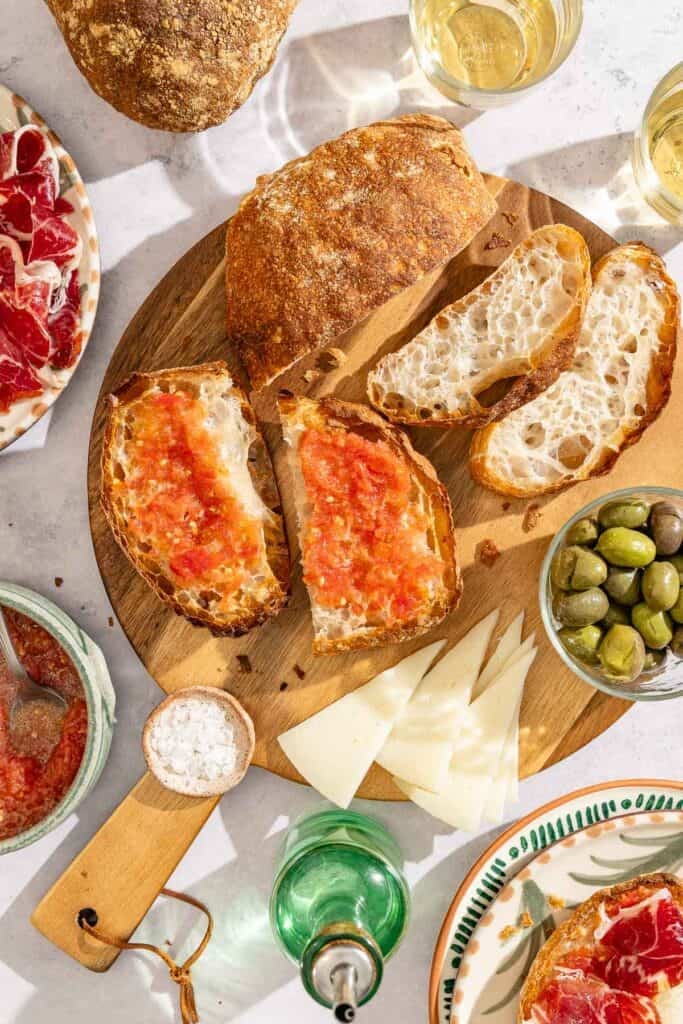
- Serve. Leave the loaves to cool on a wire rack for at least 30 minutes before slicing and serving. The crust should be thin and crisp and the crumb should be soft with large air pockets.
Dough Hydration Explained
Hydration is simply how much water is in the dough expressed as a percentage of the weight of flour. For example, this Neapolitan pizza dough calls for 1 cup of water (240g) and 3 cups (360g) of flour, so the hydration is 66% (240/360 = 66%).
Generally speaking, higher-hydration doughs develop a crisper crust, and an airier, more custardy crumb. But as you increase the hydration, the dough becomes increasingly sticky and difficult to work with. One of the reasons focaccia, a famously high-hydration bread, is baked flat in a pan is because attempting to shape it into a loaf would be a messy, frustrating experience.
Pan de cristal is typically 100% hydration, that is, it contains an equal amount of flour and water. That’s how it achieves the shatteringly thin crust and voluminous air bubbles characteristic of the bread.
To absorb and hold all of that water, the dough needs lots of structure, and it gets that structure from gluten. The flour must have a large amount of gluten-forming proteins, and the dough needs a lot of kneading to develop it.
Tips and Tricks
Use Bread Flour
Bread flour contains 12 to 14% protein, whereas all-purpose flour contains 9 to 12% protein. That may seem like a small difference, but it has a large effect on the dough’s ability to develop structure and absorb moisture. I recommend using King Arthur Bread Flour or Bob’s Red Mill Bread Flour, or an artisan brand you trust that lists at least 12.5% protein.
I won’t say that attempting this recipe with all-purpose flour is impossible, but I don’t recommend it.
Add the Water in Stages
I prefer to add the water to the dough in stages. This enables me to begin building the gluten structure in the dough before diluting it with more water. I’ve found that the dough strengthens faster than if I were to add all the water at once. It also allows me to decide whether I want to add all of the water, or hold some back for easier handling.
I start with 1 1/4 cups of the water, then knead to begin developing the gluten before adding more. Next, I add the yeast dissolved in another 1/4 cup of water, and knead the dough again to continue building strength in the dough.
At this point, the dough is at 90% hydration, which is already exceedingly high. If you’ve never baked high-hydration doughs before, you can skip the last addition of water. It will be slightly easier to handle, while still baking into a light loaf with large air bubbles. If your first bake goes well, you can try the recipe again using the full amount of water.
Take Time to Develop the Dough
I give guidance for how long to knead the dough, but you’ll need to rely more on your senses than the clock. The exact times will depend on the brand of flour you use, how you measured the ingredients, the mixer speed, and even the weather.
After you’ve added all of the water, knead on high speed. Every 10 minutes, I pause the mixer for 5 minutes to give the motor a break and to relax the dough. With a stronger bread flour, you might only need the first 10 minutes, but you may need 20 minutes or more if you’re using a weaker flour.
Use the windowpane test to assess the strength of the dough. Grab a small bit of dough and stretch it between your fingers. If you can stretch it into a sheet thin enough for light to shine through before it breaks, then the dough is ready. If it tears before it stretches thin enough, then the dough needs more kneading.
Stretch and Fold for Added Strength
Technically, if the dough passes the windowpane test, it’s fully developed, but I found that the bread bakes taller and with larger air bubbles when I also add stretch and folds. I perform three sets spaced out by 30 minutes while the dough rises.
To perform stretch-and-folds, uncover the bowl and wet your hands. Starting on the side of the bowl opposite to you, scoop one hand under the dough, stretch it up, then fold it towards you over the top of the dough. Rotate the bowl a quarter turn, and repeat. Repeat this twice more to complete a full rotation around the bowl.
Sample Baking Schedule
With a lot of steps, it can be difficult to visualize the whole process for kneading, proofing, and baking the loaves. Here’s a sample schedule for baking pan de cristal, assuming you start at 9:00 in the morning:
- 9:00am: Start mixing the dough.
- Between 9:30am and 9:45am: Finish kneading the dough. The exact timing depends on several factors, but most importantly, the gluten content of the flour you use.
- 10:15am (or 30 minutes after finishing kneading): Perform the first set of stretch and folds.
- 10:45am: Perform the second set of stretch and folds.
- 11:15am: Perform the third, and final, set of stretch and folds.
- 12:45pm: Divide the dough.
- 1:15pm: Preheat the oven.
- 2:15pm: Bake the first two loaves.
- 2:45pm: Bake the final two loaves.
For many breads, an overnight fermentation in the fridge can help spread out and simplify the baking schedule while developing deeper flavors. Unfortunately, in my testing, a cold overnight rise did not help this bread. The resulting loaves baked up flat and disappointing.
What to Serve with Pan de Cristal
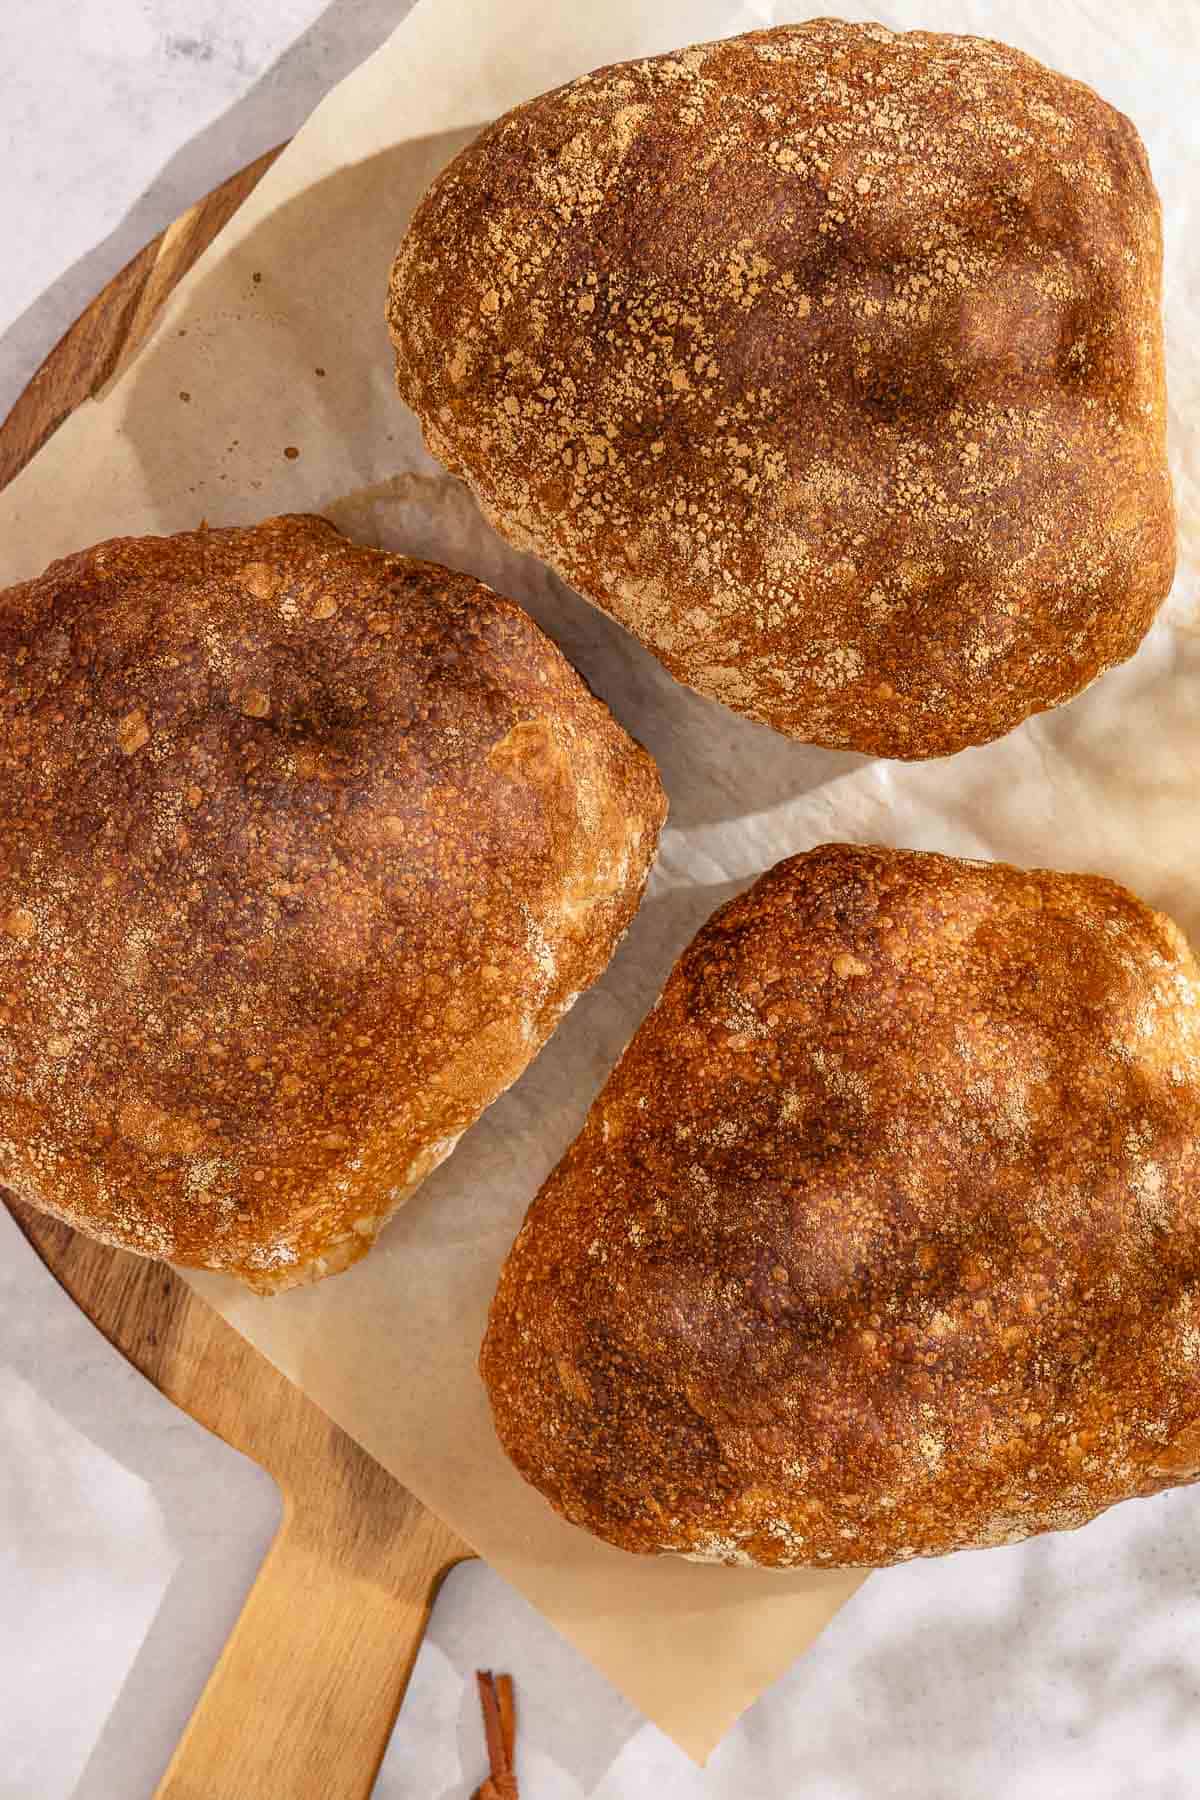
The classic way to serve pan de cristal is pan con tomate. There’s no better bread for pan con tomate—the bubbly, airy bread soaks up the tomato and olive oil like a sponge, but the thin crust stays ultra crisp.
You can top the pan con tomate with slices of Spanish tortilla, roasted escalivada, tangy boquerones, or slices of cheese and Spanish ham.
The bread works well as a substitute for ciabatta or focaccia sandwiches, like this antipasto chicken sandwich or this sandwich with arugula, roasted red peppers, and goat cheese.
Make Ahead and Reheating
Pan de cristal is best the same day it is baked, but can be kept, wrapped loosely or in a paper bag, at room temperature for up to three days.
Because of its high-hydration, the crust softens quickly. To re-crisp the crust, warm it in a 400°F oven for 5 to 10 minutes.
The baked loaves can be frozen for up to 3 months. Defrost, still wrapped, on the counter for 2 to 3 hours. Then, crisp up the crust in the oven before serving.
More Mediterranean Breads

Ingredients
- 3/4 teaspoon active dry yeast
- 1 2/3 cups water, divided (400ml)
- 3 1/3 cups bread flour (400g)
- 1 1/2 teaspoons kosher salt
Instructions
- Activate the yeast. In a small bowl, dissolve the yeast in 1/4 cup (60ml) of the water. Set aside.
- Knead the dough. To the bowl of a stand mixer fitted with the dough hook attachment, add all of the flour and 1 1/4 cups (300ml) of the water. Mix with a spatula until no dry spots of flour remain. Knead on medium speed for 5 minutes. Stop the mixer and allow the dough to rest for 5 minutes.
- Add the yeast. Pour in the yeast mixture and the salt. Start the mixer on low, and, to avoid splashing, gradually increase the speed to medium-high. The dough may split, but it will soon come back together. Continue kneading on medium-high speed for 5 minutes. Stop the mixer and allow the dough to rest for 5 minutes.
- Optionally, add the remaining water. If using, pour in the remaining 1 tablespoon plus 2 teaspoons of water. If you’re not accustomed to baking high-hydration loaves, omit this last addition of water the first time you try this recipe.
- Finish kneading the dough. Start the mixer on low, and, to avoid splashing if you’ve added more water, gradually increase the speed to high. Continue kneading on high speed until the dough is smooth and shiny, gathers around the dough hook, and pulls away from the sides of the mixing bowl, 10 to 20 minutes. If the dough is not ready after 10 minutes, stop the mixer for 5 minutes before continuing, to give the mixer and the dough a rest. The dough should pass the windowpane test: grab a piece of the dough and stretch it. If the dough stretches thin enough that you can see light through it, the dough is sufficiently developed.
- Rest the dough. Transfer the dough into a large bowl lightly greased with olive oil. Cover with plastic wrap and set in a warm spot in your kitchen for 30 minutes.
- Stretch and fold the dough. Wet your hands and fold the dough. Starting on the side of the bowl opposite to you, scoop your fingers under the dough, stretch it up, then fold it towards you over the top of the bowl. Rotate the bowl a quarter turn, and repeat. Repeat this twice more to complete a full rotation around the bowl. Cover the bowl, and let the dough rest 30 minutes longer. Repeat this process two more times, resting the dough for 30 minutes each time.
- Finish first rise. After the third set of stretch and folds, allow the dough to rise for 1 1/2 hours longer. The dough should have at least doubled in bulk, have a slightly domed top, and have visible bubbles.
- Divide the dough. Set two pieces of parchment paper next to your work surface. Dust your work surface heavily with flour. Gently turn the dough out onto the counter, being careful not to deflate the dough. Sprinkle the top of the dough generously with flour. Wet a bench knife, or other sharp knife with water. Divide the dough into 4 pieces, separating the dough after each cut so it doesn’t stick back together. Use the bench scraper and your hand to place two pieces of dough on each sheet of parchment paper, leaving space between the loaves.
- Proof. Allow the loaves to rest, uncovered, at room temperature, for 1 1/2 hours. An hour before baking, place a baking stone on a rack positioned in the bottom third of the oven and preheat it to 475°F (245°C).
- Bake. Use an upside-down baking sheet or a pizza peel, carefully slide one of the parchment pieces with two loaves onto the preheated baking stone. Bake the loaves for 20 minutes. After 20 minutes, flip the loaves to crisp and brown the undersides. Bake for a further 5 to 10 minutes, until deeply browned. Remove the loaves from the oven and leave them to cool on a wire rack. Repeat with the remaining 2 loaves.
- Cool and serve. Leave the loaves to cool on a wire rack for at least 30 minutes before slicing and serving. The crust should be thin and crisp and the crumb should be soft with large air pockets.
Notes
- Visit our shop to browse quality Mediterranean ingredients, including olive oils, honey, jams, and spices.
- Make Ahead and Reheating: Pan de cristal is best the same day it is baked, but can be kept, wrapped loosely or in a paper bag, at room temperature for up to three days. Because of its high-hydration, the crust softens quickly. To re-crisp the crust, warm it in a 400°F oven for 5 to 10 minutes. The baked loaves can be frozen for up to 3 months. Defrost, still wrapped, on the counter for 2 to 3 hours. Then, crisp up the crust in the oven before serving.
- Sample Baking Schedule: With a lot of steps, it can be difficult to visualize the whole process for kneading, proofing, and baking the loaves. Here’s a sample schedule for baking pan de cristal, assuming you start at 9:00 in the morning:
- 9:00am: Start mixing the dough.
- Between 9:30am and 9:45am: Finish kneading the dough. The exact timing depends on several factors, but most importantly, the gluten content of the flour you use.
- 10:15am (or 30 minutes after finishing kneading): Perform the first set of stretch and folds.
- 10:45am: Perform the second set of stretch and folds.
- 11:15am: Perform the third, and final, set of stretch and folds.
- 12:45pm: Divide the dough.
- 1:15pm: Preheat the oven.
- 2:15pm: Bake the first two loaves.
- 2:45pm: Bake the final two loaves.
Nutrition
Get The Mediterranean Dish Cookbook
More than 120 recipes for bright and flavorful Mediterranean diet-inspired meals.